Showing posts with label flowers. Show all posts

Wednesday, 11 March 2020

Coordinating scrapbooking papers and embellishments with Karen


I teach lots of workshops and here in France scrapbooking is particularly popular. I am currently working on my new album that I will be teaching for the first time at the end of March and I always like to include different techniques that the participants can apply to other projects. This time I am putting Brusho Crystal Colours at the fore to enable the groups to decorate their own papers and matching embellishments. I had already selected some printed papers (Florilèges Design) and plain cardstock papers so I needed the Brusho colours to coordinate with these. I chose Prussian Blue with a little Emerald Green.
I had already cut some plain white paper to the size I wanted. I sprinkled these with Prussian Blue Brusho Crystals and sprayed on some water then added a little Emerald Green to get the hue that I wanted. I used a paper towel to remove excess water and soften the colours for the background. I am delighted with the result. These papers were used to line the inside covers.


I then used the ColourCraft Tray with its air tight mixing pots to make up some pots of a mix of the two colours in water. I used this with a large round brush (size 9) to add colour to the centre of some white flowers and draw it out along the centre of the petals.

I also added the same colour to the black and white image of this camera. I am very happy with how this album is now coordinated with original papers, matching flowers and on-trend water colouring. I hope you have enjoyed these sneak peeks of the album and that this inspires you to use Brusho colours to coordinate your projects. Above all, I am hoping that the groups like the album as much as I do.

Thanks for visiting
Karen
x

Saturday, 15 February 2020

Angelina Flower Embellishments

Hi! Snowdrops are starting to peek out through the leftover leaves from Autumn, and my Crazy/Art quilt 2020 project is well underway(more info at the end of this post)! So, I've decided to do a springtime bling bling technique that I can use on my blocks!
Angelina fibers are man made fibers that are iridescent and sparkly. They come in film form and fiber form- fusible and non- fusible. For this project I am using fusible film and fusible fibers.

It's a simple technique, and very versatile! In addition to the films I used a 1" flower punch (you can also free cut flowers or use a die cutter), baking parchment and an iron.
Make sure to iron your fibers between sheets of baking parchment- a quick press should do the trick. Don't hold the iron in place too long as the fibers will brown. 

I tried a variety of methods.
  •  I cut flowers out of the film and ironed fibers in the middle.

  • I blended a couple colors of the fibers, ironed them together and then cut out my flowers. 

  • I combined fibers and film, ironed them together and the cut out my flowers.

  • You can also add things like sequins or glitter before ironing- the fibers then trap these small items into the mix.
These little flowers are great fun- I have already added some to one of my crazy blocks!
You are welcome to join in my 2020 project! Click here to join the Facebook group with more information and lots of tips and check out the Instagram at @tamaramaquilting and #tamarama2020sal .
I'm sure I'll be using these flowers in other blocks!
See you next time!
Make sure to check out all of the delish colors of Angelina that Colourcraft carries! 

Saturday, 10 August 2019

Sunflower shoes


Last month I discovered Colourcraft's fabric paints and I painted some shoes with a galaxy design. I am hooked! This time I decided to stencil some shoes with a sunflower design on them.


Armed with a pair of white trainers, sponges, tape and the fabulous fabric paints I set to work and I had a ball.


Firstly, I removed the laces and then taped the rubber strip around the base of the shoes using masking tape. I used smaller pieces of tape around the top edge to ensure I got in as close as possible without taping the fabric of the shoe. I then used a thicker tape to cover the larger section.


I taped the daisy/sunflower stencil at various intervals around the shoe and using a pencil, I traced the outline. I did this so I could plan out the design and the number of sunflowers.


To achieve the variations in the yellow colour, I mixed a little red and white with yellow so that I had several yellow shades.  I then used a paint brush to paint inside the pencil lines.

I continued to paint all around the shoe and within the pencil lines.  I couldn't decide whether or not to remove the pencil lines, but I decided that they added something so I left them in.  I also painted the entire tongue of the shoe yellow as it made it brighter.


I love them ! I hope that you have a go - I would love to see what you make :)


Saturday, 15 June 2019

3D stencilled floral card with brushos


Hi all,

This is my first blog post with Colourcraft and I am both excited and honoured to be able to share my creative projects with you. I hope you will join me, comment, learn and share your experiences. I would also love to see what you create using the techniques that I show here.


Firstly, I took a piece of 300gsm white card.  I like to use 300 gsm as it takes all the water that I need to put on it.  I stamped a set of the flowers using onyx black versafine ink and my MISTI stamping tool to ensure a crisp image. I then die cut the flowers and leaves.


I sprinkled a small amount of lemon brusho powder onto the centre of a couple of the flowers and lightly spritzed them with water. It doesn’t matter if the colour runs into some of the petals. After all, flowers are a blend of several shades, colours and design.


I then sprinkled a little of the Rose Red brusho crystals onto my craft mat and spritzed them with water to create a runny wash.  Taking each flower, I dipped the edges of the petals into the red liquid.  Use as much as you like and tilt the flower in several different ways to achieve the look you are after.


Repeat for all the flowers. Remember no two will be the same.


Drop a small amount of the leaf green brusho powder onto the leaves and spritz with water.

Create a wash with the olive green brusho crystals and dip the leaves into it.  This tones down the bright leaf green and creates interest and contrast.  I found that if I just used the leaf green it was too bright for my liking but the olive green added a lovely depth to each leaf.

Repeat for all the leaves.


Either dry with a heat gun or leave to dry whilst preparing the background of the card.

Using a blending tool and distress inks I created a lattice style stenciled background to the left hand side of the card.  Using my fan brush and black paint, I added some splatters.  I then stamped a sentiment on the side as I felt would balance out the design.


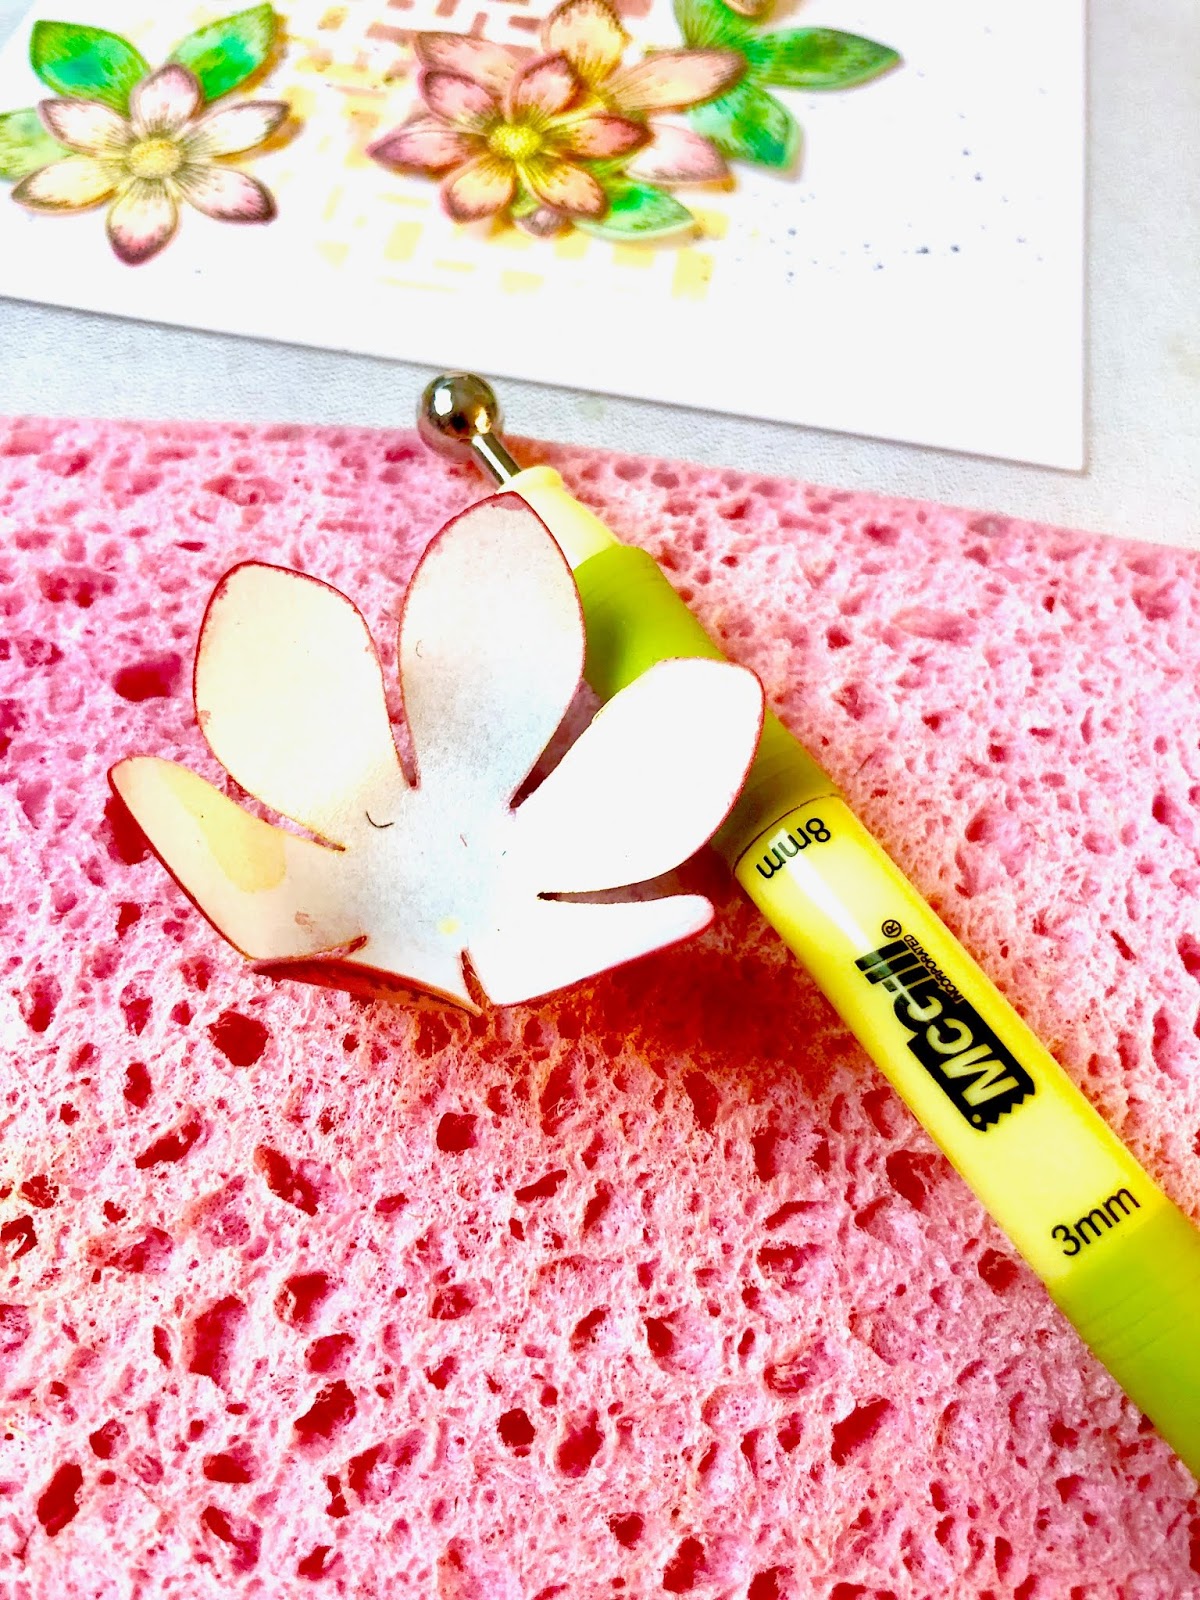
To ‘curl’ the flowers, I used a stylus tool and a sponge – first from the back, I curled up the petals, one at a time and then turned it over. This gives depth and shape to each petal.


I arranged the flowers over the stenciling to create balance and layered some of the flowers to give double sets of petals. I then glued some beads into the centre of the flowers and mounted it onto a contrasting background card.

I hope you have enjoyed this and I would love to see what you create. Please tag me in your creations 😊


Saturday, 16 February 2019

Spring Mini Quilt with Paste Paper effects

For quite some time I've been wanting to find a way to imitate traditional paste paper effects onto fabric. Well this week I got ahold of some Gelli printing tools and inspiration ran rampant!

First I got out my opaque fabric paints and one of my Gelli plates. I cut a bunch of small pieces of calico fabric (muslin) and got started.


I added some color to the surface of the Gelli plate, rolled it out with a rubber roller, and then used one of the Gelli printing tools to mark a design.


I then placed a piece of fabric over the top and gently patted with my hand so the color transferred to the surface of the fabric. You can also use a clean roller on the back of the fabric. The above picture is the result!

I then continued to play with color, tools, overprinting and got a nice batch of very pretty fabrics!!
I decided to use most of them to make a mini quilt.

First I drew a simple flower design and traced it onto 4 pieces of fusible web. I fused those to the backs of 4 of my fabric pieces and cut out and swapped around the fabrics.
I then fused these onto another piece of fabric.
I took more of my fabric pieces, paired them up, cut them into strips and wove them into new blocks.

Finally I stamped an image that I got from Rubber Dance Art Stamps and made that my central block. I used Opaque Navy fabric paint dabbed on with a foam brush.

So then I set all the blocks together into a mini quilt! Now I just need to sew it all.
Happy Spring! See you next month for some Easter inspired projects.


Related Posts Plugin for WordPress, Blogger...