Showing posts with label brusho acrylic sprays. Show all posts

Saturday, 9 February 2019

Spring is in the air

Hi Everyone...

Hope your weekend is off to a fabulous start!

I have a handmade book to share with you today,  the products featured in this project are Colourcraft's Acrylic Paints, Sprays and Soft Form Relief Paste.


Step 1

Take 3 pieces of mat board and glue down onto a paper of your choice, I used some patterned paper with spring green colours.


Step 2

Mitre your corners and apply a strip of double sided tape around the outside edge


Step 4

Remove the adhesive tape and stick down your edges


Step 5

Flip your book cover over and take a stencil and apply a layer of Soft Form Relief Paste over the top of the stencil, remove stencil and dry with a heat tool.. at this stage I used a paper piercer and pierced holes around the edge of the book cover at 1/4" intervals.


Step 6

Using sprays and acrylic paint, decorate the cover of the book, until you get the look you fancy, I use white acrylic paint to knock back the intense colours of the sprays.


Step 7

I stitched some plain hemp cord around the perimeter of the book, added the signatures and the project is complete.


I hope you like todays project and look forward to seeing you all in a couple of weeks time with another spring themed project.

Sarah x


Saturday, 12 January 2019

Valentine Heart

Hello Everyone,

I have a fun project for you today, using a wooden heart, bits and bobs from my craft desk and some wonderful Colourcraft Products.


Step 1

Take wooden heart and apply a layer of white gesso and dry with heat tool


Step 2

Fix down various bits and bobs from your supplies to your wooden heart using matte medium and dry with heat tool.


Step 3

Paint another layer of white acrylic paint over the top of your heart surface and dry with a heat tool.


Step 4

Using Colourcraft acrylic sprays of your choice, (I used scarlett and copper shimmer) spray over the entire surface of your heart and dry with your heat tool.


Step 5

I used Gold SprinkleIT mixed with water to create a highlight wash to brush over the top of the heart surface and dry with a heat tool.


Step 6 

I used a chipboard "love" word and painted with black acrylic paint and dried with a heat tool, before fixing to the front of the heart.


Step 7

I added some dark brown lace trim around the edge of the heart to finish it off


This completes the project for today, thank you so much for popping round and I shall see you all again soon

Sarah x

Wednesday, 26 December 2018

Recycled and Repurposed with Suzi

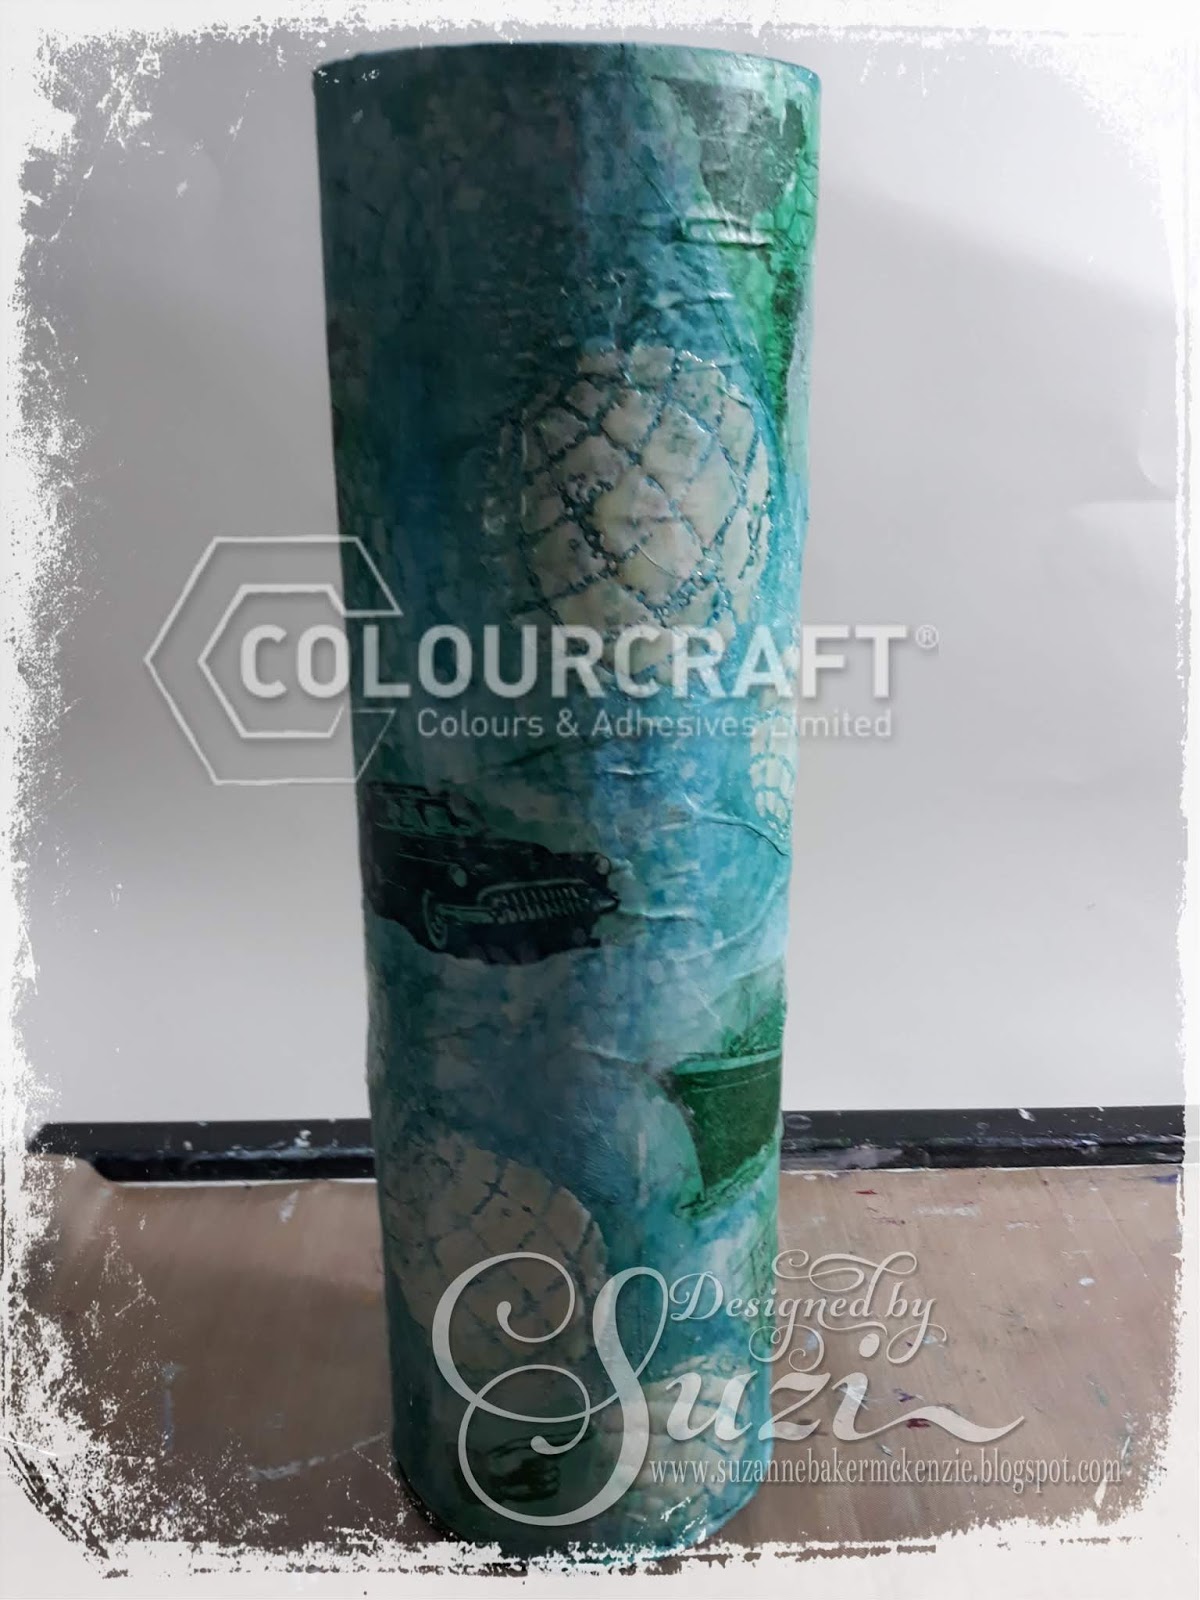
Good Morning All, I hope you are all enjoying the festive season. One of the things about giving and receiving gifts it all the wonderful packaging they come in.  For my project today I'm altering a Whiskey Bottle Tube that my Dad had received; As he travels a lot he wants to use it to protect his Water Flosser, so he asked me to change it's appearance so it doesn't raise questions from the Customs Staff.

As a starting point I took some old map paper and collaged it onto the tube, followed by a layer of White Gesso;
I then took a stencil and applied clear embossing ink through it and coated with clear embossing powder;
I then heated it with my Heat Gun;
Then it was time to add some colour, I took the tube and put it into an old cardboard box that I use as a spray booth to catch any excess sprays. I add a layer of colour with Turquoise Brusho Acrylic Mist Spray and some water.
I then added a layer of Sea Green Brusho Acrylic Mist Spray and water.
Then I dabbed away some of the colour from the embossed areas before drying the tube with my heat gun. Here's a couple of views of the dry tube;

I wanted to add some stamping to my project, so I decided to stamp some images with permanent ink onto to deli paper; 

I stamped a few sheets of deli paper, so any leftover images can be used on future projects.  The deli paper will become barely visable once applied to the tube.  You could use tissue paper instead.

I then selected some images, and added them around the tube;

Once dry edges of the deli paper where more visible than I wanted, so I added some white gesso through a couple of stencils to blend the edges.  Here's a few views of the finished tube.


To make the tube more practical to use I added a couple of layers of spray varnish.

I'm fairly happy with how the finished tube turned out, in hindsight I would have probably added the stamped images before adding the colour; this may have blended them into the background a bit more. 

I hope you've found my process interesting, and you look at some of that leftover packaging a little differently now.  I pleased to say my Dad loved the finished tube, he's added some padding inside and it fits his Water Flosser perfectly, so will be put to good use on his next trip.

Thanks for visiting with us today, Enjoy the rest of the holidays, 
Happy Crafting
Bye for now
Suzi
xxx

Saturday, 15 December 2018

Xmas Notebook

Hi Everyone,

Sarah here with you today on the blog with an altered notebook, perfect for keeping you on track on the run up to Christmas.

Lots of lovely Colourcraft products used on my project today, including SprinkleIT, Soft Form Relief Paste, Brusho, Acrylic Paints, and Acrylic Spray mist.


Step 1

Take a plain kraft covered notebook, wooden star and letters


Step 2

glue down the letters onto the wooden star and paint with colourcraft white acrylic paint.


Step 3

Take a stencil of your choice and apply to the front cover of the book using soft form relief paste and a pallete knife, then dry with a heat tool.


Step 4

Apply a layer of Colourcraft white gesso to the outside cover of the book, and wooden star and dry with a heat tool


Step 5

Take a water bottle and spray the front cover of the book and tap on some moss green brusho and dry, then some shimmering gold spray mist and gold sprinkleIT and add until you get the look you desire..


Step 6

Fix the wooden star to the front of the book and you are done and ready to use your new Christmas notebook


Thanks for popping round today.. and wishing you all a very merry Christmas, and I shall see you here on the blog with another project before the end of the year.

Sarah x


Related Posts Plugin for WordPress, Blogger...