Art journaling is used by many people as a form of therapy, letting emotions out on to the page which can then be hidden by the art layers. I don't often do this but today I thought I would show this process because it does help to sometimes get feelings out of your head and on to the page.
Without any planning as to how the page would look when finished, I made a process video:
I scribbled some thoughts in the journal and then covered the pages with some gesso and started my mark-making, adding colour with Colourcraft acrylic inks. These translucent inks are permanent once dry so they can be layered without creating mud and have a lovely soft effect.
The colours were softened further in places with white ColourCraft Eco Acrylic Paint and the stencil was used with black.
Further contrast and texture was added with Design-It paste in Glossy White.
Finally, I used a white pen to add highlighting to some shapes and the text.
Thanks for stopping by today. Do you do art journalling? I hope you like this spread and the lovely acrylic ink colours.
Karen
For our 'Love is in the Air' theme this month, I have decorated a wooden heart I bought a little while ago. I recorded the process and edited it to a short video:
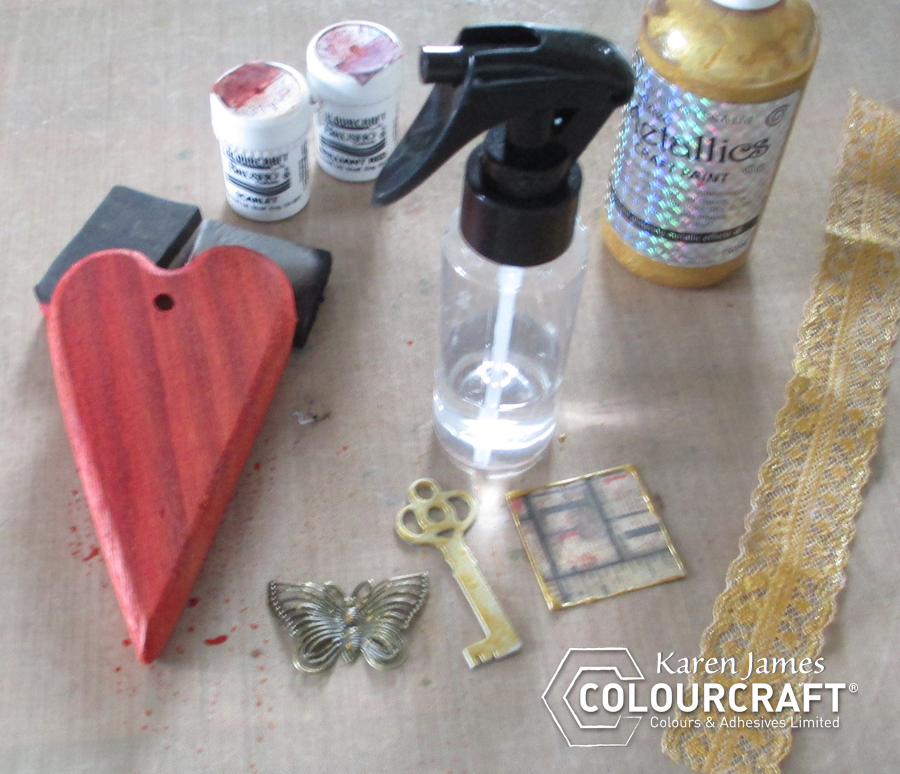
I love using Brusho as a stain on bare wood: It colours beautifully and brings out the grain pattern. This was my first treatment for the base. I mixed the Brusho with some water and brushed it on to the heart (the sponges are only there to prop it up while it dried).
Almost everything else I'd gathered to (maybe) use was painted with Eco Acrylic Gold paint and then all left to dry. I love mixed textures so in addition to the wooden heart, I'd gathered a chipboard key, some old lace, a square of scrapbooking paper and a metal butterfly. In the photo below you can see a duplicate bare wooden heart and the ribbon before they were decorated so you can see there is quite a difference before and after!
The painted ribbon was glued on to the heart and, while that dried, the chipboard key was 'aged' round the edges with Eco Acrylic Black. I also dry-brushed what was left of the paint round the heart to give it more depth and focus the eye on the surface.
Pewter Design-It paste was stenciled on to the heart and left to dry before sticking everything in place with Flexi-glue. Some word stickers and a twine hanging were the finishing touches.
I have to admit I am quite fond of my little heart and just need to find a nice place to hang it now.
One of my favourite stamping techniques with Brusho Crystal Colours is applying the powder directly to the stamp, picking up the colour with my finger and rubbing it on the stamp before misting with water and then stamping the colours. I love the watercolour effect, the ability to use one or several colours together and the random effect: You never know quite what you'll get! These techniques can be used as a background or to create lovely embellishments and focal points. Whether the result is a crisp detailed image, a more watery one with less detail or a second generation ghost print, I always love the effect.
EDIT: An unforeseen trip away caused difficulty uploading my quick (3 mins) video but it is now available. I hope you find it useful as, like most techniques, it is easier to demonstrate than explain!
Some tips:
I've used watercolor paper but it doesn't need to be very heavy weight as there is no water being applied to the paper, only to the stamp. Avoid paper with lined texture as the lines will show.
Be very careful protect your work surfaces and floor from any stray powder that might fall when stamping and misting.
The powders can stain transparent stamps: I find it best to use rubber stamps and give them a good wash under running water afterwards. Be careful not to contaminate your ink pads with colour that might otherwise stay on your stamps!
For now, the cards I've created could be used as notecards or, with text or embellishments added, could be used for a range of events. I'll keep them in my stash for when I need a quick card knowing these are available.
I added a few brush strokes to this panel.
One these panels I stamped and repeated the stamp slightly lower to the right then misted the stamp again and stamped again on the second panel, again repeating the stamp slightly lower to the right: Four impressions from one lot of powder.
All stamps used in these examples are from PaperArtsy. Thanks very much for joining us today. Is this a technique that you've tried already. As always, I'd love to see your creations: Please leave a comment with where we can see your work.
For these two projects, which I created in tandem at each stage, I created a video (below) which explains the steps and materials used. I used Brusho colours and SprinkleIT on some surfaces which I thought would resist the colour more than they did: I was very pleased with the results and the depth of colour and sparkle obtained. I hope you enjoy the video and that it will inspire you to use these products in new ways.
Couple of months ago, I have shared with you my 'Gypsy Soul' canvas where I used a stamp designed by an arty friend of mine, Mark Gould. Today, I'd like to show off another one of his creations - 'Sailor Jim'.
For some reason, the most obvious choice for me was to make a nautical-theme canvas goodie bag.
With that in mind, I grabbed a Canvas Corp canvas drawstring bag and Colourcraft Fabric Paints (both opaque and metallic) and sat down to work.
My calligraphy skills are not top notch as you can see but I didn't let that stop me from writing 'hello sailor' on the bag.