Showing posts with label fabric paints. Show all posts

Friday, 17 April 2020

Mixed media Butterfly


If you have seen my Insta feed recently you will have seen the pictures of butterfly in my garden, including one landing on my foot. They are the inspiration for this mixed media post where I use free-machine embroidery with fabric paint. 

I remember a lady at one of my free machine embroidery workshops being really surprised when I said I wasn't good at drawing. Art takes so many forms, and to be an artist doesn't mean you have to be good with a pencil!
So to help me, I found a non-copyright image of a lovely butterfly (American Monarch Butterfly, Danais Archippus to be precise) and printed it onto soluble paper.


I then laid this onto some cotton fabric and fastened it into an embroidery hoop.
The paper not only guides my stitching but adds stabilisation for the dance black free machine stitch I added.

I lowered the feed dogs on the machine and used an embroidery foot. The butterfly design gave me a guide for stitching.


See this in action 


Once the black was stitched, I ran the fabric under the tap and the paper dissolved.


 Whilst the fabric was still wet I used fabric paints to add colour to the butterfly with a fine brush - lemon yellow and gold. 


You may remember that last month I  made a screen from Tyvek Paper. Tyvek paper makes a great stencil and I used my Tyvek leaf stencil to sponge on a delicate leaf green.


I then used a foam brush edge to add some gold fabric paint


Once the design is dry, iron fix the fabric paint on a hot setting for 2 minutes or bake at 140°C for 4 – 5 minutes.

Monday, 24 February 2020

Printing on cushion covers

The orange cushion is no more!!!
Do you remember last time I did some printing on a cushion cover? 


This was the outcome - a gorgeous black and white canvas cushion right next to a fluffy orange disaster... ugh! I disliked the orange monster from the moment it landed on my sofa (yes, the buyer is aware) and it gave me great pleasure replacing it with my new black and white one.


This looks so much better!


The process is extremely simple as all you need is a canvas cushion cover, a stamp of your choice (I love ArtFoamies for this type of printing) and Opaque Fabric paint.


I started from the centre and worked my way out - the middle is double stamped.


Then I followed the pattern by stamping the squares outwards.


And then finished the whole area stamping out the edges.


As you can see the process is extremely simple and easy but the outcome is awesome.
You can use different colours to create a more rainbow-y effect but my home is predominantly grey so black and white is what my decor is.

See you next time!


Monday, 13 January 2020

Stamped Out Cushion Cover with Ewelina

Hey everyone!
It's almost mid-January and for some reason, it feels like my home decor needed some fresh touches... 


Spare half an hour gave me an idea - stamped out cushion!!!


I prepped canvas cushion cover, ARtFoamies and Opaques Fabric Paint (in black an grey because that's my main home decor colours)


I inserted a piece of cardboard into the cover to make it a softer stamping base.


As I wanted to make the design 'fading' and grungy, I used black paint to stamp out the first line.


Just place the ArtFoamie block on the bottom of the cushion and then move along horizontally to create a line.


For the next line, I added some grey to the mix.


And then even more grey, with the final top line stamped out only in grey.


It looks pretty cool and slightly grungy - just how I like it!


It's a quick and easy way to add new decor to your sofa. I love it on mine!!!

See you next time!


Monday, 26 August 2019

Angelina Fibres on a canvas bag

Hi everyone!
I have been MIA for a while but I am back now... sorry for that :)

In August, I went to drop off some of my past projects with Colourcraft at their stand at Quilt Festival - I usually avoid going to busy conventions like this because I'm not a fan of crowds but I have to admit that this one was something else! Not only because of the amazing quilting work that I had the pleasure of seeing but also because I got to have a chat with the Colourcraft people and, most of all, get my hands on some brand new products. 

Let me tell you something... they are awesome!!!

Today, I will share with you my canvas pouch with some cool embellishments made using Angelica Fibers. Not that I am blowing my own trumpet but... I have the coolest fruit lunch bag in my department!


When I first saw the small package filled with shine, colourful fiber I was like... what do I do with this? But after a quick demo, my mind was fluttering with ideas!


Here goes:
Choose your stamps, black ink (it's better if it's pretty wet) and your fibres. set your iron on medium heat (Be careful not to melt your stamp with too high setting!!!) and have baking paper ready. Ink the stamp generously and arrange fibres so that they completely cover the design. Cover it with a sheet of baking parchment and iron over until you see the stamp design come through the fabric. Remove the baking parchment and delicately remove the fibres - now melted into a sheet - from the stamp. The result should be as the last pic above shows - the design stamped onto the luminous rainbowy fabric.


Repeat the process for all the stamps you want to use in your project.


Once all your designs are ready, cut them neatly out ready for assemble. 
Do not dispose of the leftover fibres - you can use them next time - no waste!!!


You can finish your project here by attaching the elements to your bag. I used spray fabric glue to do it (Crafter's Companion Stick and Stay for fabric is perfect for that).

Or you can do what I did and create a colourful background for the elements.


To do that, I outlined the main element on the bag to know where it would be placed once finished.
I then chose a flowery stencil and with plenty of colourful Opaque Fabric Paints, I added the flower wall over the bag.


Once the paint was completely dry, I attached the fibre elements onto the bag.


Because I wanted to add some dimension to the elements, I attached the butterflies only at their centre so that the wings were sticking out when the bag is filled with my apples and oranges.


The pouch is really fun and so far, everyone who has seen it, asked where I got it from...
I'm sure it's the rainbow sparkles that do it!

See ya next time!


Warning: getimagesize(include/images/thumbnails/125/39486): failed to open stream: No such file or directory in /var/www/vhosts/smouwen.nl/thumblinky.nl/preview.php on line 85

Warning: getimagesize(include/images/thumbnails/125/39487): failed to open stream: No such file or directory in /var/www/vhosts/smouwen.nl/thumblinky.nl/preview.php on line 85

Warning: getimagesize(include/images/thumbnails/125/39488): failed to open stream: No such file or directory in /var/www/vhosts/smouwen.nl/thumblinky.nl/preview.php on line 85

Warning: getimagesize(include/images/thumbnails/125/39262): failed to open stream: No such file or directory in /var/www/vhosts/smouwen.nl/thumblinky.nl/preview.php on line 85


Saturday, 29 June 2019

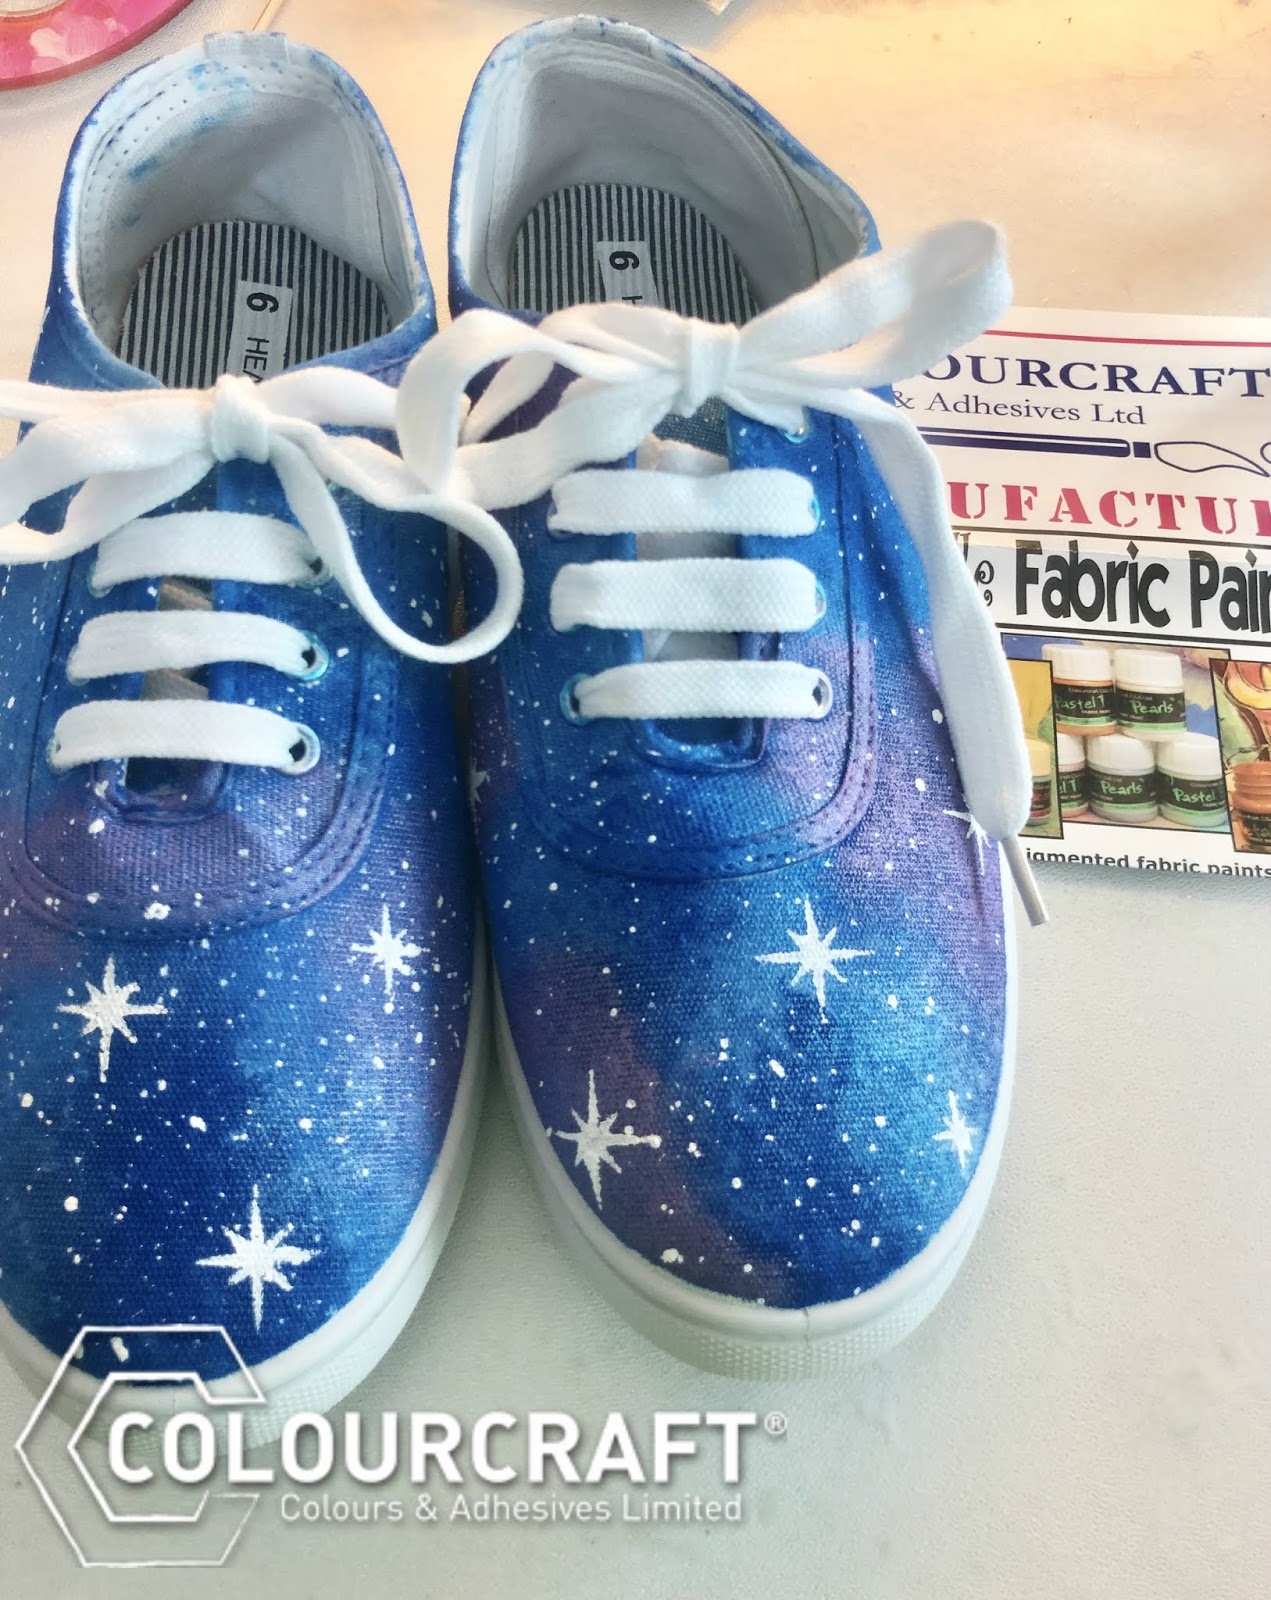
Galaxy shoes


Recently I discovered the ColourCraft fabric paints! When I saw all the lovely colours (especially the rich blues!)  I knew exactly what to do! Galaxy shoes!

Armed with a pair of white trainers, sponges, tape and the fabulous fabric paints I set to work.  It was really enjoyable and therapeutic.


Firstly, I removed the laces and then taped the rubber strip around the base of the shoes using masking tape.  I used smaller pieces of tape around the top edge to ensure I got in as close as possible without taping the fabric of the shoe. I then used a thicker tape to cover the larger section.


I used a combination of the metallic and opaque paints and started with two blues and two sponges.


I fully covered the shoes with patches of the dark and light blue paints. I was sure to cover the 'tongue' of the shoes as well.


Once that was done, I took the pink and purple metallic paints and, with the sponges, applied the colour in smaller patches on top of the blue paint.

I then used a fan brush and applied white splatters all over the shoes. I watered the paint down a little to ensure that I achieved nice splatters.


I then painted 9 stars over each shoe in different places and replaced the laces. I am so happy with my galaxy shoes.  It was so easy and so much fun! I hope you will have a go too.

Voila!


Related Posts Plugin for WordPress, Blogger...