Showing posts with label backgrounds. Show all posts

Wednesday, 11 March 2020

Coordinating scrapbooking papers and embellishments with Karen


I teach lots of workshops and here in France scrapbooking is particularly popular. I am currently working on my new album that I will be teaching for the first time at the end of March and I always like to include different techniques that the participants can apply to other projects. This time I am putting Brusho Crystal Colours at the fore to enable the groups to decorate their own papers and matching embellishments. I had already selected some printed papers (Florilèges Design) and plain cardstock papers so I needed the Brusho colours to coordinate with these. I chose Prussian Blue with a little Emerald Green.
I had already cut some plain white paper to the size I wanted. I sprinkled these with Prussian Blue Brusho Crystals and sprayed on some water then added a little Emerald Green to get the hue that I wanted. I used a paper towel to remove excess water and soften the colours for the background. I am delighted with the result. These papers were used to line the inside covers.


I then used the ColourCraft Tray with its air tight mixing pots to make up some pots of a mix of the two colours in water. I used this with a large round brush (size 9) to add colour to the centre of some white flowers and draw it out along the centre of the petals.

I also added the same colour to the black and white image of this camera. I am very happy with how this album is now coordinated with original papers, matching flowers and on-trend water colouring. I hope you have enjoyed these sneak peeks of the album and that this inspires you to use Brusho colours to coordinate your projects. Above all, I am hoping that the groups like the album as much as I do.

Thanks for visiting
Karen
x

Monday, 27 January 2020

Mixed media recycling project with Brusho

Hi everyone! 
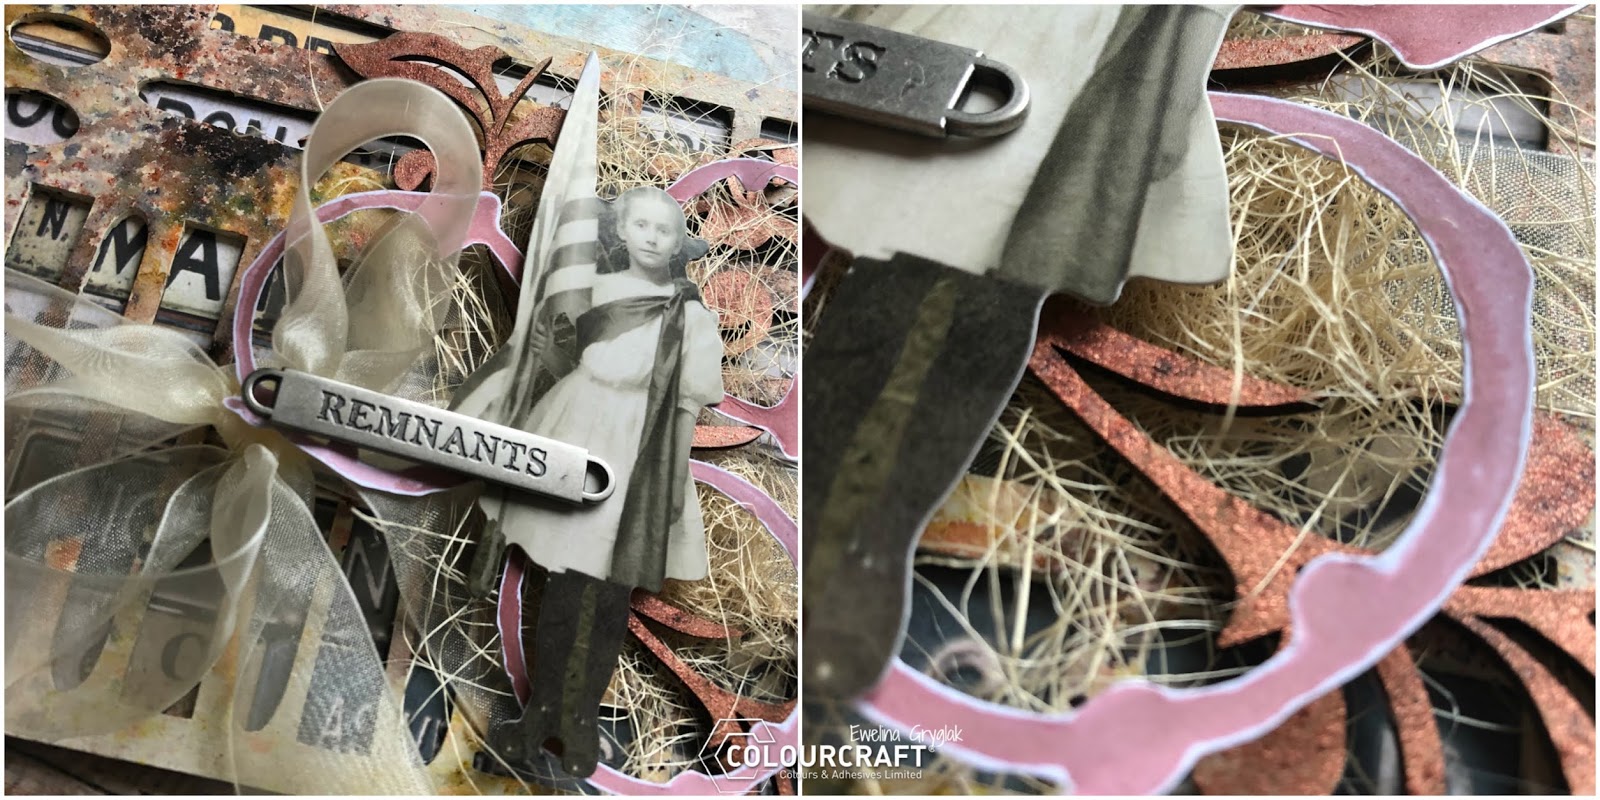
Today, I have for you a little recycling project. You know when you have a sheet of keyboard and you pop out all the elements... you are left with something that you'd normally put in the bin, right? Well... I decided to play and utilise mine as a base for mixed media projects that can be used as... an unusual card (rather than a traditional paper one) or cool piece of home decor.


Here's how I made it:


Start by preparing the sheet - I used ivory matte chalk paint.


Choose Brusho powder which will be the colour of your project - I went for Yellow Ochre, Burnt Sienna and Copper SprinkleIt to make it look a little bit rusty. Mist it with water as much as you wish creating lovely puddles of colours on the base. 


The awesome thing about using the 'negatives' is that you can leave them as they are with the holes or back them with paper of your choice adding to it another texture or design. Here I backed it with paper with vintage registration plates.


Using a puddle of Burnt Sienna, I stamped out coffee stains and fussy cut them to use as embellishments later on. (the stamp is from Crafty Too Designs)


I covered floral greyboard elements (from Lisa Horton Crafts) with Copper SprinkleIt - this made them look rusty and shiny at the same time.


For a feminine touch, I added a lacy ribbon with a big bow - I build the layers of embellishments around it. You can see it in the close-ups below:


Now, the project is finished, all I need to figure it is which wall in the house it will live on.

See you next time!


Monday, 11 March 2019

8x8 chipboard decor with Ewelina

Life is so busy here... so this week I have a quick but cute project on an 8x8 chipboard from abstudio.


I used Brusho to create background shades as well as to colour the papers and tags (which are from Canvas Corp).


I also used black DesignIt paste to make a doily which I layered in between the tags.
The paste dries flexible so whatever you make using it is easy to cut, bend and make sure that it goes where and how you want it to go.
I cut the doily in two because I only made one but wanted it sticking on both ends of the cluster... 


This time, instead of photos, I made a video for you... enjoy!


Have a great day!!!


Saturday, 9 March 2019

Easter Bunny Cards

Hello Everyone,

I have some super quick, fun and easy Easter bunny cards to share with you today..

The Colourcraft products that I used today were Acrylic paints in various different colours along in conjunction with my jelli-print plate to create fun mixed media backgrounds to then use as my easter bunnies.


Step 1

Create your jelli print backgrounds using your Colourcraft Acrylic paints, jelli plate, brayer, and stencils.


Step 2

Die cut your bunnies from your newly printed papers


Step 3

I used a script stamp dipped in a thin layer of acrylic paint to add additional detail to the bunnies


Step 4

Glue a pom-pom tail onto each of your bunnies


Step 5

Cut your mats and layers for your cards, the coloured card layer was cut at 3.25" x 3.25" and the black layer is 3.5" x 3.5" and the card bases are 5" x 5" square.


Step 6

Assembly time... glue your bunnies to the coloured layer, then stick this to the black layer and then I used foam adhesive squares to give it some dimension before applying the bunny toppers to the card bases.

I hope you enjoyed todays cards, a super quick and fun easter card idea!

Thank you for popping in and I shall see you in 2 weeks with another project

Sarah x


Wednesday, 21 November 2018

Experimenting with Brusho Crystal Colours on PVA adhesive by Karen


I've seen a few people creating with Brushos on PVA glue so I was intrigued to try it for myself. The pieces I've seen have been larger abstract pieces but, as this was my first attempt, I stayed small scale and tried a few different colour combinations to see what was produced and tested a few techniques to see what benefits the glue might bring.

I taped down some watercolour paper and spread a thin layer of adhesive over each piece and then sprinkled over the Brusho crystals. You can see below the trios of colour I used on each piece:
Purple, Lemon & Grey / Lime Green, Gamboge & Olive Green / Alizarin Crimson, Violet & Ost Blue.  They start reacting with the moisture of the glue straight away ...


... but still need some water sprayed over to help them mix and move. I sprayed and added more crystals, sprayed again until I was happy to leave everything to dry.


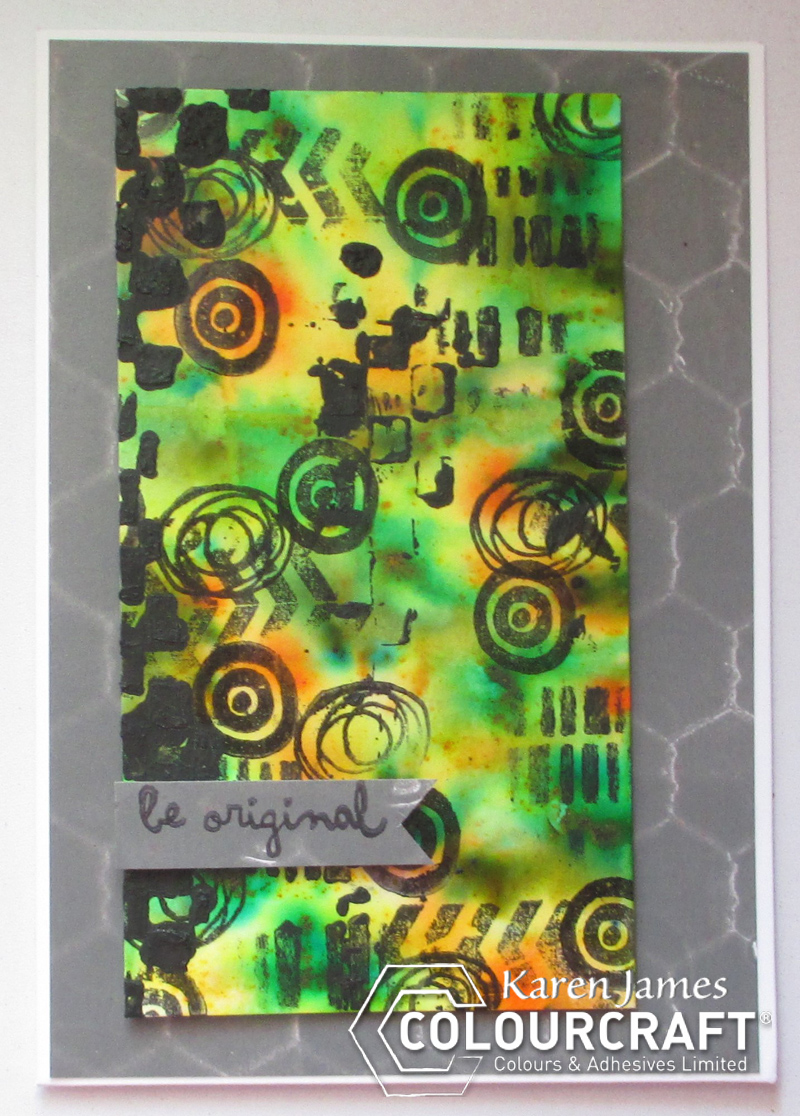
Forever impatient, I couldn't resist experimenting a bit more before the adhesive was quite dry: I pushed a stamp in to the panel on the right while it was still tacky and loved the effect! This panel already had a slightly frosty look and the faint trace of the snowflakes on the adhesive gave this a real depth. But be careful if you try this: Wipe off the adhesive between stamping and wash the stamp well immediately after use!


Once all the panels were completely dry I lifted the tape and trimmed them to size with neat edges. They had a nice glossy sheen from the adhesive. Given that the colour would usually remain water reactive, I tested how water resistant they had become by being trapped in the adhesive: There was hardly any colour transfer even after being sprayed with more water and rubbed with a paper towel.


I stamped more snowflakes on to the right panel using white paint. If the adhesive had not been used, I would expect the paint to alter in colour as the moisture reactivates the colour crystals. With the colour trapped in the adhesive, the paint stayed white.


Not wanting to cover the brusho background, I finished this card off with a stamped sentiment on a banner and matted it on to a card:

The following piece was turned upside down to the way it was created so that I could stamp in to the palest area. Although I would have preferred a smaller text, I think this is my favourite of the three: I love this colour combination and the background it created! Stamping on the adhesive requires a permanent, water resistant ink, and this took longer to dry than usual, but the coverage was very good. Even so, I was careful to use a stamping platform so that I could repeatedly stamp and be sure to get a good impression.


Finally, I used a variety of stamps and then black paint through a stencil on the last panel before matting it on to a painted gelli print paper.


What do you think? I'm really happy with the way these turned out and I hope that sharing the findings of my experiments will inspire you to try your Brusho crystals on PVA glue. Do leave a comment or link to your work if you try it or have any questions. I'm planning to try a larger abstract canvas piece very soon. 
Happy crafting!
Karen.

Colourcraft PVA adhesive can be found here: PVA adhesive.
Other products used as below:
Related Posts Plugin for WordPress, Blogger...