Showing posts with label cardmaking. Show all posts

Friday, 8 May 2020

Brusho and Alcohol on Glossy Card

Hello!! Teresa here with a different way of using your Brusho powders. We all know that Brushos can be activated with water to create vibrant and interesting backgrounds, but have you tried mixing them with isopropyl alcohol??


Take a piece of glossy card stock (the type that you use with alcohol inks) and sprinkle Brusho over the surface.


Take a pipette and drip isopropyl alcohol over the surface. You will see that some colours activate a lot, some very little. Experiment with different colours of Brusho to find out how they react.


Allow to dry - you can use a heat tool (carefully) to speed this process. Then take a large soft brush and dust away any residual Brusho powder still on the surface.


Decorate your background with die cuts and a sentiment sticker.


The Brusho and alcohol create a soft dreamy background.


Try other colour combinations ( black, alizarin crimson, lime green, orange):


You can get some surprising effects.


Thanks for taking the time to stop by today!


Friday, 13 March 2020

Easter Wishes - Using Brusho with a Stencil

Hello and welcome back!
Spring is in the air, the days are starting to get longer, and Easter is just around the corner. Today I show how easy it is to create colourful backgrounds for your card making projects using Brusho and stencils.


1. Choose a stencil and lay it over a piece of watercolour card. Sprinkle a small amount of Brusho over the surface.


2. Spritz with water to activate the Brusho.


3. Carefully lift the stencil, flip over and place face down on another piece of watercolour card. Press lightly all over to transfer the paint.


4. Carefully remove the stencil and rinse. Allow your backgrounds to dry.


5. Print or stamp your sentiments and mat onto gold card. Trim the Brusho backgrounds if necessary, and mat onto gold card.


6. Attach to card blanks and finish with a few paper flowers.


Wednesday, 5 February 2020

Doodle Heart Card with Suzi

Good Day All, Today It's my pleasure to share with you my latest creation using a mix of Brusho Crystal Colour Powders and Acrylic Inks.  It's February at last, and I'm still feeling the Love, so I've created a card featuring lots of lovely Hearts.

Here's my finished card;
Here's how I created it;

The first thing I did was to created my background paper.  I had a piece of paper that I'd used to soak up some excess Prussian Blue and Turquoise Brusho Crystal Colour Powders from a previous project, so I took that and added a little more texture to it with some bubble wrap and watered down Ultramarine Acrylic Ink ( I add a little too much water, so the pattern merged).  Once dry I added some Gold Metallic Acrylic Ink with a dip pen, then blended it out with some water.  Finally to add definition I used a really small nibbed dip pen and Black Acrylic Ink to outline some of my pattern and add a border to the piece of paper.

Next it was time to create my focal images.  I had some Hearts that I'd created with Brusho Crystal Colour Powders and a Large and Small Heart Poly Plate(from Crafty Roo Designs), leftover from a previous project, so I decided to add some doodling to them with Acrylic Inks.  I added doodles with a coordinating Acrylic Ink, then more details with Gold Metallic Acrylic Ink and finally extra fine doodles with Black Acrylic Ink.

To Make my card I took a sheet of A4 White Card and scored it in half, I then added my background, and arranged my Hearts in a pattern I liked.


You can see some of my doodling in the close up, along with the gorgeous shimmer and shine you get from the Gold Acrylic Ink.

This was such a relaxing card to make, after all most of my elements were leftover from previous projects, so I spent the majority of the time on this project adding doodling, which was lots of fun.
You could add the doodling with a mixture of Brusho Crystal Colour Powders and water, but they would blend into your Brusho background; the joy of the Acrylic Ink is it doesn't bleed into the Brusho, and dried nice and crisp with a slight shine, whereas the Brushos dry with more of a matte finish.

I used a Bamboo Dip Pen to do most of the doodling, If you've not tried a Dip Pen I highly recommend it, especially if you find the idea of using inks with a brush scary, you have a lot more control of a Dip Pen. 

I hope you've enjoyed reading how I created my project.  Thanks You for Visiting with Us Today.
Bye for Now
Suzi
xxx

Monday, 30 December 2019

Back to Basics - quick Brusho card

I know that for most crafters, the period between Christmas and New Year is THE TIME OF THE YEAR when they can craft as much as they want. Well, I am not that lucky and have to go to work every single day :(


However, I am not allowing that to stop me having colourful fun!!! 
Hence the card! ;)


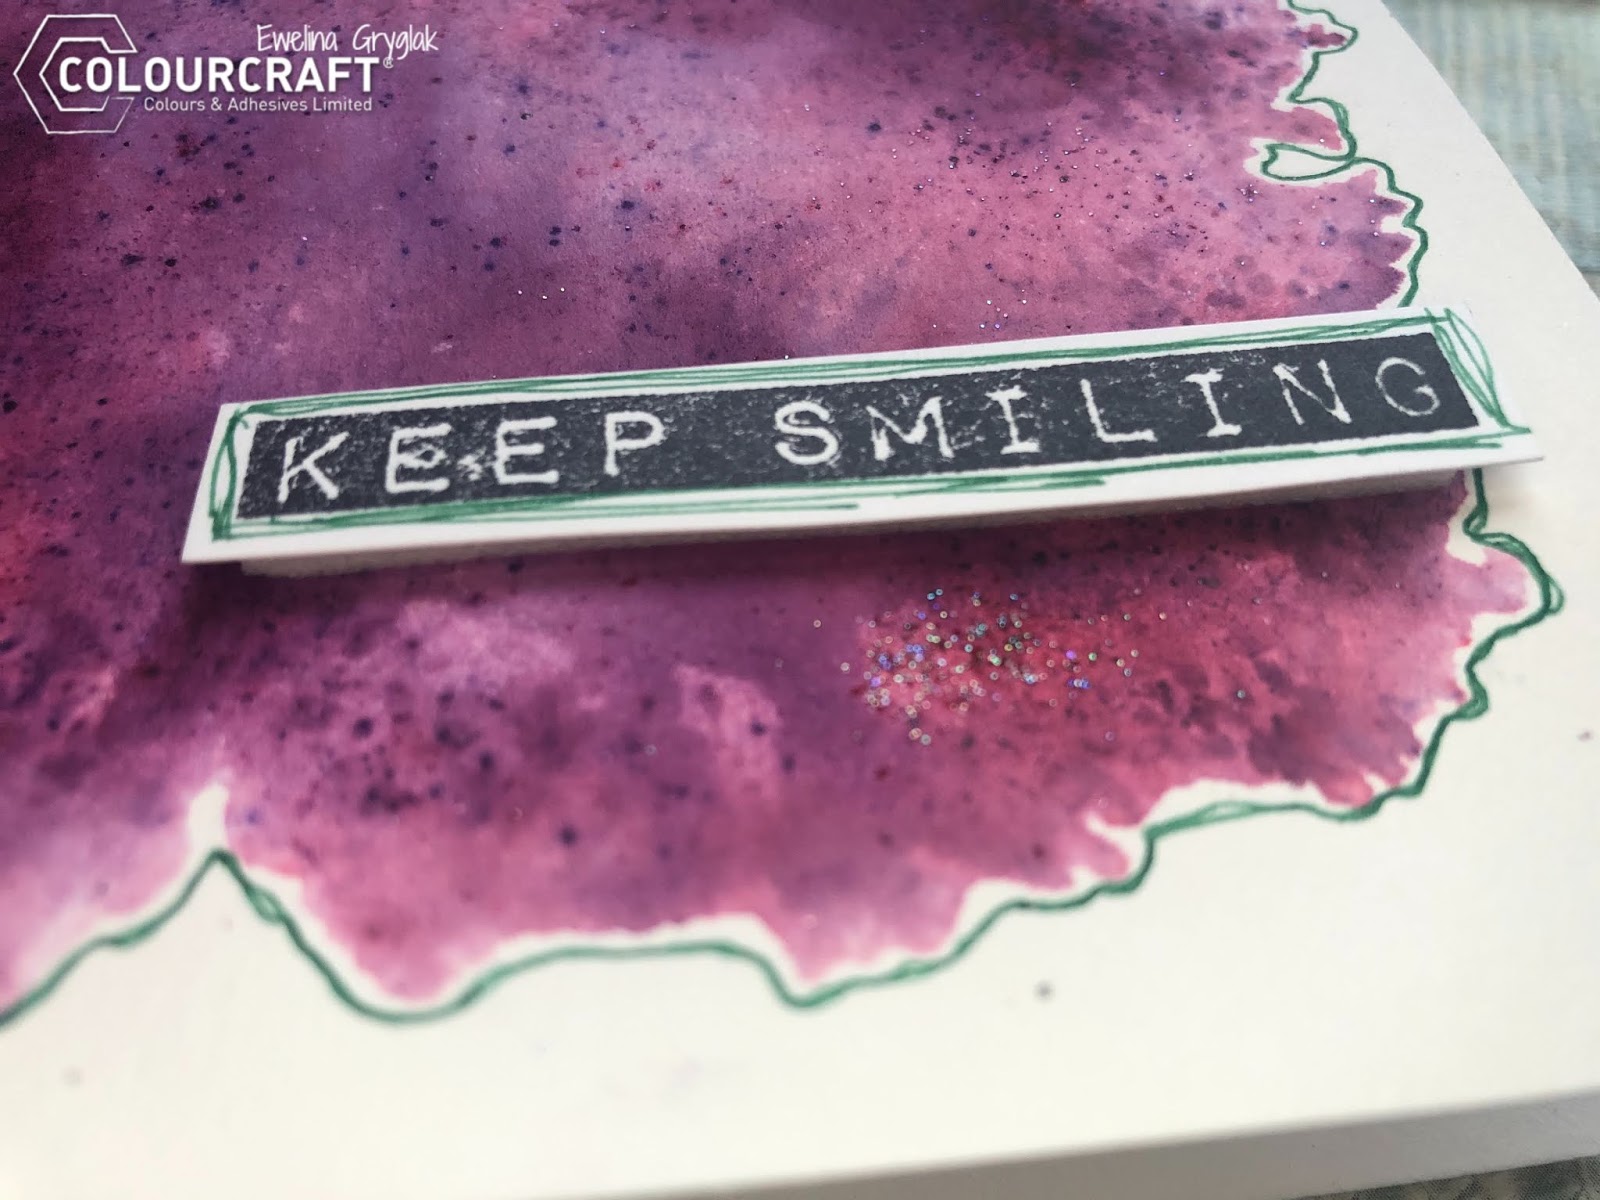
I started by sprinkling a Distressed Rectangle Polyplate with purple Brusho and iridescent SprinkleIt. Then misting it with a bit of water and... STAMP on watercolour card. 
While it was still wet, I added a little more SprinkleIt.


Once dry, I folded the A4 card and cut to shape to create a card.


As contract, I used a green gel pen to outline the shape - I have done the outline twice purely because I like my lines irregular and wonky.


I also outlined a stamped sentiment - you can see here what I mean by 'wonky lines'!


The last step was to mount the sentiment on the card.
Can you see the SprinkleIt sparkling??? I love it!


There you go - nice and easy and... preeeeeeetty!

See you next time!


Monday, 16 December 2019

Christmas Art Journal becomes an emergency Christmas Card

Hey everyone! Are you ready for Christmas? Are all your cards posted? 
I thought mine were ... until it turned out they weren't ... let me talk you through it...
It started with an art journal...


Here's how the Art Journal page came together:


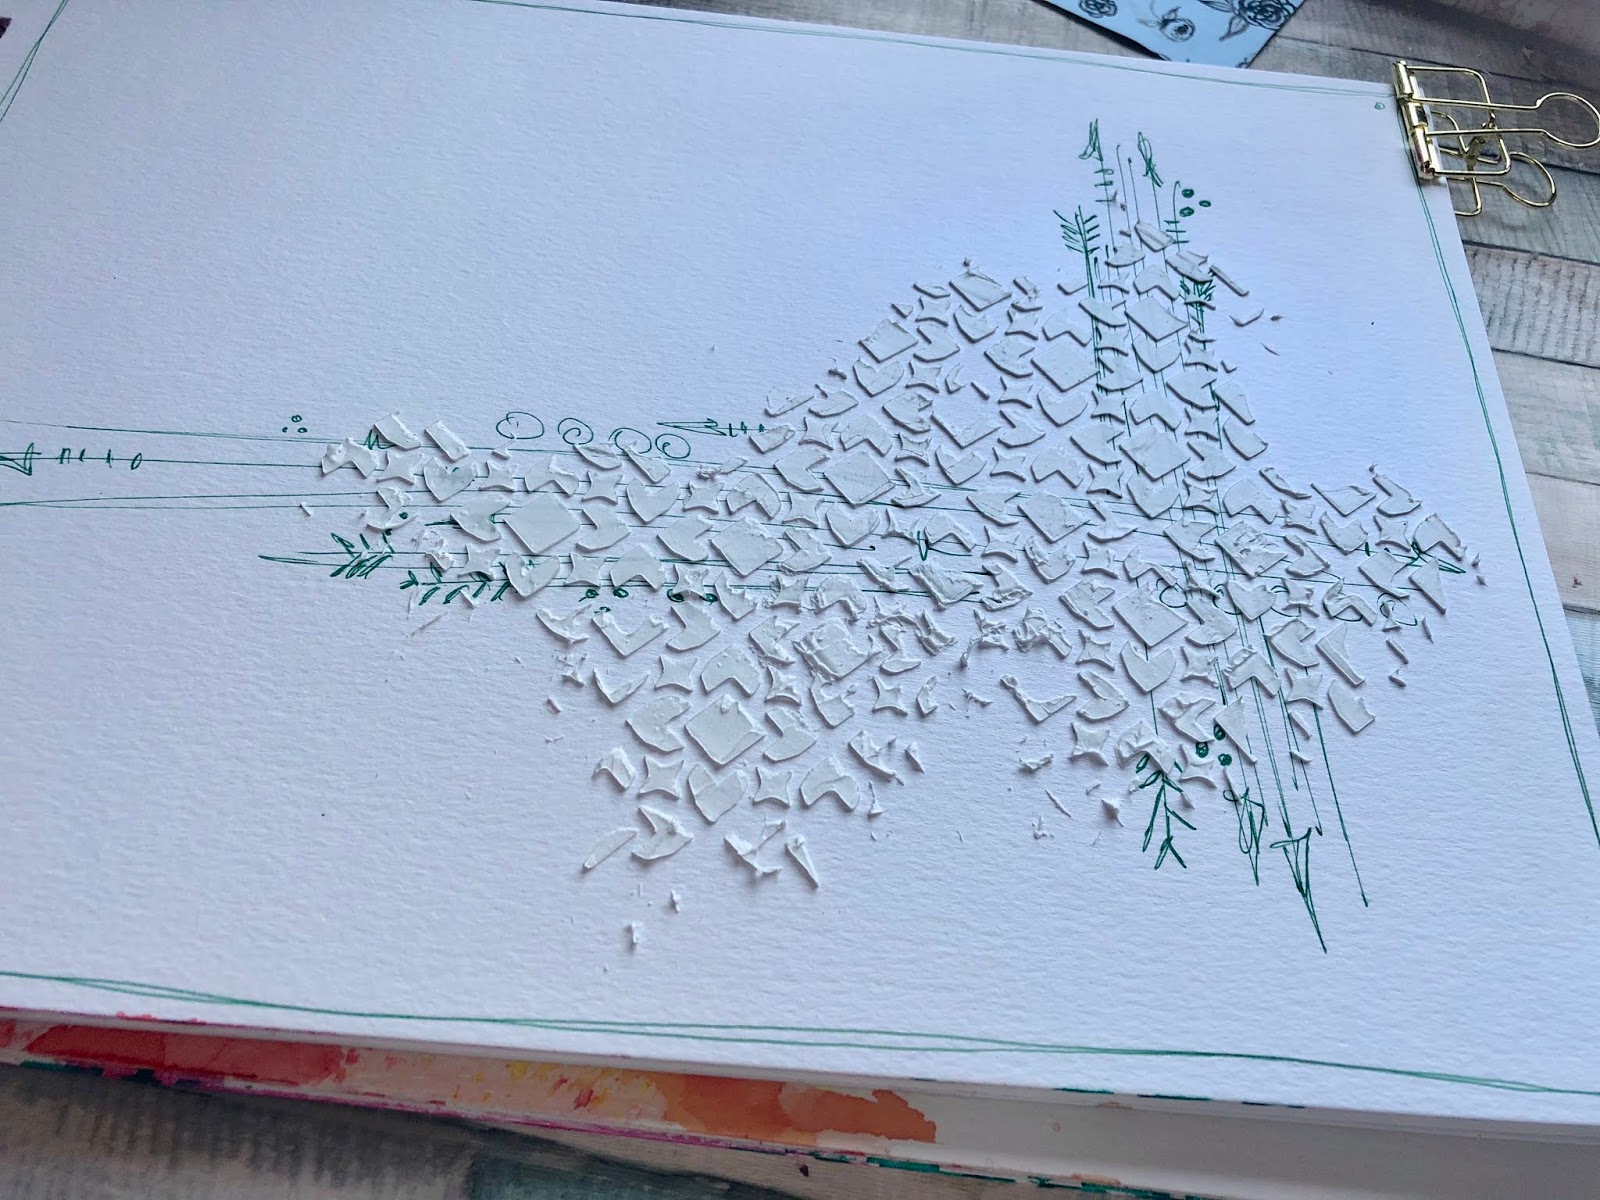
I started by scribbling a frame and some doodles with a green pen to create the first layer of background design.


Add a layer of texture paste - I like mine to be irregular and grungy.


Choose two Brusho colours you want to use and sprinkle them delicately on the textured area; then lightly spray with water avoiding making puddles. 


For additional effect, water down one of the colours and flick it off a paint brush creating splashes.


Now it's time to create a cluster to become a base of your main feature.
I used strips of various Christmas papers from ABStudio. 


I also cut out various elements from the same papers to use as embellishments which I layered in between the cluster strips.


You can stick te elements under, in between and on top of the cluster - just have fun with it!
You can add some more paint splashes now to make the elements blend nicely not the page.


Top up the finished cluster with your chosen element - I decided to use a reindeer.


TA DAH! My Christmassy Art journal page is ready!


And just as I thought that I will be able to display it nicely in my craft room, it turned out that I needed an additional Christmas card (guess counting is not my strong suit!).
In a moment of genius, I took the page out of the journal, folded in half and... the day was saved!!!


Have a great Christmas!
See you in the new year!


Related Posts Plugin for WordPress, Blogger...