Monday 30 December 2019

Back to Basics - quick Brusho card

I know that for most crafters, the period between Christmas and New Year is THE TIME OF THE YEAR when they can craft as much as they want. Well, I am not that lucky and have to go to work every single day :(


However, I am not allowing that to stop me having colourful fun!!! 
Hence the card! ;)


I started by sprinkling a Distressed Rectangle Polyplate with purple Brusho and iridescent SprinkleIt. Then misting it with a bit of water and... STAMP on watercolour card. 
While it was still wet, I added a little more SprinkleIt.


Once dry, I folded the A4 card and cut to shape to create a card.


As contract, I used a green gel pen to outline the shape - I have done the outline twice purely because I like my lines irregular and wonky.


I also outlined a stamped sentiment - you can see here what I mean by 'wonky lines'!


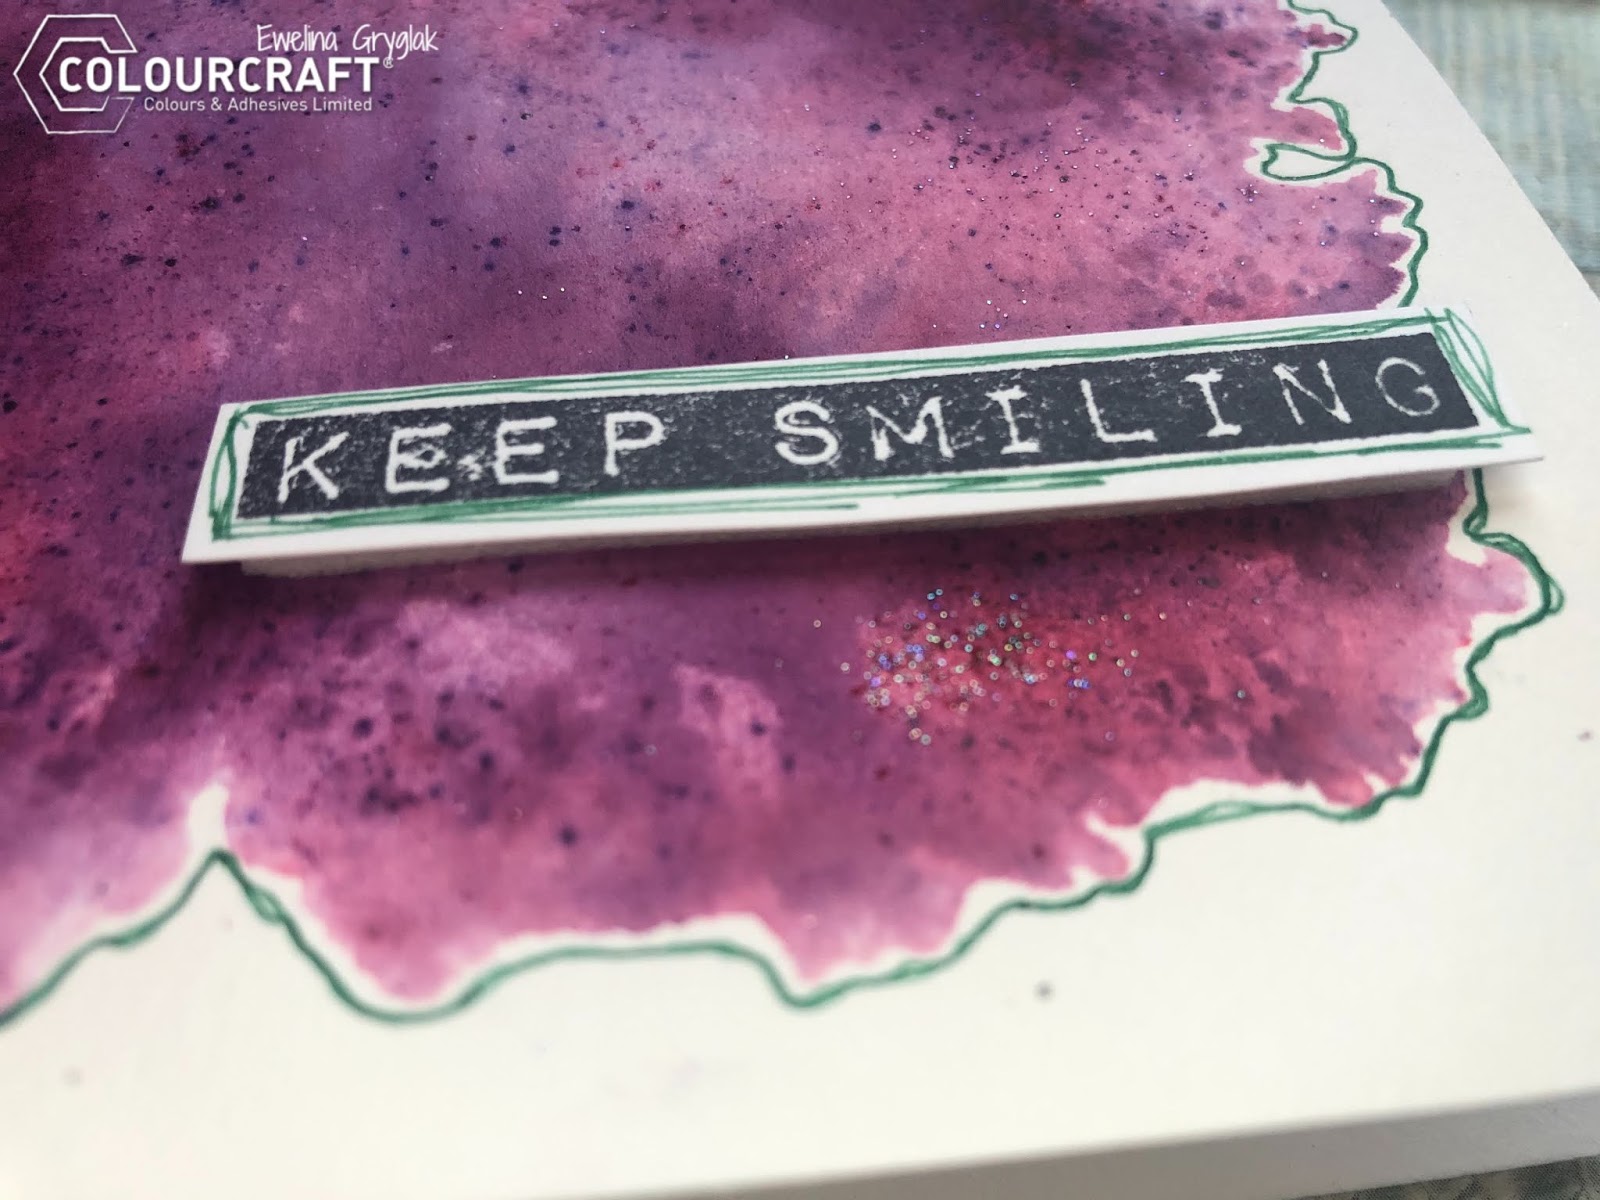
The last step was to mount the sentiment on the card.
Can you see the SprinkleIt sparkling??? I love it!


There you go - nice and easy and... preeeeeeetty!

See you next time!


Friday 27 December 2019

Let It Snow


This week I have been making landscapes, including this winter landscape. These mini fabric creations look good mounted on a card, or framed as I've done here.

On the base of some blue suiting weight fabric, I started with the sky. With my fingers, I blended little wool with a couple of Angelina fibres: shimmer blue pearl & shimmer ultraviolet.
I attached these to the background with a felting needle, but glue works too.


Next, I layered some fabrics. You may recognise some of these fabric scraps from my blogs this year, the snowy hill in the distance was from screenprinting with fibres. There are some pieces of painted Tyvek and Lutradur from this year included too. I used a Gemstone Glue Pen to hold the pieces in place.


I chose to add some free machine stitching with Gutermann sulky 4071 variegated thread.


Next, I added some titanium white acrylic paint to some of the fabric, and then sprinkled on some iridescent silver glitter crystals


Here is the trimmed,  mounted landscape in an upcycled frame:


Wednesday 25 December 2019

Merry Christmas with Suzi

Good Day Everyone and a Very Merry Christmas to you All. For Today's project I decided to create a card to capture the Christmas Spirit, using Brusho Crystal Colour Powders, Sprinkle It Powders, Foil Transfer Sheets along with a Poly Plate and sentiment stamp from Crafty Roo Designs.

Our theme this month is 'Let it Snow' so the first thing I did was to create a background giving the impression of a snowy night.  I took Brusho Crystal Colour Powders in Prussian Blue, Ultramarine and Turquoise and sprinkled them onto a large sheet of Watercolour Paper, I sprayed this with water, and added more water and pigment until I was happy with the colours and pattern. I then added a couple of layers of Iridescent Violet SprinkleIt Powder along with more water.


Once my background was dry I cut a piece for my card, I chose a 5 x 7 inch white card blank, so cut my background piece a little smaller.  I then took the Christmas Tree Poly Plate and using Brusho Crystal Colour Powders in Sea Green and Emerald I stamped a couple of trees onto my background.  I also stamped a Christmas Tree onto a piece of watercolour card for my focal point.


Using Clear Embossing Ink and Gold Embossing Powder I added my sentiment to the background.


It was then time to work on my focal point, I fussy cut the Christmas Tree I had stamped and then added some baubles and tinsel using Foil Transfer Sheets and my Fabric Master Heat Tool.


Finally it was time to put all my elements together.  I trimmed a piece of Gold Mirri Card to go behind my background and added this and the background to my card.  I then added my Christmas Tree using foam pads to give the tree some dimension.


I love the sentiment I've used, It's from one of my favourite Christmas films and it's sums up the true meaning of Christmas for me, the joy of sharing this special time of the year with family and friends.
I hope you all have a wonderful day today, and that Santa brought you lots of crafting goodies.

Thank You for visiting with us today,
Bye for now
Suzi
xxx

Monday 23 December 2019

Shaving Foam and Brusho's

Hello Colourcraft friends.  Gail here today.  The big day is fast approaching and I'm doing some last minute preparations.  I needed a few more tags and I found some precut christmas trees and decided to colour them using Brusho's and the shaving foam technique.


Aren't they cute!!


I gathered my supplies.  The tags, Leaf Green, Emerald Green and Sea Green Brusho powders, shaving foam and a shallow metal dish.  You can use any shallow container, or a paper plate if you like.  Just make sure it's big enough for you to place the item in you want to colour.


I added a thin layer of shaving foam, sprinkled the Brusho powders and moved the colour around with a plastic tool.  


I placed the first tree on the surface of the shaving foam and lifted it out.


Use a flat object, I used a ruler, to scrape the shaving foam off the surface of the tag and voila!!!   


My three tree dipped and ready to decorate.


I added some metal buttons from a Norwegian company called Papirdesign and some red and gold thread.  

The shaving foam technique is quick and fun.  It can be a bit messy with all that coloured shaving foam sticking to everything, but your project will look and smell nice.

Thanks for visiting.  I hope you have a wonderful Christmas and I'll see you again in the New Year.  Hugz

Saturday 21 December 2019

Environmentally Friendly Gift Wrapping

The holiday season is well underway and I don't know about you all- I love beautifully wrapped gifts, but as I stare at rubbish bags filled with sparkly paper, tape and ribbon, I think there must be more environmentally friendly alternatives.
Let me introduce to you all...the Japanese art of furoshiki.
Furoshiki is when you take a square of  cloth to wrap an object or objects to make it easier to carry or just to look nice. One advantage of these methods is that it's incredibly easy to wrap odd shaped objects as well as multiple objects.

Environmentally- I used old sheets, no tape, no ribbon, and they are washable and re-useable!

I started by cutting some squares of cloth in a couple of different sizes and preparing them for some tiedye techniques.
I then put them in some plastic and glass containers and used the same low immersion dyeing technique I used in this blog post

I used Colourcraft Ltd. olive green and scarlet.


  Oops how did this get in here?

 Here are the cloths as they are drying- pretty as is! But I wanted to add a bit more.


I got out some Aztec metallic paints, a Gelli plate and some wooden stamps.

Here are some details of my results!


I then poked around the internet and found this link  for some clear directions. They mention 45 cm squares, but when we make our own, we can make them any size we want!!


I'm sure I'll get better at the wrapping techniques with more practice.
I hope you enjoyed this tutorial! Enjoy your holidays and don't forget that taking time to do something creative is a great way to deal with holiday stress.


Friday 20 December 2019

Sparkling Snowflakes

Hello! Teresa here again with another snowy project for you. Today I am sharing a shimmery snowflake card.


To begin, I sprayed Brusho Acrylic Mists in Charcoal and Violet along with some Turquoise Shimmer Mist. 


I gave some die cut snowflakes a misting of Silver Shimmer Mist.


Once my background was dry I stamped and embossed some tiny snowflakes all over using Sparkling Snow embossing powder.


I added three eyelets at the top of my card to attach some twine to hang my snowflakes/


The snowflakes have 3d foam behind for added dimension.


Thanks for stopping by today, be sure to come back soon x


Related Posts Plugin for WordPress, Blogger...