Showing posts with label Rebecca Yoxall. Show all posts

Friday, 18 January 2019

Winter dandelion seed heads by Rebecca Yoxall


Happy New Year!

Hope this post finds you well.  Did you get any new art materials to play with? 
Some of my students have confessed recently they have received great quality paper and new paints but are too afraid to use it in case they spoil it. Well let this year be the year that you feel free to use the best materials you can when you create. Enjoy the beautiful paper and play with the best paints/inks/brusho that you can afford. Don't keep things for 'best' or some point in the future when you think you'll be able to paint better. 
So for my blog this month I have picked a wonderful rough cotton watercolour paper, Colourcraft acrylic inks, Brusho and SprinkleIT to produce my winter dandelion seed head painting.


I drew out my design with a soft charcoal line


I then applied a wax stick all round the edges of each dandelion and for the stalks


The wax will smudge the charcoal and give a nice soft effect as well as preserve the white of the paper surface.
The wax will prevent the layers of ink from seeping into the dandelion shapes


I picked up the turquoise acrylic ink and brushed it onto the left hand side of the paper.


Whilst the ink was still wet I sprinkled in the Ultramarine Brusho and Black Brusho.


The colours blended into the ink a little so I helped them along with a dab of water on a brush


I continued this process around the whole background


I allowed areas to drip and move by tipping the paper at different angles. 


For the centres of the dandelions I applied some water and sprinkled the Dark Brown Brusho


Onto the wet centre I spinkled the wonderful SprinkleIT iridescent gold powder.


The half seed head was finished off with a bit of dark brown Brusho as well as some individual little seed stalks that I painted in with white acrylic paint.


The little seed stalks also enhance the other dandelions as well as a few floating away in the breeze which adds a whimsical feel to the piece.


The stalks were painted with more white acrylic and the lovely rich copper acrylic ink by Colourcraft.


I few white paint splatters and voila. 
Let us know what you think and if you have a go at creating your own wintery dandelion seed heads remember to treat yourself to the best materials you can afford and ENJOY!

Bec


Warning: getimagesize(include/images/thumbnails/125/37843): failed to open stream: No such file or directory in /var/www/vhosts/smouwen.nl/thumblinky.nl/preview.php on line 85

Friday, 26 October 2018

Autumn Trees by Rebecca Yoxall


Hey everyone! 
Hope you are well on this fine Friday. I absolutely love the colour of Autumn trees and couldn't resist creating this Brusho painting.
Painting trees is so easy with Brusho, it lends itself perfectly for the wonderful copper, gold and scarlet leaf colours. 
Using a sheet of good quality watercolour paper I drew out the trunk and main branches of the tree on the right hand side and suggested at distant trees, a field and water in the foreground.
I also wanted to make sure to keep lots of light through the foliage so decided to use wax resist. I drew with a wax stick in scribbles through the tree and added some grasses in the foreground as well as down the left hand side of the tree trunk. These will show up in later pictures.


Using a spray bottle I gently covered the foliage area of the tree with water and began sprinkling the Brusho directly on the paper. I used Yellow, Yellow Ochre, Orange, Crimson and Purple. 
Just a small amount of each colour so that plenty of white paper can still be seen. 


I then made a diluted mixture of Yellow Ochre and Light Brown Brusho in a palette and using a small round brush I painted in the distant trees and the field in a smooth wash.
I used even more water to paint in the foreground and then once again sprinkled Brusho directly onto the wet area. I used Light Brown and Dark Brown.


Once the paper was dry I used Cobolt Blue to paint in the sky and the small pond area.
Only a small amount of Brusho is needed to create a soft gentle shade of blue.


I also painted another layer in the foreground. It is here you can now see the drawn wax lines for grasses.  
I mixed up Dark Brown Brusho on my palette with a little crimson and coasted the trunk of the tree continuing up to develop some of the larger branches. Whilst this wash was still damp I painted a yellow on the left side of the trunk to further enhance the effect of light. 


Smaller branches were added using a fine brush or rigger brush, placing them in between areas of foliage to create the impression of intertwining around the leaves.


Using the small brush to suggest at more grasses and seed heads at the base of the tree and along the bank finishes the composition.

I hope you've enjoyed my post this time and maybe it has inspired you to create an Autumnal landscape of your own.
See you next time
Bec

Monday, 30 April 2018

2018 to 2019 ColourCraft Design Team Day 1


Happy Monday! It is a sad and a happy day for us over at Colourcraft today as we are both saying goodbye officially to the super talented Katka, Terri and Katie, but we are saying a big hello and welcome to 4 new fabulous designers.


To celebrate the super talent of these 3 amazing ladies, who we hope will be back real soon with some guest posts for us we have decided to run a giveaway. To enter all you have to do is leave a comment on either the 2 facebook posts (today and tomorrow) or the 2 blog posts (today and tomorrow) to be in with a chance. Want to enter twice? no problem leave one comment per day, maximum number of entries per person is 2. Giveaway closes Friday 4th May at 8pm GMT. Winner will be announced on Saturday 5th of May.


So now we have said our goodbyes it is time for the hello's! We have a big warm welcome to the returning amazing Ewelina and Bec, and an even bigger hello to the fabulous two new talented artists Suzi and Karen!

You already know Ewelina is an amazing mixed media artist and Bec is our super talented painter and teacher but just in case you are new to us, you can click on their names above and it will show you all the work and tutorials they have made for us.

You can also find Ewelina's blog HERE and Instagram HERE.

You can also find Bec's facebook page HERE and Instagram HERE.

Suzi is coming onto the team bringing her wealth of knowledge of card making, mixed media and art. You can find her personal blog HERE and her amazing Instagram feed HERE.

Karen is coming onto the team as a fully experienced teacher and crafter with such a wide range of skills they are too many to list! You can find her personal blog HERE and her super cool Instagram feed HERE.

Tune back in tomorrow, same time same place to find out who the final 4 are!


Friday, 12 May 2017

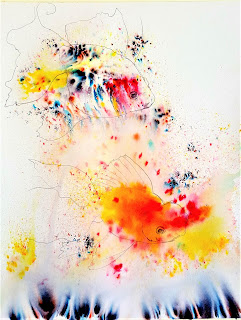
Little Brusho Fishes by Rebecca Yoxall

Hi everyone :-)
I'm happy to be writing my first blog for Colourcraft today and in my usual style I've created something bright, lively and a little bit crazy. Most importantly its great fun and easy to achieve with Brusho and Aztec Lustre paints.


I taped down a piece of watercolour paper onto a board then using a water spray bottle gave the surface a light spritz. I picked Black, Yellow and Rose Brusho and I recommend using a limited selection of colours so that they stay fresh and don't over power each other. I gently sprinkled the Brusho onto the paper paying particular attention to a couple of areas. If you have never used Brusho before then keep in mind that it is very potent, as many of you will know a little goes a long way, so don't over sprinkle. You can add more later if needed. The sprinkled Brusho then got a spray with water to diffuse it even more into the paper.


Black Brusho was sprinkled and sprayed across the bottom and the paper tilted so it ran for me to create coral.
Leave to dry letting all the wonderful Brusho magic happen.
Once dry I drew the outlines for my fish with a 2B pencil. I tried to keep the most interesting Brusho areas for inside the fish shapes. (You could trace the fish or any other sea creature for more accuracy)


When you are happy with your outline it's time to paint in the background. I chose Turquoise and Purple as well as the Yellow and Black from the first layer and mixed up each colour with water separately in a palette. Using a Brush I painted around the fish and coral mainly focusing on the turquoise as my predominant tone dropping the purple here and there. Also adding the yellow which mixed with the turquoise on the paper to create the wonderful green shades and the black made some spaces slightly darker to depict depth. Whilst areas were wet I also sprinkled very small amounts of all the colours for extra interest and texture.


Trying to keep the nice tidy edges around the fish can be tricky but take your time as Brusho is so versatile you can go back after is has dried with more colour on your brush and smudge the colours together. Adding more water around the tail and fins will give a softer look.


Now it's time to add some details. I grabbed a small brush and painted in the eyes using the black. Some scales and shading around the gills with the diluted colours. as well as frills in the fins and tail. I chose an opaque white, something like an acrylic or gouache would be perfect just to add the white in the eyes and a little highlighting on the tail.


The final shimmer which sets everything off is created by painting with Aztec lustres and metalics. Choosing colours that enhance the shades already within the painting will have maximum effect. I hope you can see in the image how wonderful they look when they catch the light. Absolutely perfect for describing the irridesensce of a fish scales.


Give it a go yourself, be as crazy and inventive as you like and we would love to hear how you got on.


Related Posts Plugin for WordPress, Blogger...