Friday 30 March 2018

A host of golden daffodils (in the rain) by Rebecca Yoxall


''I wander'd lonely as a cloud
That floats on high o'er vales and hills,
when all at once I saw a crowd,
A host of golden daffodils,
Beside the lake, beneath the trees
Fluttering and dancing in the breeze.''

William Wordsworth


Hey you lovely lot,
Couldn't resit typing the first verse of 'Daffodils' by Wordsworth, such a great poem and no guesses that I absolutely love daffodils. So what better subject for my blog this fine Spring Friday than a lovely cheerful 'host' of daffs nodding their heads in the gentle sunshine with a hint of April showers.

I began my piece by drawing out my composition from some sketches I made in my garden. I find it works best to use odd numbers of flowers and set them off to one side of the paper. I made sure to sketch very lightly as I don't want to overpower the light and delicate nature of the petals.


Using  a spray bottle I squirted a little water over the centre of the drawing then using the Lemon and Gamboge Brusho to add my first layer of colour.


These Golden Brusho crystals will spread wonderfully with a little more water sprayed evenly. I also like to leave some of the Brusho undiluted for a nice textured effect.


I dried this wash of colour with a hair dryer and allowed some of the ink to flow outside the perimeter for extra flowery movement.


I then left this stage to completely dry whilst I mixed up leaf green and ost blue to get a range of lively green shades in my palette.
Using a brush with a good point I was able to gradually paint around my flower outlines to define the shape of the daffodil heads.


I made sure to create a strong contrast up to my pencil line around the flowers but then washed the green colour outwards with more water leaving areas of the white paper to still show through. Building an uneven outline that dances with energy and movement


Continuing around the daff petals I decided to leave some spaces for the stems too developing some abstract shapes in the background as well as splashes and drips. The Ost blue top right breaks up the green shades and hints at a fresh springtime sky as well as giving me an area to play with the idea of falling rain.


There were some areas I felt need a bit more tonal variation so I decided to paint a second layer of a dark green mixture mainly around the bottom left flower head. Also adding some green to a selection of the stems and leaves.

Once I was happy with the background I grabbed a smaller brush with a fine point and applied some gamboge Brusho to the inside of the trumpets as well a some lines on the petals that will indicate shape and depth.


My final layer involved a little diluted bleach to strip out some of the colour on the stems and petals as well as capture an effect of pitter pattering rain drops.
I am always very careful when using bleach and make sure I use it in a well ventilated room or outside. I keep a separate brush and water pot so as not to contaminate anything and often wear gloves to protect my hands. I also make sure to use an old brush as the bleach may 'eat' or 'dissolve' the bristles.

This close up shows the bleach lines dripped and gently splattered across the background. Lines directed to the flower heads with a few little splatters.


And here's what I ended up with! Daffs in the spring with a bit of rain :-) 
I hope you like it and if you have a go yourself we would love to see what you create.

Wishing you a wonderful weekend.

Best wishes

Bec


Wednesday 28 March 2018

Spring is here canvas by Kate

Hi,

I would like to share with you my spring canvas. Sentiment is czech and means Spring is here. I made light mixed media background with Brusho. Than I layered different fussy cuts from floral papers. Mixed media canvas can be really easy and you do not have to use tons of colours for background. Sometimes less is more.


Have a nice day
Kate Dachovska


Monday 26 March 2018

Cute Easter Cards with Ewelina

I have recently been 'accused' of not making any 'pretty cards, only the mixed media stuff'...
At first, I wasn't sure what to make of it but then decided not to dwell too much on it and turn it into my own crafty challenge instead.


I turned my craft room inside-out looking for some 'cute' Easter stamps I remembered receiving as a gift good three years ago because they were the only thing I could think of.

Here's how it went...


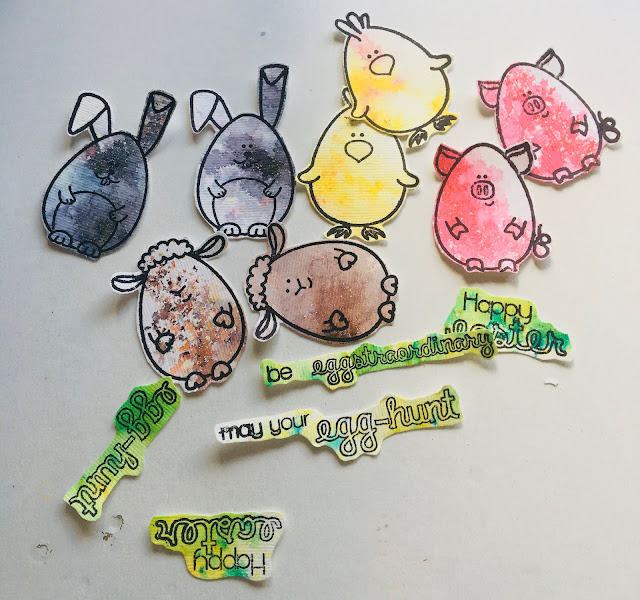
I picked Brusho powders in colours I wanted to use and sprinkled them creating small watercolour puddles. I made sure not to add too much water to allow for the colour crystals to show their lovely shades.


I then stamped out my Easter animals and sentiments on the watercolour puddles. Remember to use waterproof ink for your stamping - you wouldn't want your designs to start bleeding.


Now for the hard work - fussy cutting.
I can honestly say that it's my favourite part of crafting... NOT.


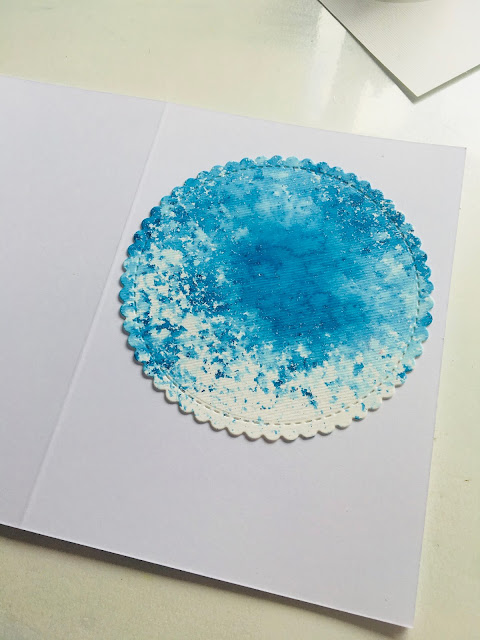
Once all my cuties were cut out and ready for adding to the card, I had to figure out how to build up the background. I decided on a layered white 'window' with blue background peeking from behind. For that, I sprinkled Turquoise Brusho on mixed media paper and let it dry.


Using my 'card template', I cut 4 white and 4 blue rectangles.


I used die-cutting machine to make sure that my 'windows' were nice and evenly cut. I used a smaller circle for the frame and a bigger one for the background - this way, I could make sure that you could only see the blue background through the 'window'.


Here you are - 4 white frames and 4 blue backgrounds.

Now, for the assembly...


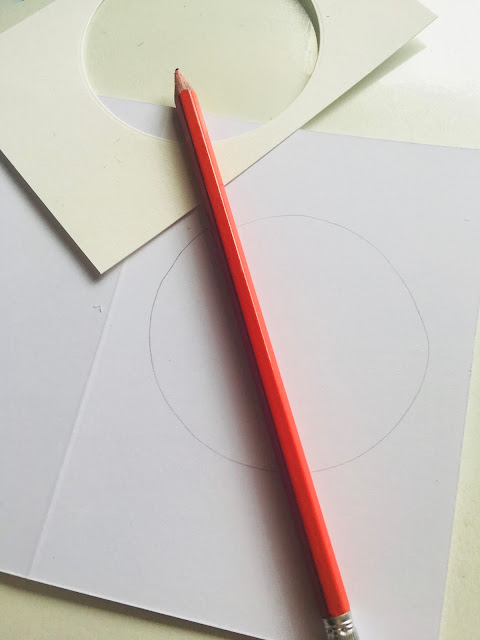
I placed the frame on the front of the card where I would later on attach it and outlined the circular 'window' on the card - this is to make sure that my background was glued in the right place...


... like this.


Using double-sided foam tape, I attached the frame to the card.
This created a nice dimension and depth.


Then it was time to add the animals and sentiments - also using double-sided foam tape.
The process was the same for all 4 cards.


And that's it! The cards are finished.


Do you think they would count as 'pretty cards'?
I certainly do!!!


Happy Easter!!!


P.S. I'll be back to my normal mixed media self next time, promise! ;)


Saturday 24 March 2018

Easter Basket by Sarah Allan

Hello Everyone!

I hope you are all having a great start to the weekend, the sun is shining, the birds are singing and springtime feels like it is almost here :)

My project today is an Easter basket, I picked up a plastic easter bucket from the pound shop and gave it the Brusho treatment ..


Step 1 - paint the bucket with a layer of gesso and dry carefully, you don't want to melt the bucket with your heat tool.. alternatively you can leave to dry naturally, i left it overnight


Step 2 - add some brusho crystal colours to some gesso and mix well, I chose moss green


Step 3 - paint the whole surface of the bucket with your new coloured gesso and dry


Step 4 - spritz some water on to you bucket in sections then sprinkle your brusho over top to activate crystals, then if required spray again until you get the look you like.   Dry in between sections and repeat.


Once you have your surface the way you want it... just fill your basket with straw and fill with easter goodies, this is am inexpensive but really  cute!


Related Posts Plugin for WordPress, Blogger...