Showing posts with label Ewelina Gryglak. Show all posts

Monday, 24 February 2020

Printing on cushion covers

The orange cushion is no more!!!
Do you remember last time I did some printing on a cushion cover? 


This was the outcome - a gorgeous black and white canvas cushion right next to a fluffy orange disaster... ugh! I disliked the orange monster from the moment it landed on my sofa (yes, the buyer is aware) and it gave me great pleasure replacing it with my new black and white one.


This looks so much better!


The process is extremely simple as all you need is a canvas cushion cover, a stamp of your choice (I love ArtFoamies for this type of printing) and Opaque Fabric paint.


I started from the centre and worked my way out - the middle is double stamped.


Then I followed the pattern by stamping the squares outwards.


And then finished the whole area stamping out the edges.


As you can see the process is extremely simple and easy but the outcome is awesome.
You can use different colours to create a more rainbow-y effect but my home is predominantly grey so black and white is what my decor is.

See you next time!


Monday, 10 February 2020

My birdhouse is cooler than yours!

It's been very cold and windy and rainy in her for the past week or so. And since it doesn't seem like I will be getting any snow this year ... I miss it so much! Like, proper snow... 20cm deep, fluffy, white heaven... that kind of thing... anyway... where was i? yes, so since it seems like I can only dream about the wite fluffy stuff, I am looking forward to spring. And with spring come birds and baby birds... and baby birds need homes.


 Do you see my logic? 
Birdhouse was the logical (...ish) next project on my list...


I didn't paint it with any base because I wanted the paint to soak into the wood and for the natural wooden pattern to be visible. Eco Acrylic paints are perfect for that!


I painted the whole birdhouse using two colours - Viridian and Turquoise.
I did two layers just to make sure the colour is vibrant despite having been soaked in by the unprimed wood.


Now to the fun part!
I mixed white with a bit of black paint to create very light grey and stamped the Peace Sign ArtFoamies all over (apart from the front). This is my first layer.


The second layer was alse created by using ArtFoamies - this time I opted for Magenta and Purple Eco Acrylics and Stars Foamies.


I made sure that I left the paint to dry thoroughly and sprayed it with varnish to prep for the weather conditions once the birdhouse is nailed to the tree in my garden.


And... yeah, my birdhouse is sure much cooler than yours! hahaha

Have a great week!


Monday, 27 January 2020

Mixed media recycling project with Brusho

Hi everyone! 
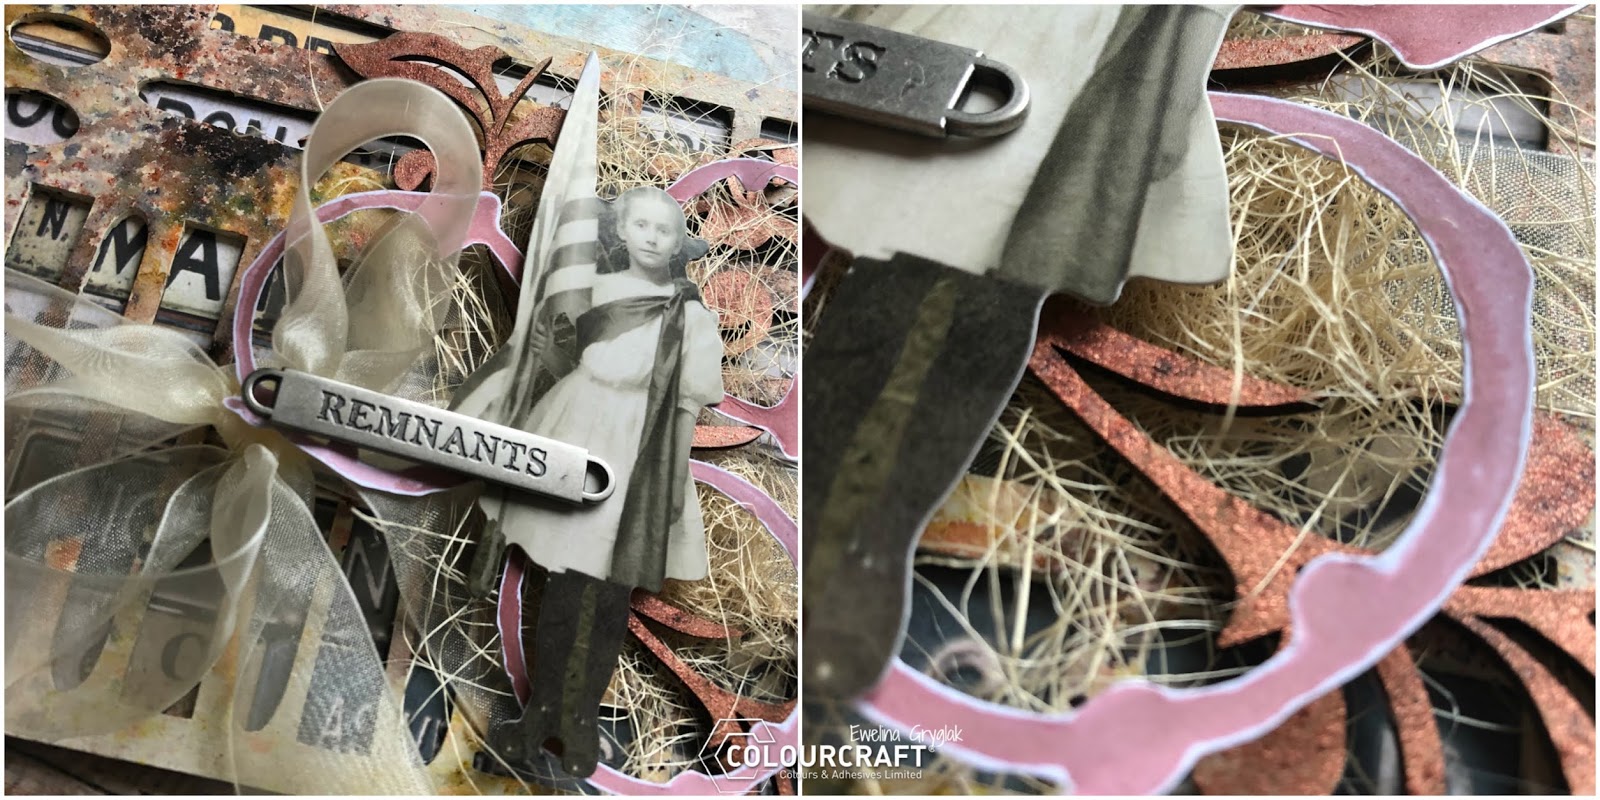
Today, I have for you a little recycling project. You know when you have a sheet of keyboard and you pop out all the elements... you are left with something that you'd normally put in the bin, right? Well... I decided to play and utilise mine as a base for mixed media projects that can be used as... an unusual card (rather than a traditional paper one) or cool piece of home decor.


Here's how I made it:


Start by preparing the sheet - I used ivory matte chalk paint.


Choose Brusho powder which will be the colour of your project - I went for Yellow Ochre, Burnt Sienna and Copper SprinkleIt to make it look a little bit rusty. Mist it with water as much as you wish creating lovely puddles of colours on the base. 


The awesome thing about using the 'negatives' is that you can leave them as they are with the holes or back them with paper of your choice adding to it another texture or design. Here I backed it with paper with vintage registration plates.


Using a puddle of Burnt Sienna, I stamped out coffee stains and fussy cut them to use as embellishments later on. (the stamp is from Crafty Too Designs)


I covered floral greyboard elements (from Lisa Horton Crafts) with Copper SprinkleIt - this made them look rusty and shiny at the same time.


For a feminine touch, I added a lacy ribbon with a big bow - I build the layers of embellishments around it. You can see it in the close-ups below:


Now, the project is finished, all I need to figure it is which wall in the house it will live on.

See you next time!


Monday, 13 January 2020

Stamped Out Cushion Cover with Ewelina

Hey everyone!
It's almost mid-January and for some reason, it feels like my home decor needed some fresh touches... 


Spare half an hour gave me an idea - stamped out cushion!!!


I prepped canvas cushion cover, ARtFoamies and Opaques Fabric Paint (in black an grey because that's my main home decor colours)


I inserted a piece of cardboard into the cover to make it a softer stamping base.


As I wanted to make the design 'fading' and grungy, I used black paint to stamp out the first line.


Just place the ArtFoamie block on the bottom of the cushion and then move along horizontally to create a line.


For the next line, I added some grey to the mix.


And then even more grey, with the final top line stamped out only in grey.


It looks pretty cool and slightly grungy - just how I like it!


It's a quick and easy way to add new decor to your sofa. I love it on mine!!!

See you next time!


Monday, 30 December 2019

Back to Basics - quick Brusho card

I know that for most crafters, the period between Christmas and New Year is THE TIME OF THE YEAR when they can craft as much as they want. Well, I am not that lucky and have to go to work every single day :(


However, I am not allowing that to stop me having colourful fun!!! 
Hence the card! ;)


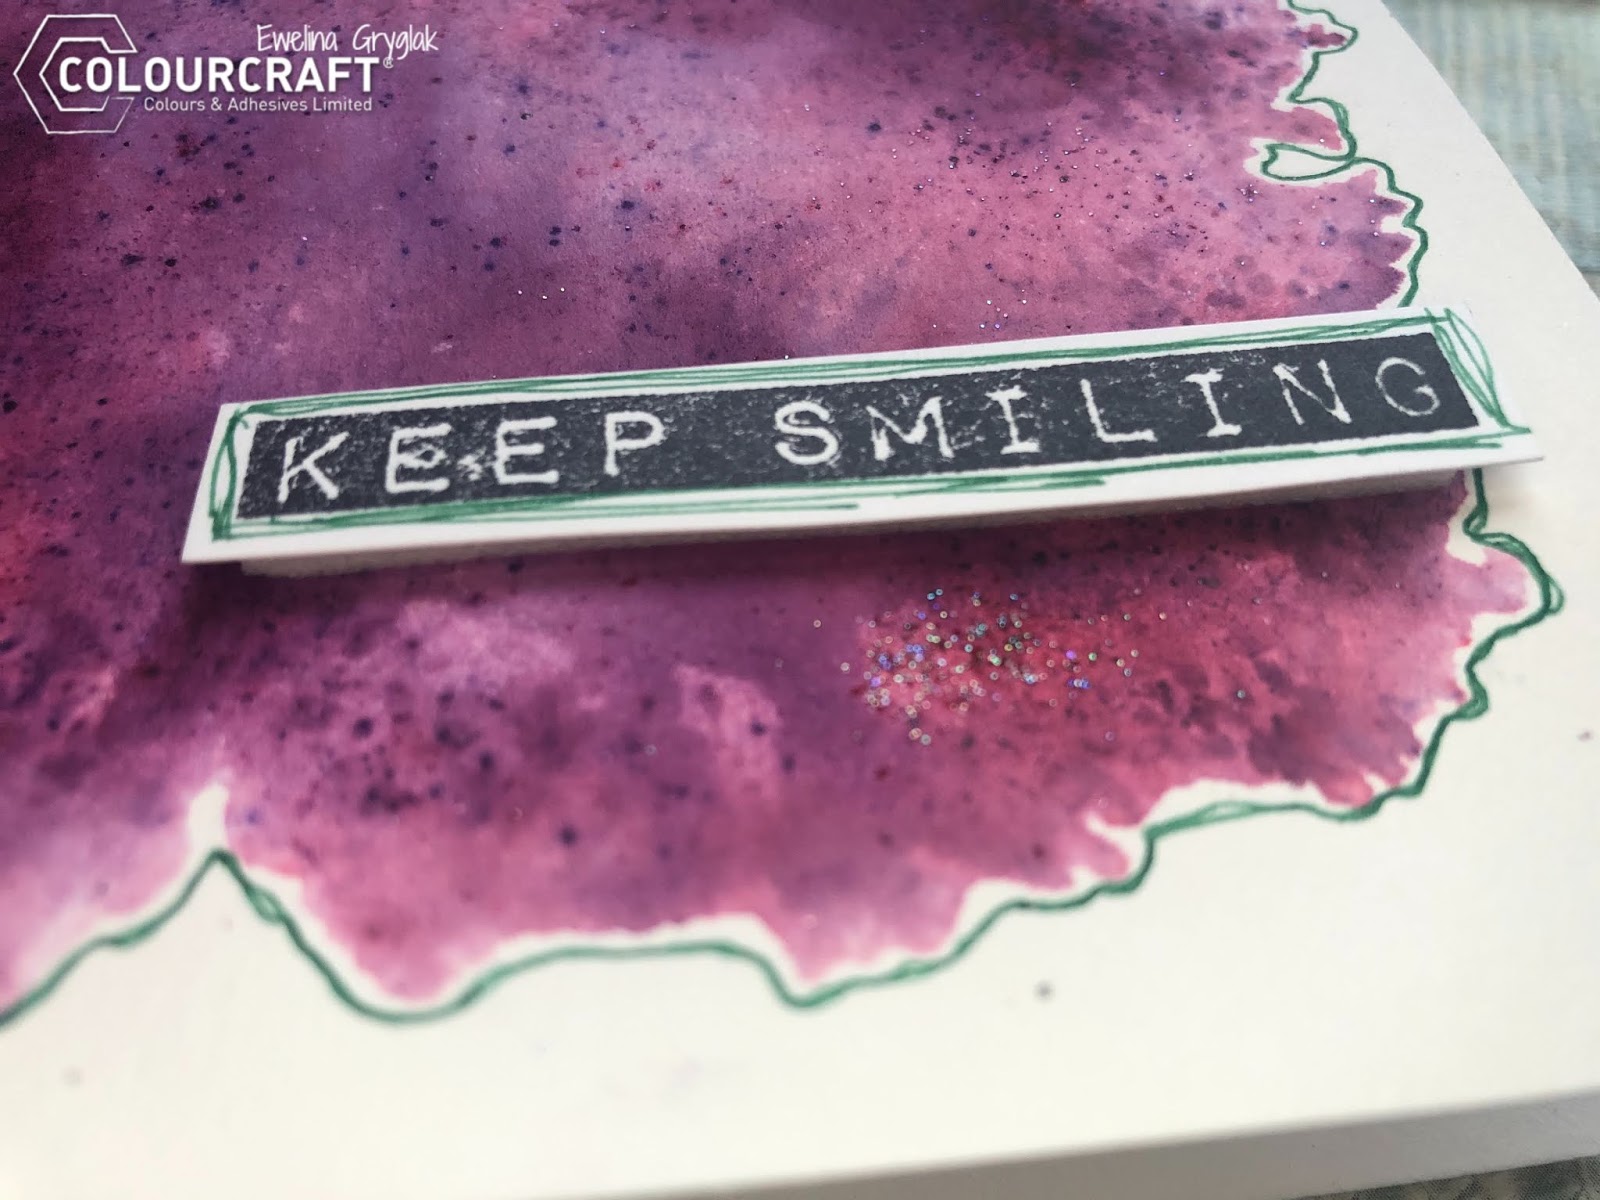
I started by sprinkling a Distressed Rectangle Polyplate with purple Brusho and iridescent SprinkleIt. Then misting it with a bit of water and... STAMP on watercolour card. 
While it was still wet, I added a little more SprinkleIt.


Once dry, I folded the A4 card and cut to shape to create a card.


As contract, I used a green gel pen to outline the shape - I have done the outline twice purely because I like my lines irregular and wonky.


I also outlined a stamped sentiment - you can see here what I mean by 'wonky lines'!


The last step was to mount the sentiment on the card.
Can you see the SprinkleIt sparkling??? I love it!


There you go - nice and easy and... preeeeeeetty!

See you next time!


Monday, 16 December 2019

Christmas Art Journal becomes an emergency Christmas Card

Hey everyone! Are you ready for Christmas? Are all your cards posted? 
I thought mine were ... until it turned out they weren't ... let me talk you through it...
It started with an art journal...


Here's how the Art Journal page came together:


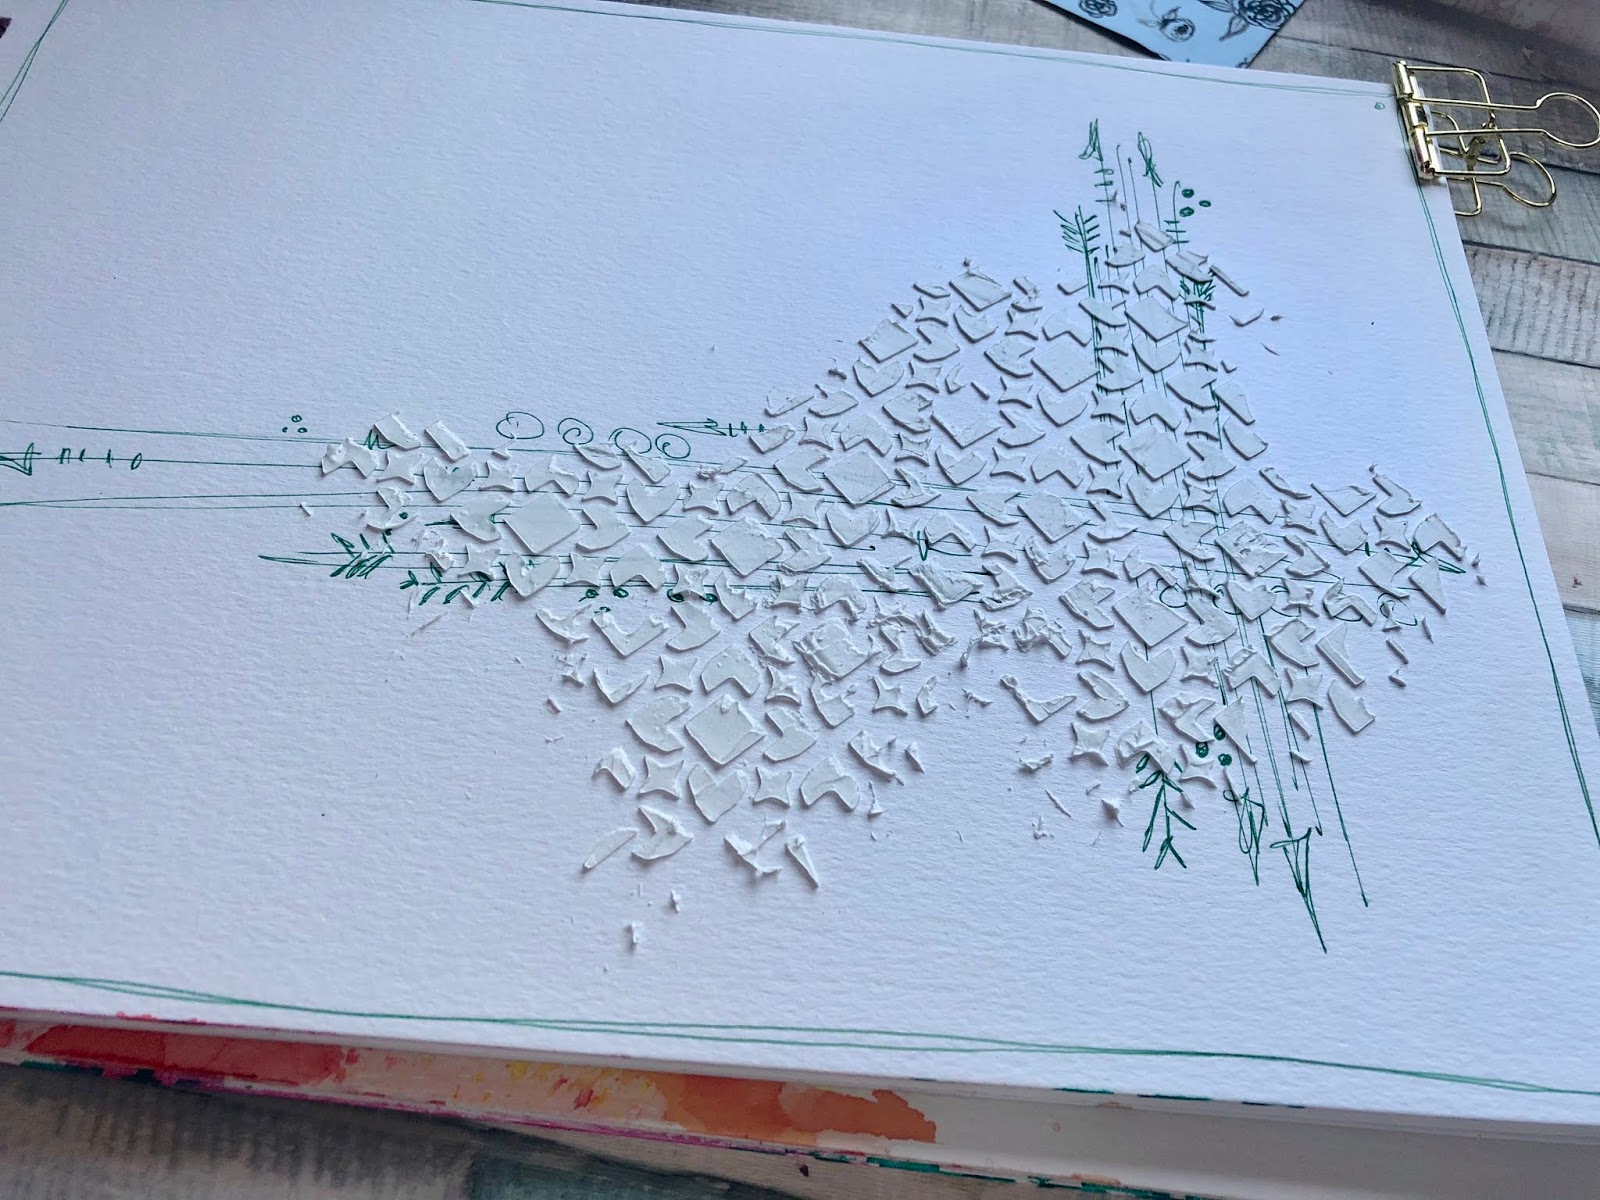
I started by scribbling a frame and some doodles with a green pen to create the first layer of background design.


Add a layer of texture paste - I like mine to be irregular and grungy.


Choose two Brusho colours you want to use and sprinkle them delicately on the textured area; then lightly spray with water avoiding making puddles. 


For additional effect, water down one of the colours and flick it off a paint brush creating splashes.


Now it's time to create a cluster to become a base of your main feature.
I used strips of various Christmas papers from ABStudio. 


I also cut out various elements from the same papers to use as embellishments which I layered in between the cluster strips.


You can stick te elements under, in between and on top of the cluster - just have fun with it!
You can add some more paint splashes now to make the elements blend nicely not the page.


Top up the finished cluster with your chosen element - I decided to use a reindeer.


TA DAH! My Christmassy Art journal page is ready!


And just as I thought that I will be able to display it nicely in my craft room, it turned out that I needed an additional Christmas card (guess counting is not my strong suit!).
In a moment of genius, I took the page out of the journal, folded in half and... the day was saved!!!


Have a great Christmas!
See you in the new year!


Related Posts Plugin for WordPress, Blogger...