I love to design using different techniques and materials - mixed media & skills.
Here are some sketchbooks I have decorated with quilted Tyvek squares
These spiral-bound Pink Pig sketchbooks, stocked by Colourcraft, have handmade coloured silk covers (front and back) and 35 leaf quality 150gsm cartridge paper (made from acid-free pulp purchased from accredited and sustainable resources).
This picture does not really show how fabulous the silk cover design on the notebooks is, you really do have to hold one in your hands to appreciate it!
They come in some gorgeous colours, I've used the Berry and Lime Green, and a wide range of sizes, I've used the 21cm square.
Not all the sizes and colours that Colourcraft actually stock, are listed in their website dropdown options so give them a ring if you want to order from the whole range.
For this project, I started with a couple of squares of Tyvek fabric.
These were stamped with a couple of my favourite polymer stamps: patterned heart and leaf. I mounted the polymer stamp on a acrylic block and inked them with StazOn ink. As the ink is solvent-based, I can paint the Tyvek squares straight away using eco-friendly acrylic paint in leaf green and purple
While the slightly diluted paint was still wet, I sprinkled on a little Brusho SprinkleIT: iridescent violet on the leaf and metallic pearl on the heart.
Once this was dry, I layered the Tyvek on top of black cotton fabric with some quilting batting behind. I chose a couple of variegated threads.
I sewed around the outside of the Tyvek squares with a zig-zag stitch. This holds it firm for the next stage: free machine embroidery of the heart and leaf.
Then it's time to heat distress the Tyvek, using a heat gun. NB. Work in a well-ventilated area.
I made a heating mat from a folded newspaper covered in kitchen foil. I used a couple of pins to hold the quilted squares to the mat.
Once cooled, I flattened the squares with my hands, before trimming and using double-sided tape to mount them on the sketchbooks.
For more detail, on this process, you can watch the film from my YouTube Channel.
Showing posts with label Helen Moyes. Show all posts
Friday, 29 May 2020
Friday, 24 January 2020
Painted & Stitched Heart Cards
Well, January has seemed to fly by, and it will be February next week!
So it is time to be thinking about showing appreciation to those we care about.
So whether you are into celebrating Galentines Day on the 13th or Valentine's Day on 14th February here is a painted and stitched idea!
I took a piece of well-washed cotton cloth (a piece of sheet to be honest) and stretched it on an old wooden frame. Three-Point pins are great for stretching the fabric to a frame, not causing tears, and come with a handy tool for removing them too, but you can use drawing pins.
I then had a play with three Markel Oil Sticks: purple, light gold, and red. These look good on their own but will resist added paint too. They do sink into the cloth so don't rub off as you are stitching later.
I then used some batik dye powder I had mixed up in jam jars.
These are handy concentrated cold water fabric dyes and I mix up lots of different colours just from the three primary colours. You just dilute them to get pastel shades!
For an average jam jar, I dissolve 30g of table salt in a little hot water and then make it up to 250ml with cold water. You then add 5g (1 level tablespoon) of Batik Dye fixer powder and 1g (a quarter of a teaspoon) of the dye powder.
I painted these on the fabric making several hearts.
You can see here how I let the paints bleed as I was wanting a shabby-chic effect.
When the paint dries sandwich two layers of fabric with some wadding in the middle.
You can secure this with a couple of pins but I used an embroidery hoop.
I used a couple of different embroidery thread colour and used running stitch around my painted lines.
I then trimmed the hearts and used double-sided tape to secure them to the front of cards. I'm not sure whether to leave them simple like this or whether to add a sentiment cut from the ribbon. What do you think? (Sometimes crafting on your own can seem lonely when you want another opinion, but here the online crafting community can be wonderful, so please do tell me in the comments what you think)
These heart cards also seem like a good idea for weddings and even thank you cards too!
I did make a heart-shaped padded shape too but haven't found the safe place I put my lavender to fill it with yet. I'll keep looking and will hopefully find it before February. It's nice to show yourself some love too and so I plan to put the scented heart in my wardrobe.
So it is time to be thinking about showing appreciation to those we care about.
So whether you are into celebrating Galentines Day on the 13th or Valentine's Day on 14th February here is a painted and stitched idea!
I took a piece of well-washed cotton cloth (a piece of sheet to be honest) and stretched it on an old wooden frame. Three-Point pins are great for stretching the fabric to a frame, not causing tears, and come with a handy tool for removing them too, but you can use drawing pins.
I then had a play with three Markel Oil Sticks: purple, light gold, and red. These look good on their own but will resist added paint too. They do sink into the cloth so don't rub off as you are stitching later.
I then used some batik dye powder I had mixed up in jam jars.
These are handy concentrated cold water fabric dyes and I mix up lots of different colours just from the three primary colours. You just dilute them to get pastel shades!
For an average jam jar, I dissolve 30g of table salt in a little hot water and then make it up to 250ml with cold water. You then add 5g (1 level tablespoon) of Batik Dye fixer powder and 1g (a quarter of a teaspoon) of the dye powder.
I painted these on the fabric making several hearts.
You can see here how I let the paints bleed as I was wanting a shabby-chic effect.
When the paint dries sandwich two layers of fabric with some wadding in the middle.
You can secure this with a couple of pins but I used an embroidery hoop.
I used a couple of different embroidery thread colour and used running stitch around my painted lines.
I then trimmed the hearts and used double-sided tape to secure them to the front of cards. I'm not sure whether to leave them simple like this or whether to add a sentiment cut from the ribbon. What do you think? (Sometimes crafting on your own can seem lonely when you want another opinion, but here the online crafting community can be wonderful, so please do tell me in the comments what you think)
These heart cards also seem like a good idea for weddings and even thank you cards too!
I did make a heart-shaped padded shape too but haven't found the safe place I put my lavender to fill it with yet. I'll keep looking and will hopefully find it before February. It's nice to show yourself some love too and so I plan to put the scented heart in my wardrobe.
Friday, 27 December 2019
Let It Snow
This week I have been making landscapes, including this winter landscape. These mini fabric creations look good mounted on a card, or framed as I've done here.
On the base of some blue suiting weight fabric, I started with the sky. With my fingers, I blended little wool with a couple of Angelina fibres: shimmer blue pearl & shimmer ultraviolet.
I attached these to the background with a felting needle, but glue works too.
Next, I layered some fabrics. You may recognise some of these fabric scraps from my blogs this year, the snowy hill in the distance was from screenprinting with fibres. There are some pieces of painted Tyvek and Lutradur from this year included too. I used a Gemstone Glue Pen to hold the pieces in place.
I chose to add some free machine stitching with Gutermann sulky 4071 variegated thread.
Next, I added some titanium white acrylic paint to some of the fabric, and then sprinkled on some iridescent silver glitter crystals
Here is the trimmed, mounted landscape in an upcycled frame:
Friday, 13 December 2019
Winter Sparkle Card
This month on the Colourcraft blog, the theme is "Let It Snow". Have you had any snow yet or just frost?
The few clear yet frosty nights have been a welcome break from all the rain, and have inspired this Winter Sparkle card. The techniques could equally be used on a canvas or on tags, either for gifts or journalling.
I started with two pieces of dark A4 card, one purple, and one black. They actually ended up being almost identical!
Once the card was folded I masked the back but this was only partially successful, so I recommend making the design on card and then mounting it on another folded card when complete.
I sprinkled the card with a selection of Brusho colours: Prussian Blue. Purple, White & Grey. I also sprinkled on some Brusho SprinkleIT: Irredescent Flash & Pearl.
This was then sprayed with spray starch and covered with cling film before leaving it the dry. This created a lovely background effect like frosty foliage.
While this was drying, I drew and cut out a template on the matt side of freezer paper.
I then ironed the gloss side of the freezer paper template onto the lower part of the card. This helps get a clean edge when sponging acrylic paint on. I made a mix of yellow, gold and bronze paint to get the colour I wanted, but the choice is yours!
Once the paint is touch dry, peel off the freezer paper stencil.
Now it's time to add some more sparkle! First I used a round ponge and embossing pad with silver embossing powder to create a moon
and the small snowflake polymer stamp on an acrylic block
A heat tool will melt the embossing powder to give a lovely sparkle 3D finish.
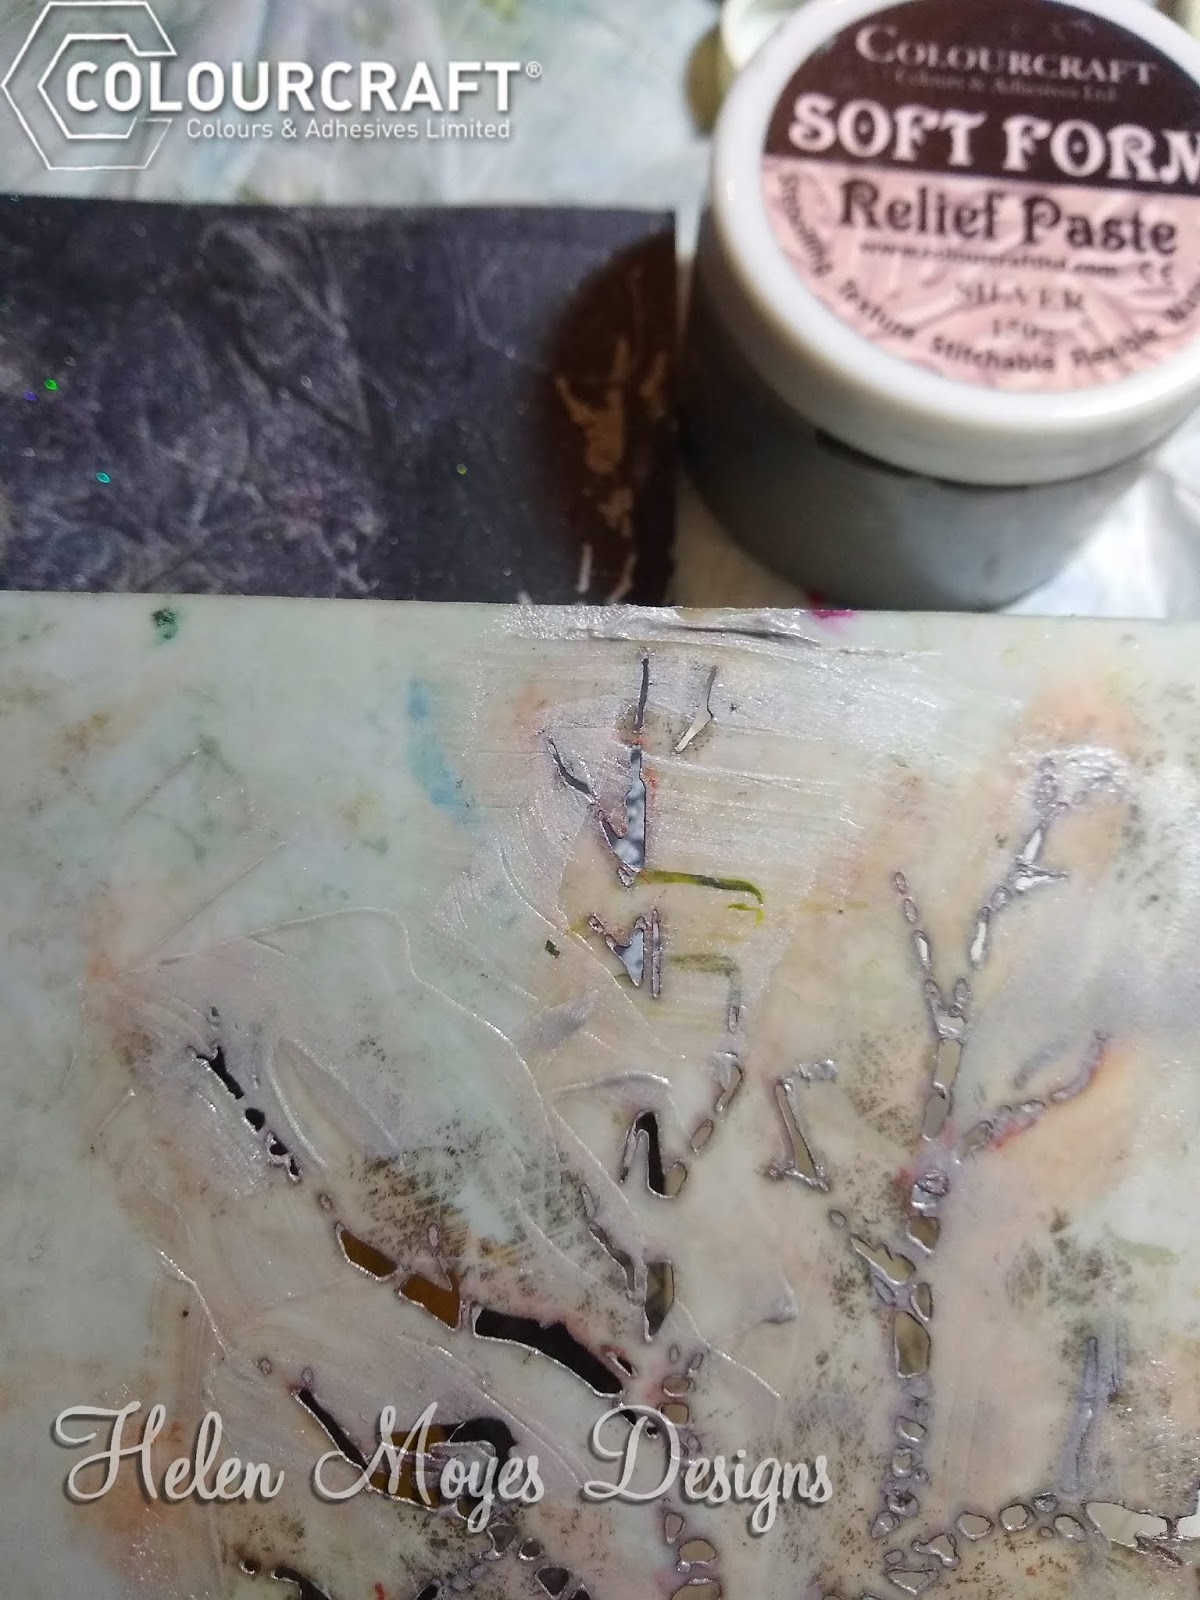
I then added some trees to the sides of my design using silver DesignIT relief paste, applying the paste through the secured tree stencil using an old credit card. Lift the stencil away carefully upwards to avoid smudging the paste and allow it to dry.
I then used the same technique for the bottom of the card but with the pearl DesignIT relief paste and TCW "Jungle Vines" mylar stencil. Colourcraft does stock this so give them a phone call (01142421431) if you would like one as they are not all listed on the website.
Adding an eye and mouth to the stag finished this winter scene.
I would love to see your Christmas card designs, so please do share them with me.
Friday, 29 November 2019
Forest Layers
This week I've been having a play, building up layers on a cotton fabric base, although you could use a base of heavy paper instead.
The process used some yarns, screen printing, a couple of stencils and couching stitching. Oh and I thought the forest needed some sparkle too!
Here is my finished picture, but you could use the same techniques and products and come up with your own unique picture.
Screen printing can be messy so protect your surface. I like to use several layers of newspaper over a plastic sheet which gives a little give which helps the printing.
I used some yarn and some net from lemons to add design. Having taped them across the fabric I mixed some adva print pearl binder and Adva-Print concentrated fabric colours brown and white. I then placed a screen printing screen over the fabric and a dribbled the mixed colour across the top area.
Tips for screen printing:
Once the screen printing was dry, I decided I wanted to have a little sky showing through the forest tree design. I mixed a little Brusho ost. blue with water and dabbed it onto the area I thought needed to be the sky. I added a little SprinkleIT Iridescent Violet to the wet blue to give the effect of light sparkling through the trees.
I then started to build up the layers of the forest.
In my palette, I mixed a little Brusho moss green and a little Brusho thickener with some water to form a paste.
I then dabbed this over some of the TCW "Jungle Vines" mylar stencil Colourcraft do stock this so give them a phone call (01142421431) if you would like one
When dry, this is the picture so far:
I stood back to view the composition and was not entirely happy. I decided it needed some sunlight shining through part of the trees onto the forest floor.
I mixed some thickened Brusho Yellow Ochre and dabbed it through the TCW "Burst" mylar stencil. This is the same as I used for the bag design a couple of weeks ago.
I added some SprinkleIT Iridescent Gold to the wet yellow paint before I removed the stencil.
When dry, I ironed the design on the reverse to remove any creases. I did this on a makeshift "ironing surface" consisting of folded newspapers covered in foil so as to not get any paint or sparkle on my ironing board!
I then tried a mount on the design to check I was happy with the design. I decided to stop there.
What do you think?
The process used some yarns, screen printing, a couple of stencils and couching stitching. Oh and I thought the forest needed some sparkle too!
Here is my finished picture, but you could use the same techniques and products and come up with your own unique picture.
Screen printing can be messy so protect your surface. I like to use several layers of newspaper over a plastic sheet which gives a little give which helps the printing.
I used some yarn and some net from lemons to add design. Having taped them across the fabric I mixed some adva print pearl binder and Adva-Print concentrated fabric colours brown and white. I then placed a screen printing screen over the fabric and a dribbled the mixed colour across the top area.
Tips for screen printing:
Holding
the screen firmly down with one hand, place the squeegee (or an old plastic credit card) above the
ink and, applying some pressure, pull it down the screen, taking the
ink with it pull at a 45º angle Repeat, and then put the squeegee to one side, being careful
not to drip excess ink.
Holding
the fabric down with one hand, lift the screen up from the bottom
edge and then away.
You can mix the Adva print colours to get the shade you want (I mixed a green to use next).
When
you have finished wash
the screen with cold water. Scrub it lightly with a sponge or nylon
washing-up brush to make sure you get all the ink out.
Leave the
screen to air-dry before printing again.
Once the screen printing was dry, I decided I wanted to have a little sky showing through the forest tree design. I mixed a little Brusho ost. blue with water and dabbed it onto the area I thought needed to be the sky. I added a little SprinkleIT Iridescent Violet to the wet blue to give the effect of light sparkling through the trees.
I then started to build up the layers of the forest.
In my palette, I mixed a little Brusho moss green and a little Brusho thickener with some water to form a paste.
I then dabbed this over some of the TCW "Jungle Vines" mylar stencil Colourcraft do stock this so give them a phone call (01142421431) if you would like one
When dry, this is the picture so far:
Wanting to add more layers and create 3D, I put the fabric in an embroidery hoop and couched some yarn down.
I stood back to view the composition and was not entirely happy. I decided it needed some sunlight shining through part of the trees onto the forest floor.
I mixed some thickened Brusho Yellow Ochre and dabbed it through the TCW "Burst" mylar stencil. This is the same as I used for the bag design a couple of weeks ago.
I added some SprinkleIT Iridescent Gold to the wet yellow paint before I removed the stencil.
When dry, I ironed the design on the reverse to remove any creases. I did this on a makeshift "ironing surface" consisting of folded newspapers covered in foil so as to not get any paint or sparkle on my ironing board!
I then tried a mount on the design to check I was happy with the design. I decided to stop there.
What do you think?
Friday, 15 November 2019
Burst Bag
This week I've been adding surface layers to decorate a canvas bag. The techniques could be used to decorate a canvas, cards, a quilt block, a baseball cap ...
The medium I used was EXpandIT 3D Expanding Fabric Medium which I coloured with a couple of Adva-Print concentrated fabric colours
I used the TCW287s Mini Burst stencil to create the design.
My bag was new so I washed it and then ironed it when dry.
Before you start decorating a bag, it is good to add some thick card inside the bag, to stop it from sticking together and also having the design seep through to the other side. This way you can decorate both sides independently if you wish.
First I added EXpandIT mixed with a little golden yellow using a sponge brush. Here you can see that I didn't cover the whole stencil design.
Without waiting for this to dry, I added fluorescent orange to the coloured EXpandIT and added that to the rest of the stencil design.
I then hung the bag up to dry.
Once dry I used a heat tool to expand the 3D medium paint. Keep moving the heat tool around to avoid overheating/scorching the medium. You can watch my burst design expanding here
I wanted to add a little sparkle to the burst design with foiling.
First I added some flexi glue holding the bottle at 45 degrees and gently squeezing. I put some on top of the expanded medium and a little just at the edges of the burst design.
I let this go tacky, then laid a foil sheet over the top. I used two different transfoil sheets, summer rainbow and rose gold.
You can see my transfoil technique here
Here is my finished bag design. What do you think?
What would you decorate using these techniques?
Friday, 1 November 2019
Batik Bag
And it's now November!
Here on the Colourcraft blog, we will be looking at surface layers throughout the month.
Today I'm sharing my batik bag. Batik is a technique of wax-resist dyeing which originated from Indonesia. Batik is made either by drawing the resist with a spouted tool called a tjanting or by printing the resist with a stamp. My bag used both these and also rubbing wax colour onto the cloth.
First, I washed the cotton bag to remove any "dressing". I ironed it and let it dry. Then I used a wooden block and Markal sticks to apply some coloured wax.
There are a wide range of individual wooden printing blocks to choose from (flowers, leaves, animals motifs, geometric shapes) or you can get a selection box. There is a wide range of Markal stick colours to choose from too.
I then put a thick piece of card inside the bag so that I could treat each side differently and the wax or dye colour wouldn't seep through both layers.
I fastened part of a stencil (gathered flowers) to one area of the bag using masking tape and applied melted batik wax over the stencil with a brush. I also dipped the wooden blocks in the wax and printed with them. All these areas will resist any dye and remain the original bag colour.
I melted the wax with a wax melting pot which has temperature control to keep the wax melted. The non-drip rim and 6 openings to allow the wax to flow back onto the cup, which is ideal for me to use at workshops. If you are just giving batik a go, you can place the wax in a washed-out food can and place that in a saucepan of water on the hob. keep a close eye on it and don't leave it unattended though! Alternatively, you can use an electric tjanting, but I've not tried one.
In the picture, you can see the wax melting pot with some tjanting. Use this to add dots, lines etc to your design.
I then painted on some batik dye using a sponge brush. I mix the powder with the fixer and water in clean jam jars. I would recommend the Batik Fabric Dye Complete Starter Pack which contains 3 x 25g Dyes 1 each: Red, Yellow, Blue, 1x 500g Fixer, Wax, Tjanting Tool, sponge brush, Gloves & Instructions for use.
I then let the dye dry before applying more wax. This will remain the first dye colour.
Finally, after removing the card, I scrunched up the bag, which cracks some of the wax to give a distinctive crackled effect, and put it in a jar of second dye colour. A good shake distributes the dye onto the bag.
After letting the bag dry the wax was removed using a dry iron and newspaper to absorb the wax. Make sure all the bag is ironed to fix the dye.
Here on the Colourcraft blog, we will be looking at surface layers throughout the month.
Today I'm sharing my batik bag. Batik is a technique of wax-resist dyeing which originated from Indonesia. Batik is made either by drawing the resist with a spouted tool called a tjanting or by printing the resist with a stamp. My bag used both these and also rubbing wax colour onto the cloth.
First, I washed the cotton bag to remove any "dressing". I ironed it and let it dry. Then I used a wooden block and Markal sticks to apply some coloured wax.
There are a wide range of individual wooden printing blocks to choose from (flowers, leaves, animals motifs, geometric shapes) or you can get a selection box. There is a wide range of Markal stick colours to choose from too.
I then put a thick piece of card inside the bag so that I could treat each side differently and the wax or dye colour wouldn't seep through both layers.
I fastened part of a stencil (gathered flowers) to one area of the bag using masking tape and applied melted batik wax over the stencil with a brush. I also dipped the wooden blocks in the wax and printed with them. All these areas will resist any dye and remain the original bag colour.
I melted the wax with a wax melting pot which has temperature control to keep the wax melted. The non-drip rim and 6 openings to allow the wax to flow back onto the cup, which is ideal for me to use at workshops. If you are just giving batik a go, you can place the wax in a washed-out food can and place that in a saucepan of water on the hob. keep a close eye on it and don't leave it unattended though! Alternatively, you can use an electric tjanting, but I've not tried one.
In the picture, you can see the wax melting pot with some tjanting. Use this to add dots, lines etc to your design.
I then painted on some batik dye using a sponge brush. I mix the powder with the fixer and water in clean jam jars. I would recommend the Batik Fabric Dye Complete Starter Pack which contains 3 x 25g Dyes 1 each: Red, Yellow, Blue, 1x 500g Fixer, Wax, Tjanting Tool, sponge brush, Gloves & Instructions for use.
I then let the dye dry before applying more wax. This will remain the first dye colour.
Finally, after removing the card, I scrunched up the bag, which cracks some of the wax to give a distinctive crackled effect, and put it in a jar of second dye colour. A good shake distributes the dye onto the bag.
After letting the bag dry the wax was removed using a dry iron and newspaper to absorb the wax. Make sure all the bag is ironed to fix the dye.
Here is the finished bag.
I got pastel shades but much deeper colours are possible using more batik dye powder and less water. Different stencils and wooden blocks would also create a very different design.
I would love to see your batik designs, please share them with me
Subscribe to:
Posts (Atom)