Showing posts with label art quilt. Show all posts

Saturday, 23 May 2020

Layered Garden with Transfer Colours

This week the Fabulous Clare did some tips, tricks and demos with Colourcraft's transfer paints in a live broadcast on Facebook! You can watch it HERE

Anyway, I also love playing around with Transfer paints. This week I thought I would take inspiration from my last blog post, this time doing similar techniques but on fabric!

I decided to use transfer paints and crayons- that way I could do my images on paper first and then layer them onto fabric when I transfer them with an iron.
Transfer colours are paints, crayons and pencils that you draw and paint on paper with (normal copy paper is best really) and then transfer over to fabric with polyester content (or that has been treated with transfix) by using heat. I started by decorating my paper- I used an old candle and Colourcraft resist sticks to scribble on paper- even over a rubbing plate!! I painted around some hot glue stencils I made for my last blog. I used some makeup sponges to stamp through a paper stencil I made and around actual leaves I had picked. 


These are the finished papers I made:


The wax resists the paint, I also flicked some droplets onto some of my pieces. 
I then played around with using pieces I had cut out of plain paper as masks and ironing the different paintings in layers onto a glittery satin. 
Leaves laid on the fabric...

This is with the "background" painting ironed over the top.

This one is with several of the paintings ironed on top of each other. 

This one is my favorite result! The paper paintings often can be used more than one time- giving a lot of depth and texture to a piece.

Here was the one I had done on paper with Brushos:
I'm quite pleased that I managed to imitate the effect! Of course, I had done the one on fabric with mostly shades of grey, but you can see the similarities.
Here are some more links to blog posts I've done with transfer paints:

See you next time!!!


Saturday, 25 April 2020

Angelina Dragonflies - Garden Mandala part 2

Last time I talked about making the butterflies in my mandala quilt- this time I'm going to show you how I made the dragonflies!
I started with the wings.
First I chose some beautiful Angelina films and fibers- making sure to crinkle the film to get the best effect.
I added a very thin layer of the fibers between two layers of the crinkled film- ironed between parchment paper- a VERY QUICK pass with the iron gets these to fuse together. If you iron for too long of a time, the fibers can change color.  I made two different colors and then cut these into wings.
For the bodies I started by sprinkling some Brusho and SprinkleIT onto fusible web, adding water and letting it dry.

By the way, the paper backing makes a great piece for collage and/or art journals!

I then peeled off the fusible and made a layer of fabric, the painted fusible and a transfer foil in a shimmery and sheer rainbow color- ironed those together to make the base of my dragonfly bodies.

I backed this with more fusible web and then cut and applied my dragonfly bodies with a mini iron (being careful not to melt the wings!). Make sure to protect your iron from the front of your foil/fusible/fabric sandwch as well! 
I then added beads for eyes and voila! Bling bling dragonflies! 

I added some color to the leaves in the middle- now it's just to add ants, ladybugs and maybe some flowers in the corners.
See you next time! Stay healthy.


Saturday, 28 March 2020

Distressed Butterflies with Transfoil- Garden Mandala part 1


Hi Everyone!

In all the craziness in the world at the moment- there are some bright spots! One is more time to craft! the other is Colourcraft Ltd. delivers!
One project I've been working on is a minature quilt with the theme of "Garden" for my quilt guild's show in October. I thought it would be fun to combine a bunch of different art quilt and embroidery techniques in a mandala whole cloth quilt.
The first art quilt element I did was linoleum cut and printed snails. You can read my blog about doing those here.
Today I'm going to explain how I made my butterflies though! 
I started with quilting all the basic creatures etc I'm going to have through all three layers of my quilt sandwich. This included doing a bit of appliqué and trapunto on my little linoleum printed snails.

Then I took Pastel Pearl Fabric Paint in pink and pearl and painted each butterfly.


I then added dots of transfer foil using fusible web and drew around them using a pink paint pen.


There is fusible on the dots, I lay over the foil and used the mini iron to activate the glue. Let it cool before removing. 

It just didn't feel like enough to me though... so I added some "mending powder" which is basically fusible in a powder form and added more foil. This gave me a random "distressed" effect on my butterflies which I love! 

Here is a picture of the quilt so far:


Next time I will show you how I make the dragonflies! More foil, Angelina and lots of bling.
Take care of yourself. 


Saturday, 14 March 2020

Marbling with Manutex

Recently I was teaching a workshop in paper decoration and one of the techniques we tried out was traditional marbling.
Basically, traditional marbling is where thinned, water based paints, are dropped onto a prepared "size", manipulated with sticks, combs and/or brushes and then applied to paper or fabric which is prepared to accept the paints.
Sounds complex, doesn't it? It doesn't need to be!


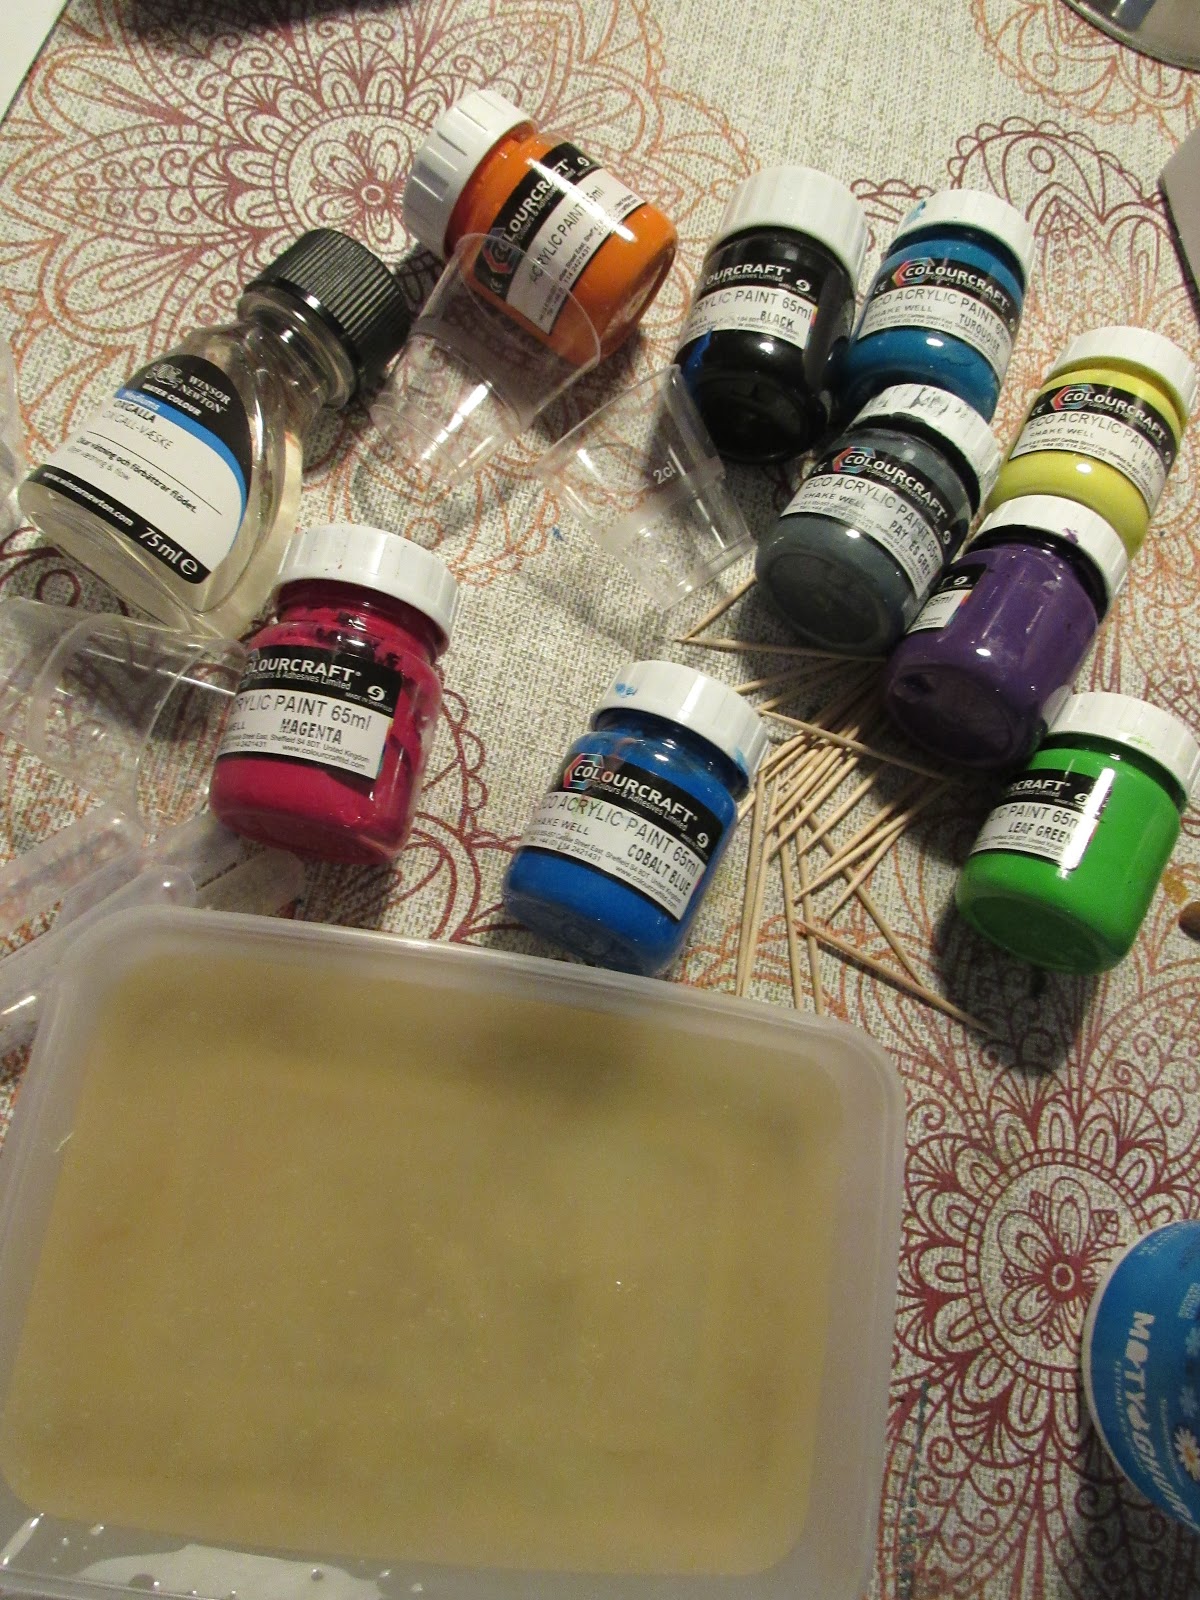
There are different types of materials which can be used as the size in marbling. It basically is something which creates a surface you can float your paints on and manipulate them before applying to the fabric. I've used a couple of the traditional ones, Carageenan is one- it can go bad pretty quickly, takes 24 hours to set and is extremely expensive. Methocel is another option- but it needs to be blended with ammonia to work and is a bit trickier. Then I remembered MANUTEX. Manutex is a Colourcraft product, often used with Procion dyes to thicken them for different techniques. I had used some the previous summer and wondered if it could work as a marbling size. It can!!

Basic instructions for fabric marbling with Manutex:
  • Mix 2 heaping teaspoons of Manutex with one litre of warm water and let sit for 2 hours
    • pour into a shallow container larger than your fabric
  • Mix 2 teaspoons of Alum (used for pickling as well as other things) in 4 liters of warm water for treating your fabric.
    • Soak your fabric in the Alum mixture and hang dry or dry flat. NB! Ironing fabric while it is treated with the alum could cause it to burn.
  • Blend Colourcraft acrylic paints with water until they can be picked up easily with a dropper, you might also need to add Ox Gall (usually used with watercolour paints)- a few drops can help your paints to float better.
  • Drop your colors onto the shallow container of Manutex- use combs, toothpicks etc to make designs.
  • Lay your dry, treated fabric gently on the top of the bath and pull off (the paint should stick to the fabric)
    • Immediately rinse your fabric gently under cool running water. The object here is to get the size and any extra paints off- the design should stay on the fabric!
  • Let your fabrics dry, and then heat set.


Dropping and combing color on the manutex

Lay the fabric onto the size, gently pat and pull off.

You can also just let the colors spread without combing to get a different effect.

Here are all the fabrics dried and heat set:


One thing I'm using these fabrics for are some miniature crazy quilt blocks for my #tamarama2020sal, Twenty art/crazy quilt blocks sewn in 2020. The mini blocks are for my "light" version. More info can be found here.

If you want to see another method of marbling check out these blogs :
here and here

MANUTEX


Related Posts Plugin for WordPress, Blogger...