Saturday 29 February 2020

Team Building with Linocut- Into the Garden

My local quilt group is going to have an exhibition this Autumn with the theme "Garden". I have a small group of ladies that meet once or twice a month to sew assorted types of quilts with like minded people. We decided that we would do our own challenge quilts for the exhibit. Our main requirement was that we wanted to try miniature quilts- these will be 30 cm x 30 cm.
To make it a bit more fun, we also decided that we would create a linoleum block to print with, with a common theme. As you can see, we chose snails!

Some of the ladies were quite hesitant at first, but with soft cut linoleum blocks and a bit of encouragement, we got some great results.

We started by sketching our designs on small pieces of soft cut linoleum.

I like to give beginners a piece of lino bigger than the desired size of the image. This gives the artist a place to hold the block while carving.

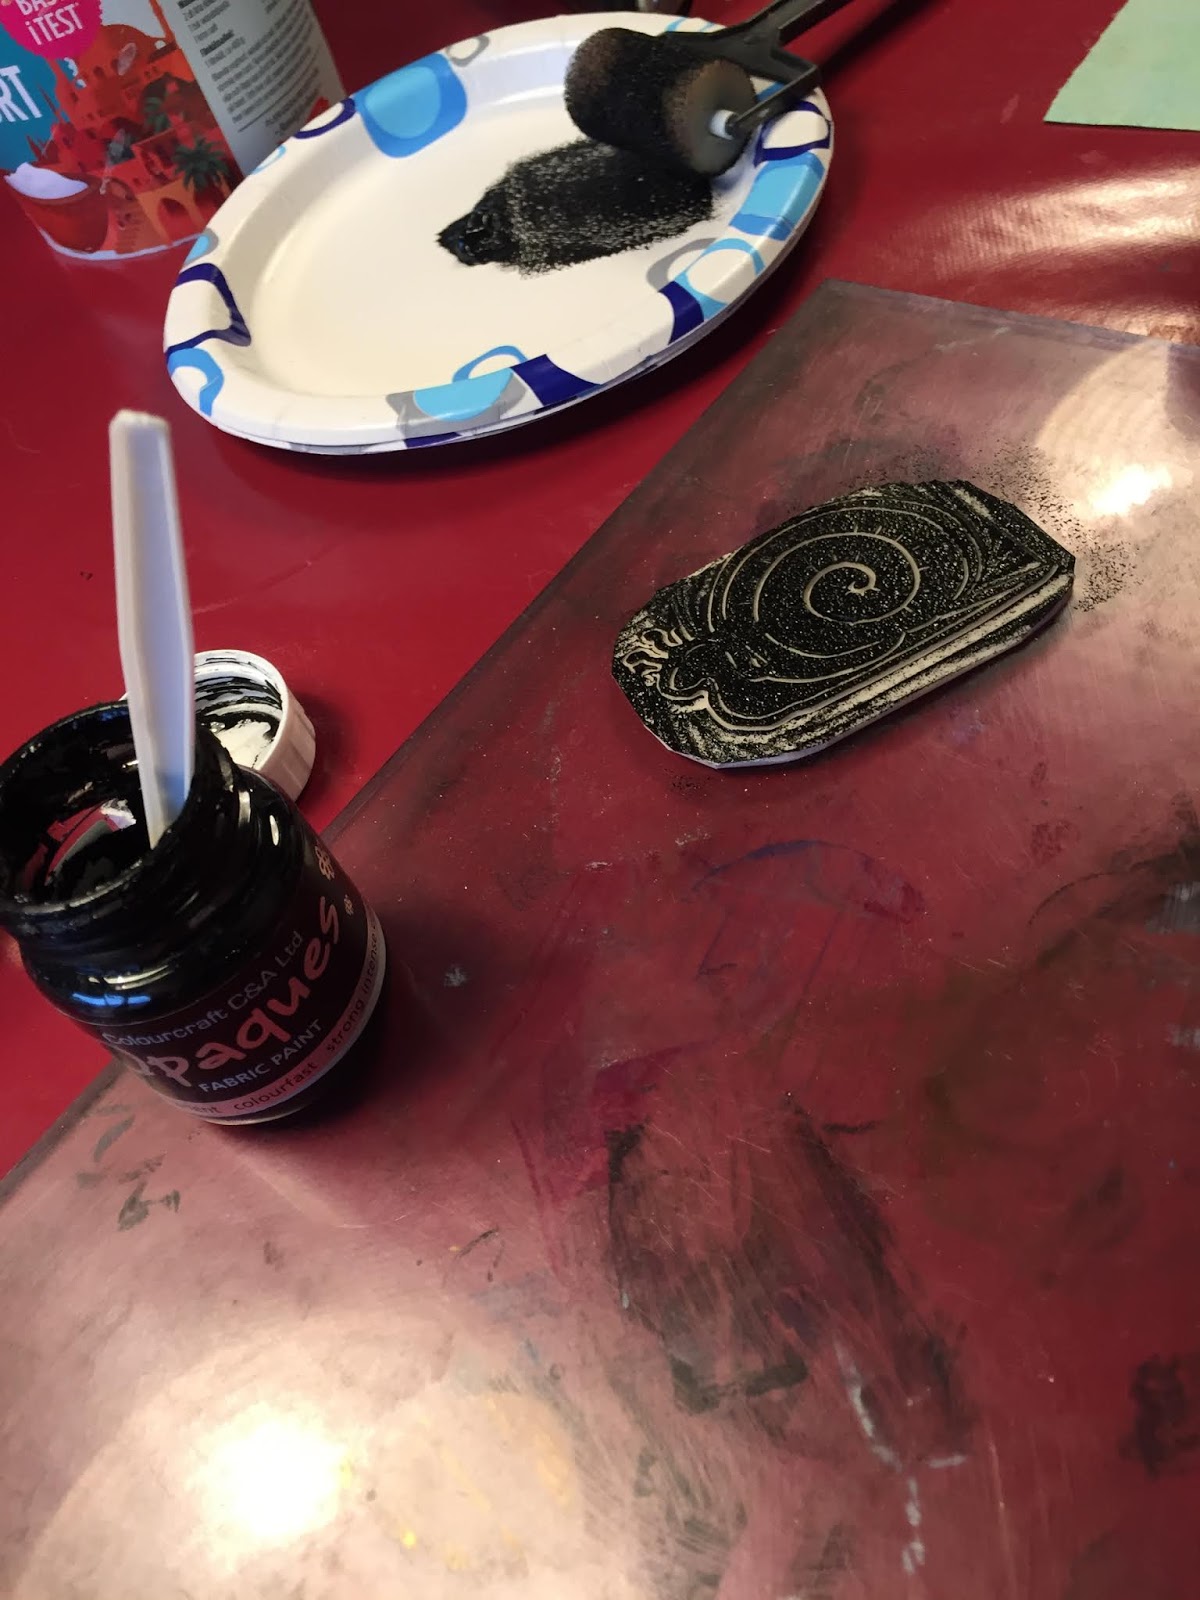
Next, we cut the image part of the block down to size, used a foam roller and black Opaque fabric paint, and rolled on the paint.

We then placed the block onto the desired fabric, rolled the backside with a clean rubber roller, and voila!
It's easy to go back into the block afterwards and clean up any extra carving you want to do. I personally thinks it adds to the handmade feel of the piece.
I thought it would be a fun idea to print everyone's blocks onto the same piece of fabric, as a record of our day together, this project, and our group as a whole.

A
Aren't they all fantastic?

I can't wait to see what their final projects are going to be- you all will get to see more of mine as I will be using some more interesting techniques throughout the process.
If you want some more info and ideas on linoleum cutting, you can check out some of my previous blog posts:


Wednesday 26 February 2020

Stenciled and foiled Birthday Cards with Karen


It's that time of the year when I need several birthday cards for male friends and family.
I gathered several sheets of white card and spread Design-It paste through a stencil on each one. I used Ocean Blue, Shimmering Aquamarine and Copper.

These were left to dry before sprinkling them with Brusho Crystal colours and spraying with water. I used Turquoise, Sea Green and Cobalt on two and a mix of Sea Green and Sandstone on the Copper stenciled piece.

These pieces were trimmed to size once dry. The sentiment was cut from double-sided foam and Transfoil was stuck on to the correct side before sticking these to the panels.

The panels were stuck on to card bases and I used Flexiglue to stick on small wood stars. This held these in place while I added more glue to their surfaces and left this to dry until tacky. I then added Transfoil scraps to give the stars a matching shiny surface. This photo shows one finished (left) and one in process (right). The blue version is still in progress as I ran out of stars and need to find other embellishments.

So, a few more cards full of shine and texture ready to send off.
Thanks for stopping by today.
Karen
x


Monday 24 February 2020

Printing on cushion covers

The orange cushion is no more!!!
Do you remember last time I did some printing on a cushion cover? 


This was the outcome - a gorgeous black and white canvas cushion right next to a fluffy orange disaster... ugh! I disliked the orange monster from the moment it landed on my sofa (yes, the buyer is aware) and it gave me great pleasure replacing it with my new black and white one.


This looks so much better!


The process is extremely simple as all you need is a canvas cushion cover, a stamp of your choice (I love ArtFoamies for this type of printing) and Opaque Fabric paint.


I started from the centre and worked my way out - the middle is double stamped.


Then I followed the pattern by stamping the squares outwards.


And then finished the whole area stamping out the edges.


As you can see the process is extremely simple and easy but the outcome is awesome.
You can use different colours to create a more rainbow-y effect but my home is predominantly grey so black and white is what my decor is.

See you next time!


Saturday 22 February 2020

An upcycled brusho bangle


I use a lot of stencil tape in my craft room and the last time that I emptied a tape roll, I wondered how I could utilise it. Voila - an idea popped into my head. A bangle using one of my fav products of the moment - brushos.

Firstly, I sprinkled some lemon, turquoise and leaf green brushos onto a large piece of tissuetex.  Tissuetex is fabulous as it is more robust so it can be torn and 'stretched' a little more easily than standard tissue paper. I spritzed some water onto the brusho powder.  This gave me the mottled effect.  In some places, I spritzed it with more water than others to give variety in the effect.


I then painted my empty tape roll with two coats of white acrylic paint - inside and out.


I tore the tissuetex into random but large pieces and I used modge podge to adhere these pieces to the painted roll.  In some parts, I taped over others to ensure that the roll was well covered and that the effect was how I wanted it. I was sure to cover it evenly and over the edges as well.


Finally, I gave a coat of modge podge all over to ensure that all pieces were well stuck and coated to seal it completely.  A bangle - ready for Spring and the fabulous colours that I wear then :)


Friday 21 February 2020

Tyvek Tulip

As the storms rage, I decided to dream of Spring and decided to make a tulip 


The first step is to colour Tyvek sheets and some paper covered wire. Tyvek has a distinctive pattern which is ideal for flowers. I used a mixture of diluted acrylic paint and then sprinkled on some Brusho crystal colour. I rolled the paper coloured wire across the wet Tyvek to colour that too. I then left them to dry


The name "tulip" is thought to be derived from a Persian word for turban, which it may have been thought to resemble. I've been experimenting with making different flowers with Tyvek paper. Making this tulip felt a little like creating a turban!

I studied the components of tulips to plan the flower. here is the templates I used to cut out the flower pieces from the Tyvek.

If you copy and paste this template image into a word processor and then enlarge it to A4 you will have the size I used.
I cut out the shapes of the template from the coloured Tyvek as shown:


I added detail to petals by stitching on them with variegated thread. You can do this by hand or machine, or just paint on some brush strokes for detail. 

I used a zig-zag stitch to fasten some coloured wire pieces onto the three outer petal shapes.


Inside the flower is a small, stemlike piece, the pistol, the very top part of the pistol is called the stigma and this was made using the bottom template piece, rolling it up and heating it to get the bubbly shape.  You can see I used a glass worktop saver held the Tyvek with a skewer and applied the heat with a heat gun in a well-ventilated space.


I then wound some stamens on with thread  (the sort sold for cake flowers). Next, I fastened a couple of inner (non-wired) petals with wire and zapped them with the heat gun to create some curling shape.


It needed a few hand stitches to feel secure.


I then arranged the three wired outer petals on, twisting the ends of the wire around the stem wire. A little more heat shapes and firms the petals.


Finally, I fastened on the leaves and finished the stem wire with green florist tape.


You may be interested to read the blog of the Autumn leaf arrangement I made with Tyvek. 

I would love to hear about any creations you make with Tyvek paper, please share them in the comments. 

Related Posts Plugin for WordPress, Blogger...