Showing posts with label screen printing. Show all posts

Friday, 29 November 2019

Forest Layers

This week I've been having a play, building up layers on a cotton fabric base, although you could use a base of heavy paper instead.
The process used some yarns, screen printing, a couple of stencils and couching stitching. Oh and I thought the forest needed some sparkle too!

Here is my finished picture, but you could use the same techniques and products and come up with your own unique picture. 


Screen printing can be messy so protect your surface. I like to use several layers of newspaper over a plastic sheet which gives a little give which helps the printing.

I used some yarn and some net from lemons to add design. Having taped them across the fabric I mixed some adva print pearl binder and  Adva-Print concentrated fabric colours brown and white. I then placed a screen printing screen over the fabric and a dribbled the mixed colour across the top area. 


Tips for screen printing:

Holding the screen firmly down with one hand, place the squeegee  (or an old plastic credit card) above the ink and, applying some pressure, pull it down the screen, taking the ink with it pull at a 45ยบ angle  Repeat, and then put the squeegee to one side, being careful not to drip excess ink.
 Holding the fabric down with one hand, lift the screen up from the bottom edge and then away.
You can mix the Adva print colours to get the shade you want (I mixed a green to use next).


 When you have finished wash the screen with cold water. Scrub it lightly with a sponge or nylon washing-up brush to make sure you get all the ink out.
 Leave the screen to air-dry before printing again.


Once the screen printing was dry, I decided I wanted to have a little sky showing through the forest tree design. I mixed a little Brusho ost. blue with water and dabbed it onto the area I thought needed to be the sky. I added a little SprinkleIT   Iridescent Violet to the wet blue to give the effect of light sparkling through the trees.


I then started to build up the layers of the forest.
In my palette, I mixed a little Brusho moss green and a little Brusho thickener with some water to form a paste. 

I then dabbed this over some of the TCW "Jungle Vines" mylar stencil  Colourcraft do stock this so give them a phone call (01142421431) if you would like one


When dry, this is the picture so far:


Wanting to add more layers and create 3D, I put the fabric in an embroidery hoop and couched some yarn down.


I stood back to view the composition and was not entirely happy. I decided it needed some sunlight shining through part of the trees onto the forest floor.
 I mixed some thickened Brusho Yellow Ochre and dabbed it through the TCW "Burst" mylar stencil. This is the same as I used for the bag design a couple of weeks ago.
I added some 
SprinkleIT  Iridescent Gold to the wet yellow paint before I removed the stencil.


When dry, I ironed the design on the reverse to remove any creases. I did this on a makeshift "ironing surface" consisting of folded newspapers covered in foil so as to not get any paint or sparkle on my ironing board!

I then tried a mount on the design to check I was happy with the design. I decided to stop there.


What do you think?


Saturday, 17 August 2019

Warhol Inspired Cat Prints

One of my favorite artists- certainly in the PopArt genre, is Andy Warhol! He played around a lot with icons both human and not, Marilyn Monroe and Campbell's Soup being examples- using printing techniques and exploring with color!
This month I've done my own version, using my lovely cat Leia as a model.

First I printed out a black and white photo of her in the size that I wanted to make my prints. Since she is a black and white cat, it makes it even easier for this technique. I then used a light board to trace around the main areas of color I wanted to separate out.


Then I used a clear plastic with a sticky back (freezer paper would also worked) and traced and cut out my stencils- the black parts, the white parts and her eyes and nose. I stuck these onto blank screens. I used three, but you can also use one and just switch out the stencil after you've printed one. I made sure to have an inch of uncut plastic around my image.


I then marked a registration mark on my fabric in pencil- where I will place the lower left hand corner of the plastic stencil when I'm printing.

I then laid the screen into place, mixed up some Eco Acrylic Paint with fabric medium and pulled it through my screen. I blended various colors because I didn't want to use super pure shades.

I mixed different colors and printed all the "white" portions of Leia. Let those dry and then printed the "black" portions (using the registration mark as a guide as to where to place the next screen), and finally doing the "eyes and nose".
The result looked like this:
Pretty cool! I like how they aren't perfect- but I wanted to add more detail to bring her to life. I used paint pens, but it also could have been fun to put these on some wadding and backing and quilt the details!
My prints all have their own individual character- which is something I quite like. 

I hope you enjoyed this technique and give it a try with your own photos!

See you next time!!
-Tamara

Monday, 16 April 2018

A fond farewell by Terri Koszler


Hi Terri here today to say farewell, as this is my last post for the first ever Colourcraft Design team.  Fear not I will be popping back in every so often with some Screen printing posts to keep you updated on new techniques and way to incorporate screen printing into your crafting.


I thought as it's my last post I would not only create using screen printing and Brusho but I would create 3 cards, because all good things come in 3s.


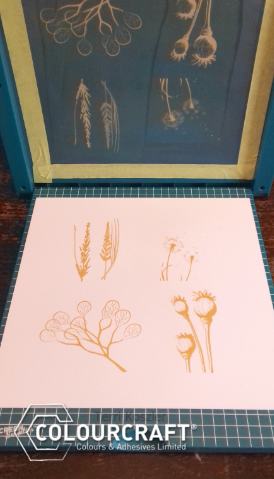
I started my projects off by pulling a simple print using my screen sensation seed pods screen along with Colourcraft's Gold textile screen printing ink.


Once dry I cut my print down to make four 5"x5" prints.  I then added a sprinkle of Olive green brusho and spritzed with water.  I allowed this to dry naturally and then mounted them onto dark brown card. I added a stamped quote to each image using Altenew's Beautiful quote stamps. I added 3 of the 4 images to 6"x6" white card blanks.  (I chose not to use the dandelion head image as the brusho covered too much of the image)

Here's what each of the cards looks like;


I have had so much fun over the past 12 months creating a variety of projects for the blog and want to take this opportunity to thank Clare Horner our DT coordinator for all her hard work and guidance and everyone at Colourcraft for providing me with such amazing products to work with and for their confidence in my ability to showcase their products.

I look forward to seeing what the next team create.


Monday, 2 April 2018

Using multiple colour screen inks by Terri Koszler

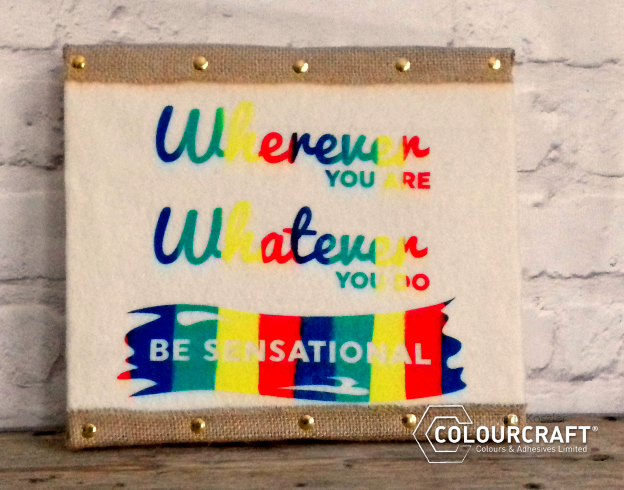
Today I am sharing a video showing an easy way to use multiple inks on one screen when screen printing.


As I printed onto felt the ink will take longer to dry.  I decided to add my print onto a canvas frame, to do this I covered the frame with a strong double sided tape to keep the felt in place.

I then added some hessian strapping to the top and bottom of the frame using some brass push pins for added decoration.


I hope you've found the video helpful, please look back at some of my other screen printing posts for more inspiration.


Monday, 27 November 2017

Screen Printing on different surfaces by Terri Koszler

Happy Monday everyone, today I am going to be giving you another instalment in my screen printing series. I am going to be focusing on what surfaces you can print onto and some of the possible pitfalls you may come across, in the hope that I can save you from making the same mistake I did when starting out.


Paper, card and tissue paper


Paper is an easy surface to print onto. You can print on to any colour, most textures and of course dont forget that you can print over a pattern. I love printing onto old book pages. If you leave the pages on a windowsill for a day or two they will yellow a bit giving an aged look.


Natural textures surfaces, cork, slate and wood


Cork is a lovely surface to print onto, you can still see the natural texture of the surface through the ink. Slate and wood are also bases for printing.

Craft Foam


Craft foam or funky foam as you may have heard t called is another cool material to use.  The thing to remember here is that it isn't porous like paper so will require a longer drying time.

Shiny smooth surfaces; mirror, glass and tile.


Glass and mirror are both great surface to print onto and both can be purchase relatively cheaply.  An old mirror can be given a new lease of life with a simple screen design.

Mirror card with a linen weave


Printing over mirror card gives a really nice effect and is easy to do.

Acetate


Printing on to acetate is fun but can be tricky if you're not careful, see below for pitfalls.


Fabric


You may remember this project from one of my previous posts (click here) Fabric is the material that most of us think of when talking about screen printing, there are so many fabrics you could use; calico, leather, denim and felt are all good choices.


Ok so on to possible pitfalls;


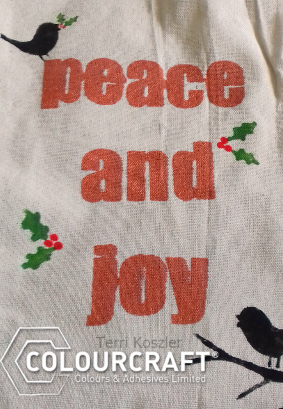
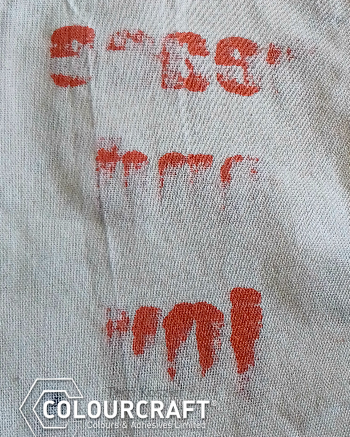
Open weave fabrics = ink bleed!!!

If using a fabric thats open/loose weave place a piece of card inside or underneath the first layer or you'll end up with a mess on the reverse.........I wont make that mistake again!


A baggy screen = smudges and halos!

If you've printed onto a surface that is raised in places or was thick yet smaller than the size of your screen you may end up with a baggy screen as when you pull the ink and squeegy over the bulk it can stretch the screen or leave a build up off ink in place. This will effect your net print, in the picture above you can see a circle from where I printed onto the mirror and then onto card.

I should have tightened my screen to avoid this problem.


Failing to tape down smooth shiny materials = vacuum effect and smudges!!!

When you print onto things like paper, card and acetate you should always tape them down. Failure to do so results in your chosen material sticking to the screen and smudging when you try to remove it. I didn't tape down my acetate in the picture above and when I tried to remove it it slipped and caused smudging.........

Here's a quick project showing how to add screen printed details to candles.


You will need to screen print onto tissue, if your tissue is double or triple ply separate to single ply after printing. 


Tear around your image by hand, dont use scissors or you wont get a good result.


Lay you image on top of your candle and wrap with a piece of wax paper.


Gentle heat with your heat gun making sure not to get to close or stay in one position to long, you will see the paper recede into the wax leaving you with a smooth result.

I must stress that I only use the candles for display purposes once I've added screen printed images to them as fire and inks can be dangerous!


As with any new hobby there are always things to learn and mistake to be made. I hope that I have given you some tips on how to avoid some common problems so that you can have get on and have fun.

I will be back with more screen printing fun soon, I'm thinking we'll look at using multiple colours on one screen and using more than one screen on a project.

Till then have fun experimenting.

Terri


Related Posts Plugin for WordPress, Blogger...