Showing posts with label stamp. Show all posts

Monday, 24 February 2020

Printing on cushion covers

The orange cushion is no more!!!
Do you remember last time I did some printing on a cushion cover? 


This was the outcome - a gorgeous black and white canvas cushion right next to a fluffy orange disaster... ugh! I disliked the orange monster from the moment it landed on my sofa (yes, the buyer is aware) and it gave me great pleasure replacing it with my new black and white one.


This looks so much better!


The process is extremely simple as all you need is a canvas cushion cover, a stamp of your choice (I love ArtFoamies for this type of printing) and Opaque Fabric paint.


I started from the centre and worked my way out - the middle is double stamped.


Then I followed the pattern by stamping the squares outwards.


And then finished the whole area stamping out the edges.


As you can see the process is extremely simple and easy but the outcome is awesome.
You can use different colours to create a more rainbow-y effect but my home is predominantly grey so black and white is what my decor is.

See you next time!


Monday, 10 February 2020

My birdhouse is cooler than yours!

It's been very cold and windy and rainy in her for the past week or so. And since it doesn't seem like I will be getting any snow this year ... I miss it so much! Like, proper snow... 20cm deep, fluffy, white heaven... that kind of thing... anyway... where was i? yes, so since it seems like I can only dream about the wite fluffy stuff, I am looking forward to spring. And with spring come birds and baby birds... and baby birds need homes.


 Do you see my logic? 
Birdhouse was the logical (...ish) next project on my list...


I didn't paint it with any base because I wanted the paint to soak into the wood and for the natural wooden pattern to be visible. Eco Acrylic paints are perfect for that!


I painted the whole birdhouse using two colours - Viridian and Turquoise.
I did two layers just to make sure the colour is vibrant despite having been soaked in by the unprimed wood.


Now to the fun part!
I mixed white with a bit of black paint to create very light grey and stamped the Peace Sign ArtFoamies all over (apart from the front). This is my first layer.


The second layer was alse created by using ArtFoamies - this time I opted for Magenta and Purple Eco Acrylics and Stars Foamies.


I made sure that I left the paint to dry thoroughly and sprayed it with varnish to prep for the weather conditions once the birdhouse is nailed to the tree in my garden.


And... yeah, my birdhouse is sure much cooler than yours! hahaha

Have a great week!


Friday, 10 January 2020

Home is Where You Hang Your Heart

I don't know whether it's that I'm recovering from the "Festive Flu", or the dark, damp days, but I'm really appreciating being at home! This got me thinking about the saying "Home is Where Your Heart Is" which caused me to remember the other saying "Home is Where You Hang Your Heart", which I used for this hanging.


Sorry, it's not a great photo, but the dull day has quickly turned dark so my glass cabinet was the only place I could find to have light shining through the heart to show the glass paint. I am planning to hang it up in my porch so I will hopefully post a better photo on Instagram

First I cut a couple of hearts from some of the cardboard I save to upcycle. I cut a heart "hole" in each. I then painted them with white gesso and left this to dry.


Then I painted one side of each heart with metalic gold paint.


Once this was dry I sprayed these gold sides with gold and bronze Brusho Shimmer spray and then sprinkled on some SprinkleIT gold to really get them glitzy.


While this was drying I wrote my quote on an acetate sheet with a black glass outliner. I also drew a heart with the outliner which when dry I filled in with some glass paint.


I then took some Shimmering Deep lagoon & Shimmering Coral Red Angelina fibres and laid them over the patchwork heart stamp which I had inked with Stazon.


I then covered this with baking parchment and used a dry medium iron to fuse the fibres ( and the ink design) together. 

I made three hearts with Angelina so I could create a 3D effect under the large heart, also using invisible thread and some pink and gold beads

I sandwiched the acetate between the two card hearts with glue and left them to dry.


I hope you are enjoying your home, and especially being able to craft. 

If you would like to sew some hanging hearts rather than paint some, then I have some heart kits available.


Helen x

Friday, 13 December 2019

Winter Sparkle Card


This month on the Colourcraft blog, the theme is "Let It Snow". Have you had any snow yet or just frost?
The few clear yet frosty nights have been a welcome break from all the rain, and have inspired this Winter Sparkle card. The techniques could equally be used on a canvas or on tags, either for gifts or journalling.


I started with two pieces of dark A4 card, one purple, and one black. They actually ended up being almost identical!
Once the card was folded I masked the back but this was only partially successful, so I recommend making the design on card and then mounting it on another folded card when complete.

I sprinkled the card with a selection of Brusho colours: Prussian Blue. Purple, White & Grey. I also sprinkled on some Brusho SprinkleIT: Irredescent Flash & Pearl


This was then sprayed with spray starch and covered with cling film before leaving it the dry. This created a lovely background effect like frosty foliage


While this was drying, I drew and cut out a template on the matt side of freezer paper


I then ironed the gloss side of the freezer paper template onto the lower part of the card. This helps get a clean edge when sponging acrylic paint on. I made a mix of yellow, gold and bronze paint to get the colour I wanted, but the choice is yours!


Once the paint is touch dry, peel off the freezer paper stencil.

Now it's time to add some more sparkle! First I used a round ponge and embossing pad with silver embossing powder to create a moon


and the small snowflake polymer stamp on an acrylic block 


A heat tool will melt the embossing powder to give a lovely sparkle 3D finish.

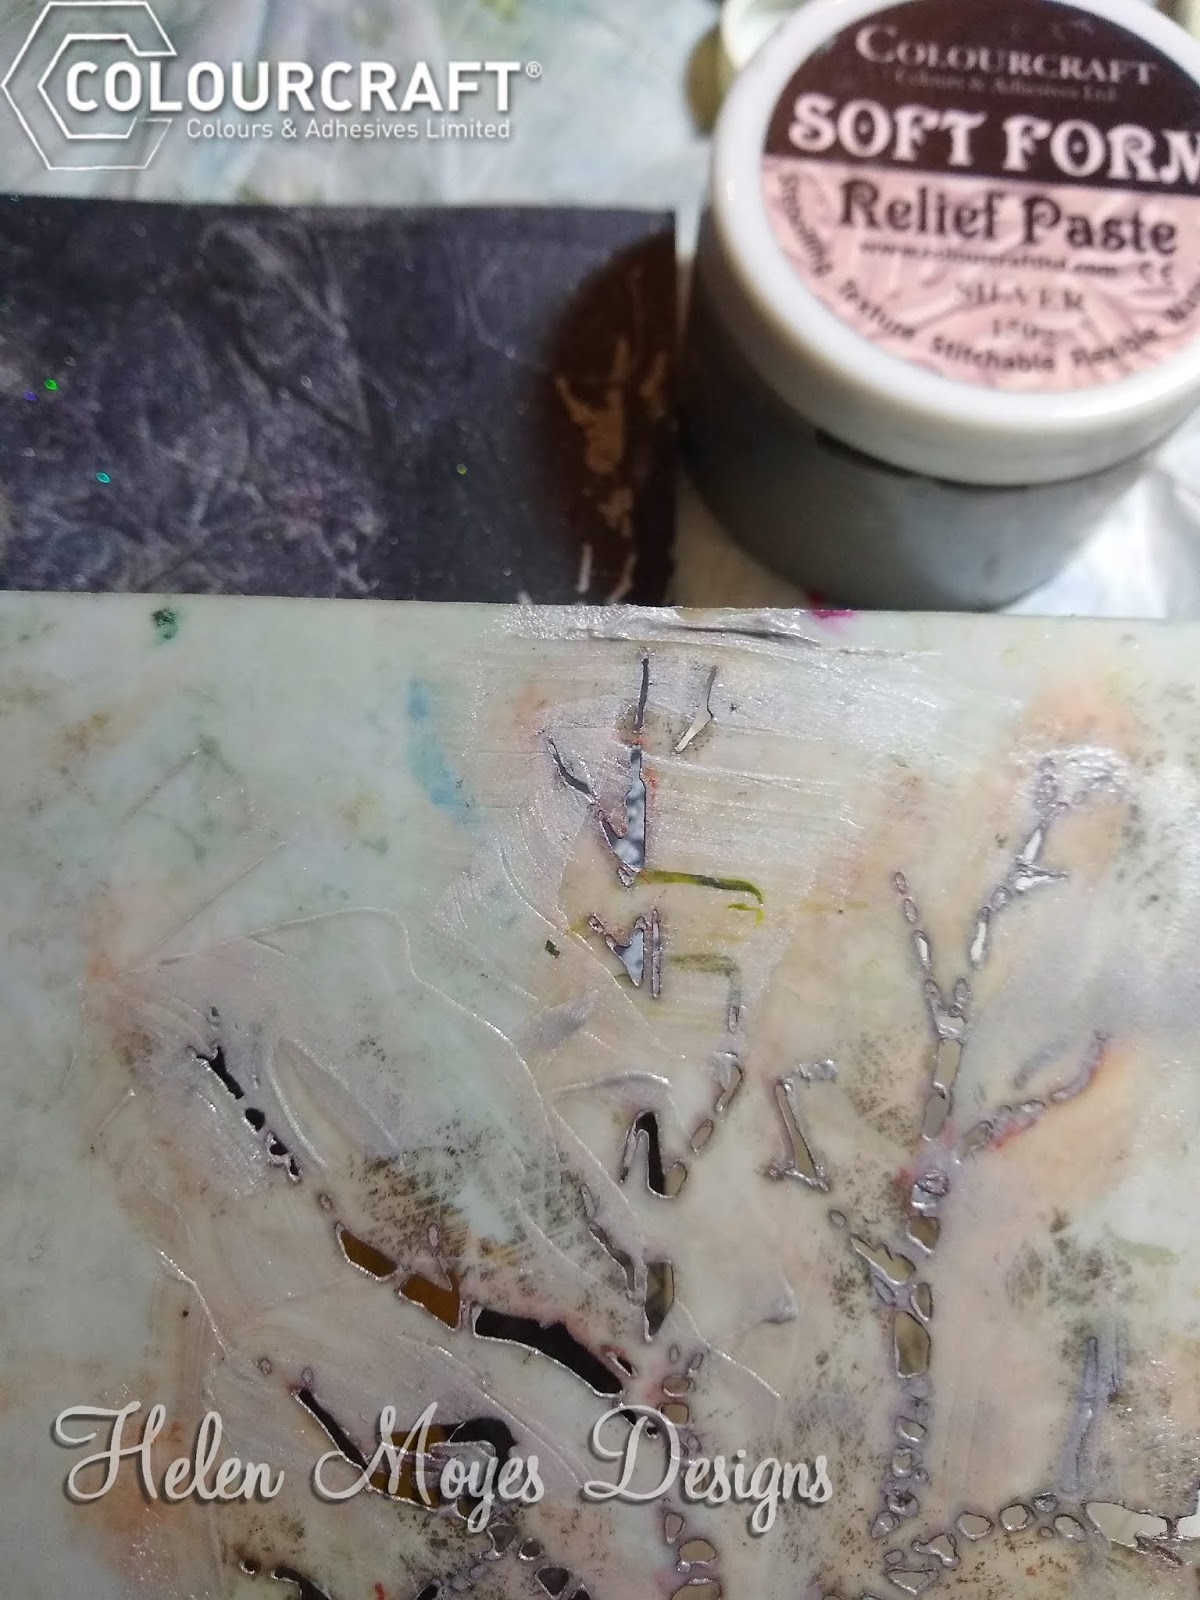
I then added some trees to the sides of my design using silver DesignIT relief paste, applying the paste through the secured tree stencil using an old credit card. Lift the stencil away carefully upwards to avoid smudging the paste and allow it to dry.


I then used the same technique for the bottom of the card but with the pearl DesignIT relief paste and  TCW "Jungle Vines" mylar stencil.  Colourcraft does stock this so give them a phone call (01142421431) if you would like one as they are not all listed on the website.


Adding an eye and mouth to the stag finished this winter scene.


I hope you are keeping warm.

I would love to see your Christmas card designs, so please do share them with me.

Monday, 2 December 2019

Acrylic Paint Art Journal

Hello everyone! Today I want to share with you something I don't often do - an Art Journal. My main inspiration behind it was the need to do stamping... a lot of stamping!!! To make it happen, I used ArtFoamies stamps and Colourcraft Eco Acrylic Paint.


To start a glued and gessoed over two pages from an old book - I like how the letting can be seen thorough the paint later on. I also like highlighting some of the words by drawing boxes around them once the page is finished.


As background, I wanted an ombre pink-to-white with some lifted mandala designs (once done, turned out I didn't really like them so they ended up being covered... yikes!).
I also painted purple spots in three columns.


First layering of stamps was done by the humble paint lid.
I dunked it in teal paint and stamped on the page.


Next was the spotty circle and green paint.


Then lines and crosses - first in white, then (without cleaning off the white) purple, pink and even some teal - I like the uneven colouring.


I left it to dry before moving to the next/last stage.


With black and white gel pens, I outlined some of the shapes, drew a frame around the page, framed some of the background wording peeking through the paint and did some general doodling all over.


The end result - a bright page and fulfilled need of stamping.


See you next time!


Friday, 18 October 2019

Snowflake Stitching on Soluble Film


We are down to single figures for daytime UK temperatures now, no snow yet but definitely chilly. I had better hurry up and finish knitting my fingerless gloves!


This week I’m making a stitched bowl, one made up almost entirely of my stitches, but using soluble film as a base. At the end of the process, leaving a little of the film in the stitches (but not to show) will give the stiffening for a bowl shape.


I am going to use a snowflake stamp to create an image in Angelina fibres to inform my stitches on soluble film. You could use any other stamp or even go straight to the stitching!


Stamps are best mounted on a stamp block. They just stick on their own but can be peeled back off again.
I selected a couple of the Angelina fibres from the cool assortment and heated the iron to medium heat. I placed the stamp block on my ironing board with the snowflake stamp uppermost and inked it using an ink pad. Before the ink dries I laid the Angelina fibres over the inked stamp. Making sure to cover it with baking parchment first, I then pressed the fibres onto the inked stamp, counting to 10.


It's hard to show you the effect from my photos 


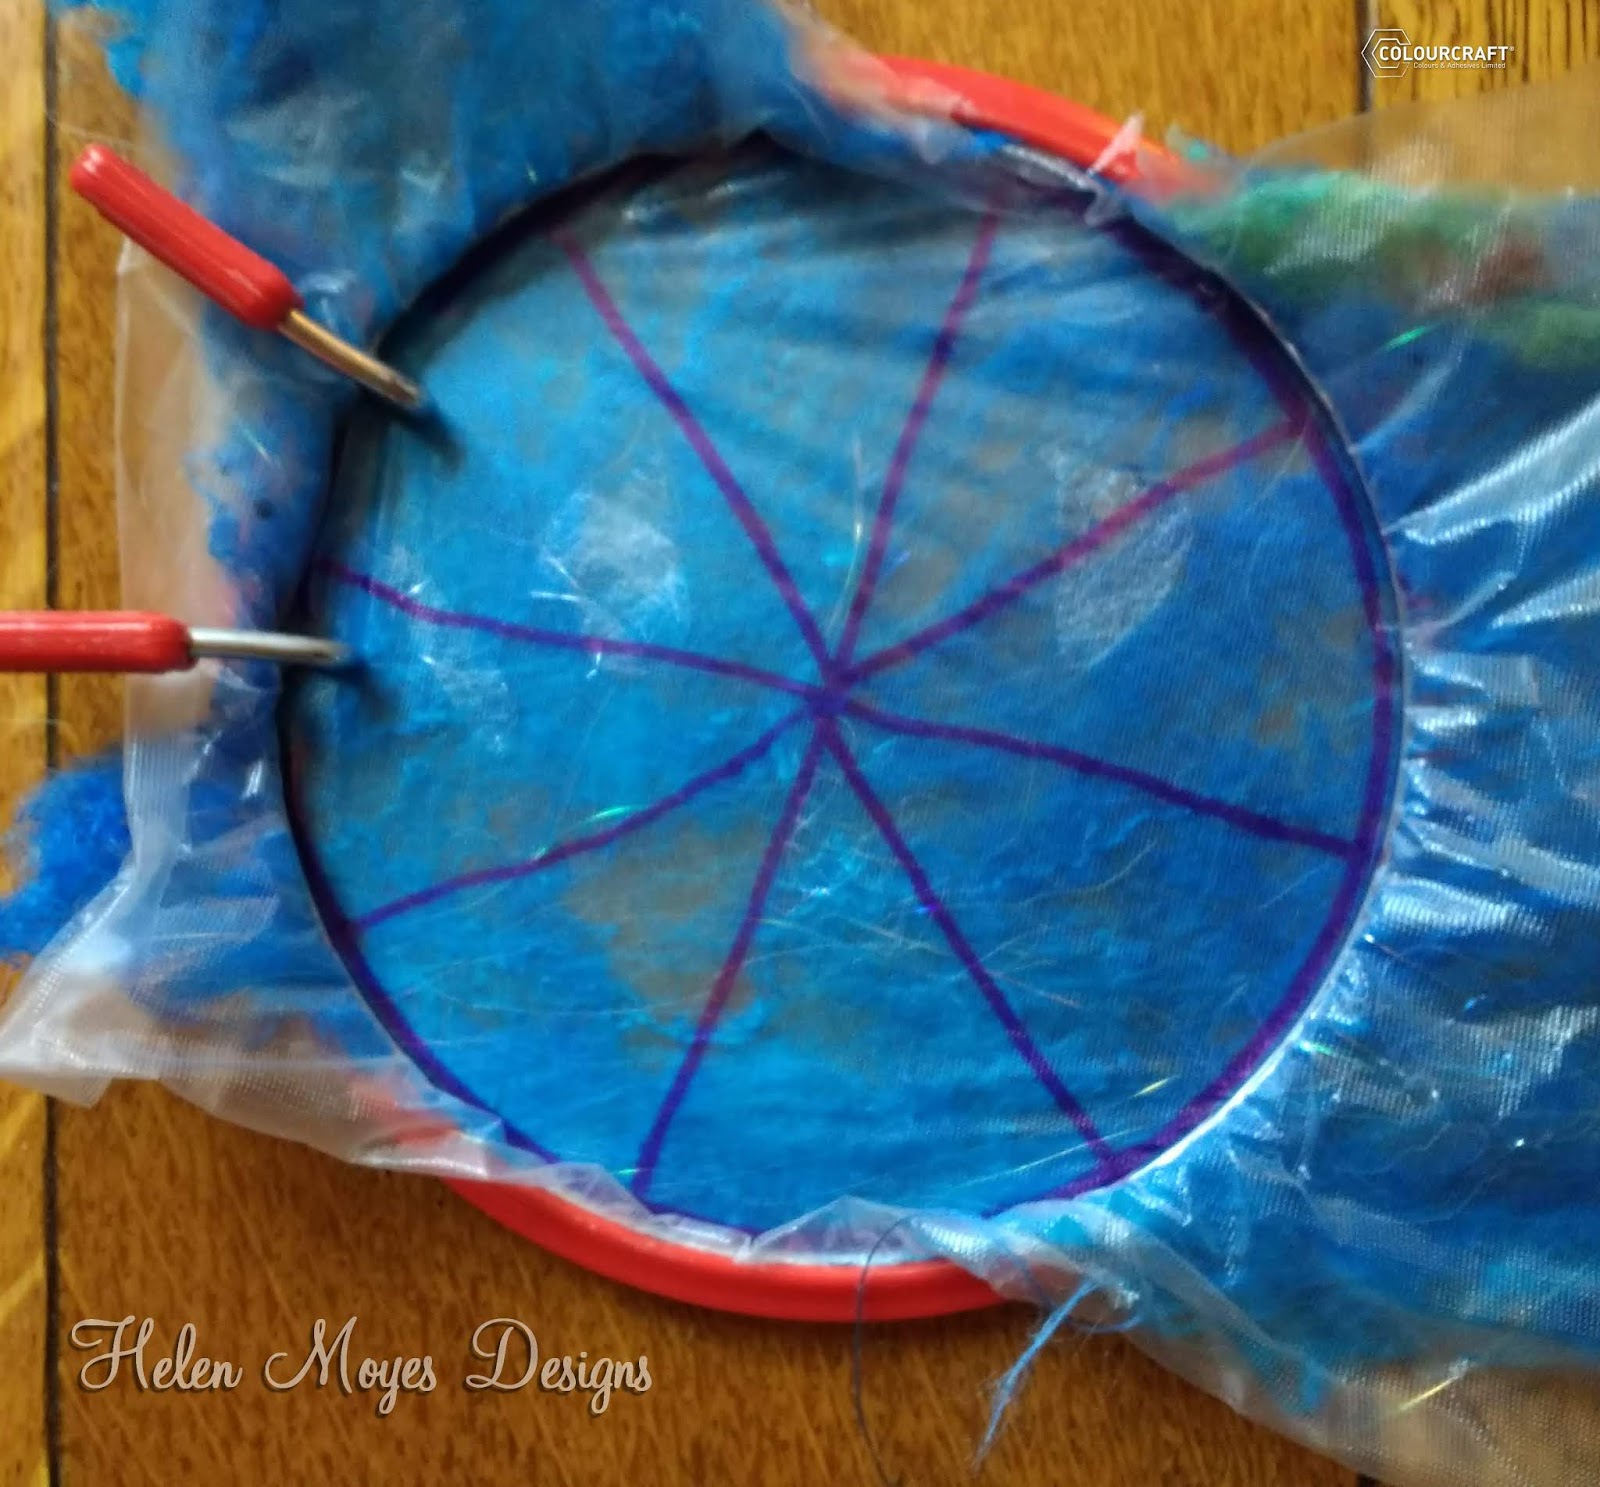
I then cut out the stamped snowflake in the Angelina. This was placed within the centre of a folded piece of soluble film with a fine layer of turquoise mulberry silk hankie. I snipped a few further bits of the Angelina into the soluble film “sandwich” before placing it in an embroidery hoop.

I used a marker to draw outwards from the snowflake points to further guide my stitching.


 Free machine embroidery stitching using satin and metallic threads outlined the snowflake and then filled in the circle. If you’d like to come to a workshop to learn free machine embroidery stitching get in touch.


Once I was happy there was sufficient stitching to make a complete bowl, I released it from the hoop and cut away the excess soluble film from the outside of the circle.
T
ip: save scraps of soluble film, you may try to mend pieces of the water soluble film with an iron (changing its thickness by gluing layers together, and as a possibility of using the leftovers by joining the pieces until the resulting piece will be big enough to be hooped again). Overlap pieces of film inside a sandwich of baking parchment. Use a warm iron and a little steam for a few seconds only.


This is what the stitching looked like before dissolving the film.


Dissolve the film by swishing the stitching in warm water. Remember for a bowl you want to leave a little film still in the stitching.
And this is what the stitching looked like after dissolving the film. 


I left it spread out over a plastic bowl overnight to dry.


This is what the stitched bowl looked like after drying and with some light showing through to show you the detail.


These bowls are great for storing jewellery and are very lightweight gifts to post.
As well as bowls, this method makes great brooches.
I would love to see your creations.


Helen x


Related Posts Plugin for WordPress, Blogger...