Showing posts with label Beads. Show all posts

Friday, 10 January 2020

Home is Where You Hang Your Heart

I don't know whether it's that I'm recovering from the "Festive Flu", or the dark, damp days, but I'm really appreciating being at home! This got me thinking about the saying "Home is Where Your Heart Is" which caused me to remember the other saying "Home is Where You Hang Your Heart", which I used for this hanging.


Sorry, it's not a great photo, but the dull day has quickly turned dark so my glass cabinet was the only place I could find to have light shining through the heart to show the glass paint. I am planning to hang it up in my porch so I will hopefully post a better photo on Instagram. 

First I cut a couple of hearts from some of the cardboard I save to upcycle. I cut a heart "hole" in each. I then painted them with white gesso and left this to dry.


Then I painted one side of each heart with metalic gold paint.


Once this was dry I sprayed these gold sides with gold and bronze Brusho Shimmer spray and then sprinkled on some SprinkleIT gold to really get them glitzy.


While this was drying I wrote my quote on an acetate sheet with a black glass outliner. I also drew a heart with the outliner which when dry I filled in with some glass paint.


I then took some Shimmering Deep lagoon & Shimmering Coral Red Angelina fibres and laid them over the patchwork heart stamp which I had inked with Stazon.


I then covered this with baking parchment and used a dry medium iron to fuse the fibres ( and the ink design) together. 

I made three hearts with Angelina so I could create a 3D effect under the large heart, also using invisible thread and some pink and gold beads

I sandwiched the acetate between the two card hearts with glue and left them to dry.


I hope you are enjoying your home, and especially being able to craft. 

If you would like to sew some hanging hearts rather than paint some, then I have some heart kits available.


Helen x

Saturday, 9 November 2019

Tyvek Beads with Angelina Bling


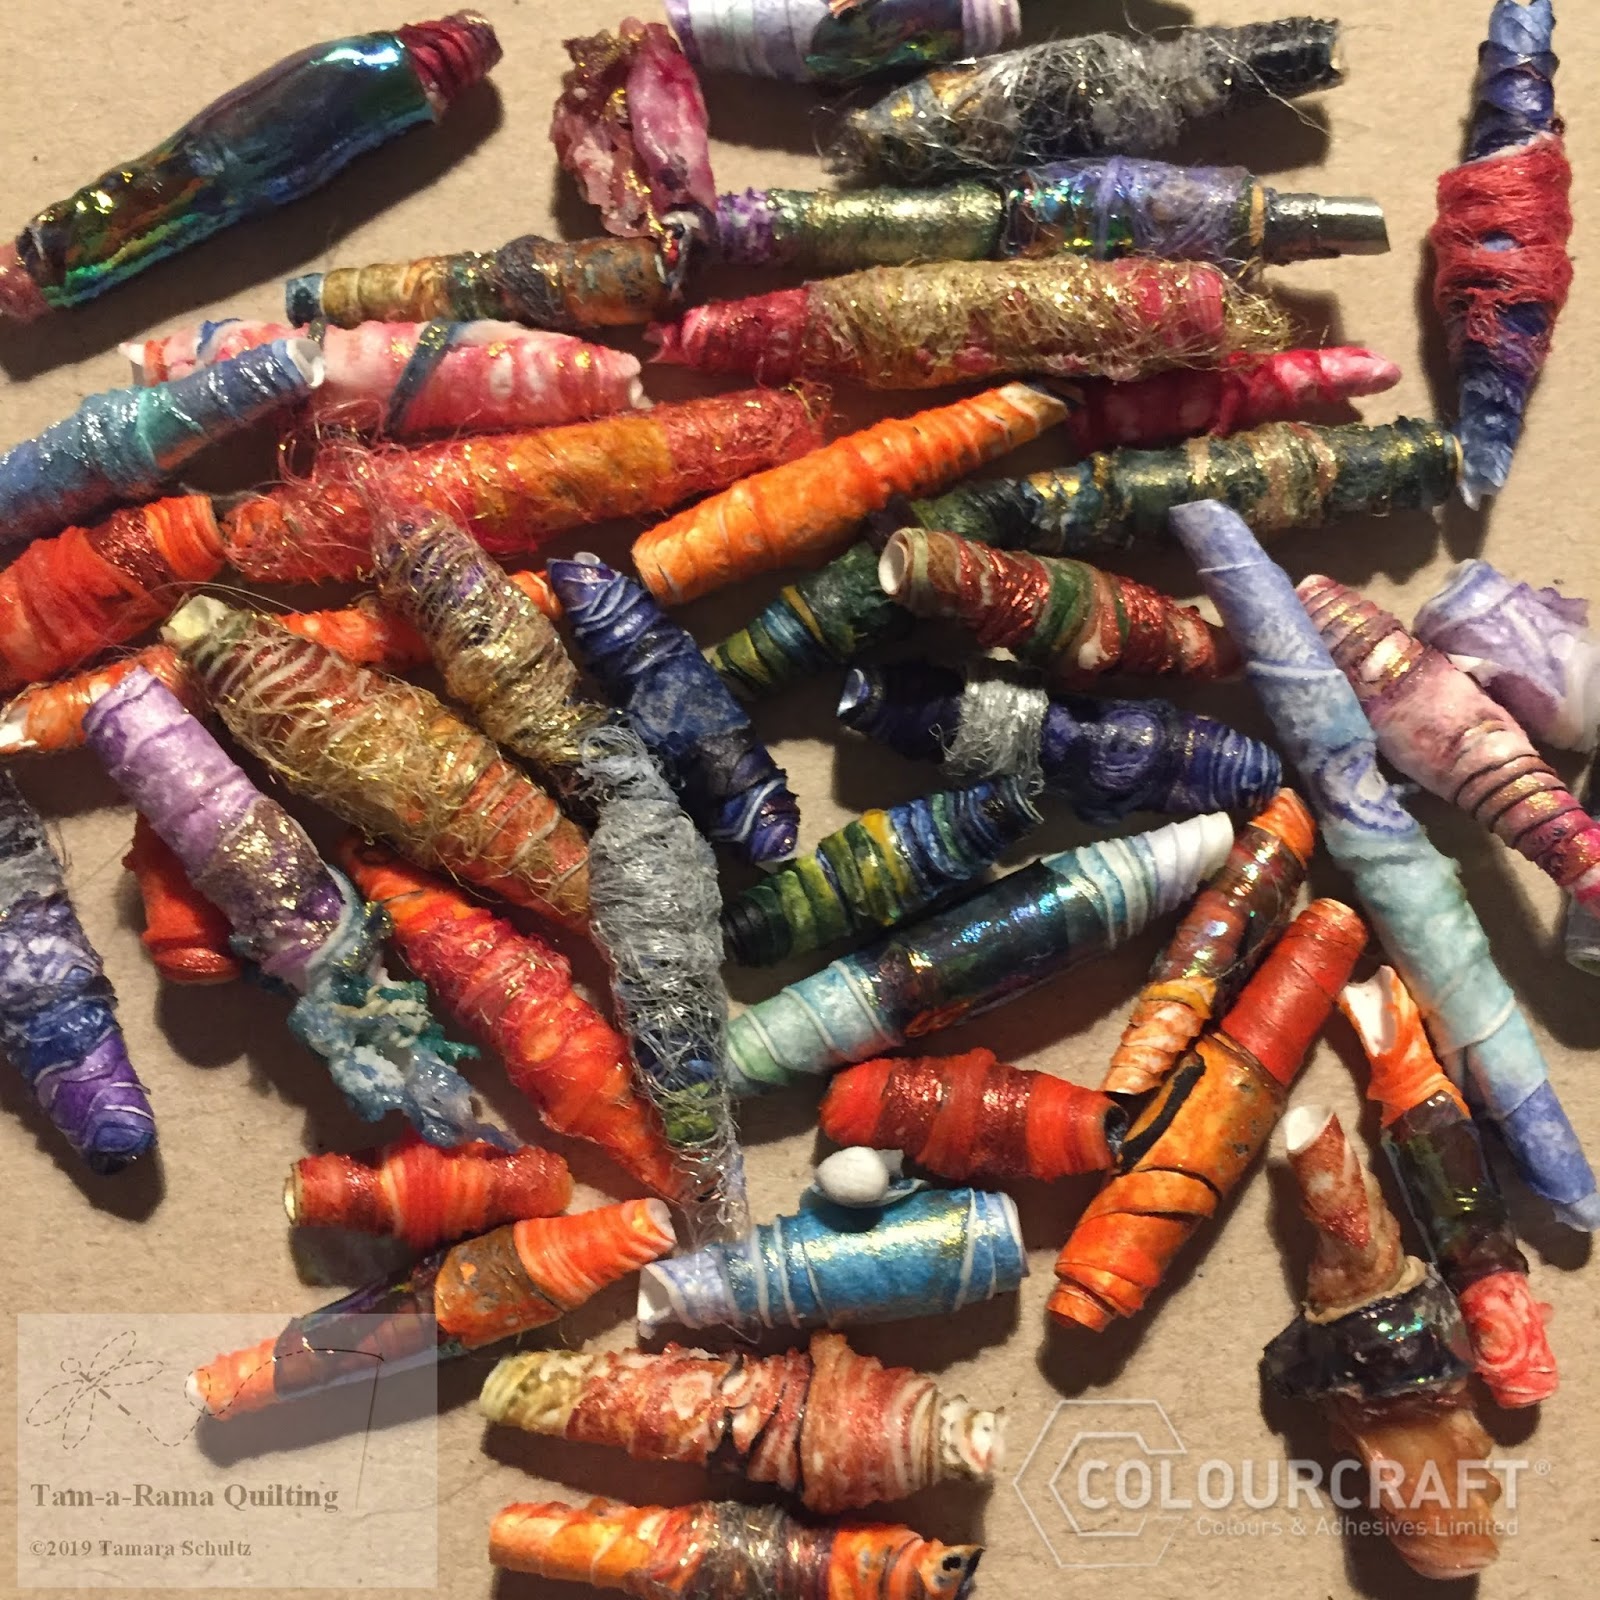
I wanted to show you all an easy way to make really beautiful beads using Tyvek and Angelina fibres and film

Tyvek is a man made material which can be painted on and sewn- as well as a multitude of other uses. One of it's characteristics is that it shrinks when heated with a heat gun. That's a key element in how we make these beads!
I started off by painting my Tyvek by sprinkling on Brusho and spraying with water. These are wet, and quite dark. They dry a lot lighter, which is good, because when we shrink them, they get dark again!
After these were dry, I  cut them into long skinny triangles. The wide part will be slightly wider than your finished bead, and the length of the triangle determines how fat your bead will become.
I take each triangle and wrap it around a bamboo skewer- starting with the wide end. You want them on fairly secure but not so tight that you can't take them off later! Glue the last couple of centimeters of the smaller end around your bead with a glue stick- just to hold it in place while you are heating it.


Now comes the BLING! I like to use both Angelina fibres and films! Cut small strips of the film and/or use a few of the fibres and wrap them around the middle of your bead- a bit of gluestick can help these stay in place. 

Don't worry about the fibres sticking out- you can get them under control when you use your hot air gun!
Which is the next step. Hold the stick and heat with a hot air gun. The tyvek will shrink and edges curl a bit, the Angelina will stitch to itself- the fibers become more glittery, the film more glossy.
Make sure to not scorch anything!!
Here are these beads close up:

You can see how the Angelina color shifts and how the Tyvek edges curl and the color gets darker. The longer you heat them, the harder the beads get.

Perfect for sewing on a mixed media project! Or making fun jewelry with!

Very fun to make anyway! And each one is unique!
See you next time!


Friday, 4 October 2019

Lutradur Lantern


October is here and despite some sunshine, there is definitely a chill in the air! Here in the UK, it is time to make our homes cosy and think about having light in darker evenings. This past year I have been experimenting with Lutradur and particularly like making vessels that can be used as a lantern or as a vase.
Lutradur is a spun textile. "Hot textiles" refers to using heat with spun textiles, creating new effects for crafting projects. Did you see the leaf arrangement made with Tyvek I made last month?
Lutradur comes in several different weights (weight per square metre), which suit different uses:
Lutradur 18gsm very fine. I haven’t used this, let me know if you have and what you made?
Lutradur 30g Lightweight has transparency which can be utilised in appliqué, enabling the background(s) to show through. Further heat distressing will allow total reveal in places.
Lutradur 70g, Regular is lovely for brooches, having enough body but having a little drape.
Lutradur 100g, Medium weight has a little transparency and distinct shapes and distressed areas are easy to achieve.
Lutradur 130g, heavy weight, enables self-supporting artwork ie. small screens.
Lutradur 230g extra weight similar to felt I haven’t used this, let me know if you have and what you made?


I find the medium weight, 70gsm, is most versatile and my preference for these Lutradur Lanterns. The picture below shows lanterns I’ve made with 70g
and 130g.


Taking a rectangle of Lutradur (25 x 17cm) apply some surface decoration.
This can simply be spraying with Brusho Shimmer Spray such as the bronze I used here, or stencil with some orange Eco Metallic Acrylic Paint


In the other lanterns I have used a Markal Artist Paintstik, making freehand swirls first, before applying some Brusho or acrylic paint. I have experimented with small pieces of appliqué and couching some texture threads too!


Take care as, unlike Tyvek, paint can go through the Lutradur to what is underneath. However, any paper underneath the lighter Lutradur will gain a pleasing paint effect that could be used in another project.
Once any paint is dry I like to add stitch. Lutradur is really easy to stitch through, either by hand or by machine. In these later, more architectural lanterns, I have used a thicker thread hand wound onto my bobbin and sewn along a design marked on the wrong side, so the thicker, bobbin thread is on the right side. The marker pen with eraser ink is great for marking up any design.


Add beads preferably using invisible thread.
Folding under a little to the wrong side and stitching along the bottom edge can add stability if using the lighter Lutradur.


Now comes the hot textiles bit:
You can make a simple heat tool mat by pinning tin foil onto a folded up wad of newspaper. (a glass worktop protector can also be used).
You maybe wondering what the ceramic plant pot in the picture is for? Well, I find it really handy to have upside-down next to my heat mat and put the heat tool down through the hole. This avoids burns and damage.
Work in a well-ventilated space and avoid distractions.


Using a Fabric Master Heat Tool, I cut out window shapes and added a variety of sized dots. These will add to the design and also allow light through the lantern. I also distressed the top edge too.
I just used the one plain pointed tip, but there are several that come with the heat tool. If you do change tips, take care as they are really hot, switch off and allow to cool down. You can get some silicone finger protectors, but do still do take care!


The final stage is to form a cylinder around an empty glass jar and secure the overlapped edge with some invisible thread stitch (or glue). The lanterns look good on a shelf all year round, but as twilight approaches they are great with a tealight inside the glass jar.


I love to see all the different lanterns produced when I run a Paint & Stitch workshop with Lutradur. I would love to see your creations too.


Helen x


Friday, 20 September 2019

Creating Texture


Have you discovered Texture Magic yet?
This week I have been quilting with a layer of shrink fabric interfacing and then using the steam from a steam iron to cause it to shrink and create an interesting texture on my silk Autumnal fabric. This is the real colour of the fabric, I'm not sure what happened to the colour on the other photos which went very pink!


Sew texture magic to the back of your fabric, apply steam and the fabric shrinks approximately 30% in all directions creating a beautiful textured effect. The result is permanent, washer and dryer safe.


I made a sandwich by placing my fabric face down, adding batting and then a piece of the polyester Texture Magic interfacing. The instructions tell you not to worry about any wrinkles in the Texture Magic as they will disappear after steaming, which is indeed the case. I smoothed it outwards as I pinned from the middle of my piece.
Quilting


My fabric has three-inch stripes so I chose to use these as a guide for my first quilting of straight lines to form a 3” grid.


 The instructions say you get more texture the closer together your stitch lines are, so I think this distance is the maximum to get any texture.
Inspired by all the berries around, I chose to free motion quilt round(ish) shapes with a variegated thread with blues, plum, berry pink (Mettler silk finish “Berry rich” 9816). I free-motion quilted alternate squares of my grid.


In the remaining squares I hand quilted a cross in the centre using bright orange (Aurifil 50wt 1133). I measured and marked the centre of the grid with the air erasable pen. I then added a bead to the centre of each cross from the red mix of Indian beads.


Steaming
I laid the fabric on my ironing board with the Texture Magic side up and set the steam iron to a hot steam setting. Similar to the hover technique for the Tyvek Autumn leaves I made earlier this month, you need to hold the iron close to but not touching the interfacing in order to get the texture and dimension effect (rather than pressing it flat).


As it is steamed it puckers and pulls in until it reaches the point it doesn’t pull in any more.
My hand slightly quilted squares puffed up more than the more heavily machine quilted squares.


Sewing

I’m planning to make a bag with my piece of textured quilt, but I'm tempted to make a cushion cover as the fabric would go well in the Ecclesall Textile School sewing lounge!
This will have to wait though as I have three customers sewing projects to complete and several workshops to lead in the next couple of weeks.
I will post my finished project on my Instagram feed for you to see.

I would love to hear about your adventures with Texture Magic

Helen x


Friday, 6 September 2019

Autumn Colours: Tyvek Leaves


I don’t know if you are one of those folk rubbing your hands together in glee at the thought of Autumn? I tend to reluctantly face the fading of summer as I love long days and sunlight. However, I do love some aspects of Autumn, log fires and the changing colours of the leaves to name a couple.
So in crafting, it is autumn leaves I turn to for inspiration at this time of year.
In July I shared how I use painted Tyvek sheets for the sky in textile art landscapes, but once painted there is so much more you can do with Tyvek! Amazing things happen when you apply heat.
(You can apply heat using an iron, craft heat gun or a soldering iron.
Take care not to breathe in the vapours, working in a very well ventilated area and wearing a respirator if doing more than a small piece. At my workshops we are able to use the conservatory for the heating part, working by the open French Door).


The first step is to paint the Tyvek paper sheets. Water-based paint acrylic paint is fixed when completely dry whereas watercolour will dissolve in water. Don’t dry on paper which will leech the colour from the sheet, I painted one side a reddy brown and then waited for that to dry before turning over and painting with a mixture of green acrylic paints. But if you’d like some Autumn sparkle, before each side dries, Spray on a little water and then sprinkle on a little Brusho SprinkleIT. I used gold and copper. The great thing about using Tyvek for this project is that the paint does not go through so each side can be different.


Look at the lovely effect, you get on Tyvek when it’s dry:


You can either draw on a leaf freehand or if you, like me, are not so confident in your drawing skills, draw around leaves. Mark on some veins too.

I then sewed the main stem and centre vein using satin stitch over paper-covered wire. Variegated thread looks good. Because each side of the Tyvek was a different colour, I used different variegated threads in the needle and bobbin.
Sew the veins with a straight stitch or free machine embroidery.


Sewing on clusters of beads with invisible thread adds more sparkle! There is a pack that has some gold and pinky colours in that work well.


I painted the exposed paper covered wire and then sprayed the leaves with gold Brusho Shimmer spray for even more Autumn glow.
Now to apply heat. This will distress the Tyvek, causing it to bubble, curl, and produce holes. The leaves will become firmer, and look more realistic. The trick is to not distress it too far so you are left with no leaf.
Protect your iron and ironing board with baking parchment, placing the leaf between two pieces.


Use a dry iron but don’t press! Hover the iron over the sandwiched leaf. Note my hand position for how I find it easiest to do this. Keep checking how the leaf is applying short bursts of heat until you are happy.


I added a few extra holes with a craft soldering iron. I made a pad to do this on with newspaper with foil on top.


Here it is held up to the light.


I then curled the wire stems around each other to create my Autumnal table decoration. I think it looks great on a mirror tile as you get the reflection of the underside.


I couldn’t resist taking it outside to the garden to see how realistic it looked. What do you think?


Happy autumn, Helen x

Friday, 14 June 2019

Botanical Textile Art


I'm so excited to be part of the Colourcraft Design Team. As a textile and mixed media artist, fabric and/or thread are involved in most of my projects, but not always. My first blog shows how I have coloured fabric to create a Botanical fabric picture.

I just love seeing all the flowers in my garden right now. On a sunny day, I’m even tempted to take my sewing machine outdoors, but usually, our climate is such it’s safer to just take hand sewing outside so you can quickly move inside in if it clouds over. This piece involves both machine stitch and hand stitch for the flowers, so we are good whatever the weather.


The first stage is to prepare the canvas.
For a vintage feel, I took three floral pieces from my fabric stash and joined them together.
It is worth remembering the golden ratio. This rule of thirds states that if you divide any composition into thirds, vertically and horizontally, then place the key elements of your image either along these lines or at the junctions of them, you’ll achieve a more pleasing arrangement and more interesting and dynamic compositions.
So I didn’t have any of my patchwork divisions in the centre (vertically or horizontally) and the botanical focus of my final composition is in the is about two thirds up and left. I include a pattern to print and use if you wish.

Once I had my fabric patchwork piece, I wanted a more subtle floral vintage background so painted on white gesso.
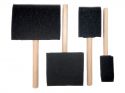
To avoid brush marks, and for speedy application, I used a foam brush


Gesso is an excellent base coat primer and is non-yellowing and non-cracking. One coat is enough and dries quickly. Previously I have tried building up the effect I wanted with diluted leftover white matt emulsion paint, but this wasn’t as quick to apply or to dry.

The bonus of the primer is that it stiffens the patchwork too so you don’t need to use an embroidery hoop when sewing. As long as you haven’t got a fine needle in your sewing machine, it works just fine.

If you want a distressed look you can scratch away some of the dry primer with either a piece of sandpaper or a metal pot scourer.

For the flower petals I used some old cotton lining. (just wash new cotton fabric well if you are using new) and after laying it on a plastic sheet I sprayed it with water and then sprinkled on my chosen Brusho colours. Spraying with some more water created the mottled hydrangea petal effect I was wanting. Hydrangeas are more blue or pink depending on the soil but with art, you can choose to have both.
You could use the BrushoMist Sprays instead in violet, rose red, ultramarine for example.

I dried and ironed my cloth ready for the later stage of creating the flower head.

Draw out your composition or print my design. The final design will be a mirror image.
I traced the design onto Stitch N Tear, although because of the primer, you don’t really need the stabilising properties and could use paper. I find it easier to tear away than paper though. 

Having the design on the wrong side, I did my first machine stitching along the outline of the vase on the wrong side. I chose to do this with grey thread (top and bobbin) and without the feed dogs. I love the freedom of this free machine embroidery but it is worth practising if you are new to this technique. I do run workshops in South Yorkshire if you are interested.

I then turned the canvas over and repeated stitching the vase, using my first stitching as a guide.
I chose to add a couple of light highlights to the vase to create the reflection on the glass. I used a light variegated blue, white yellow thread and a satin stitch.
You could use paint to create these instead.
I used a watered down blue Brusho to fill the bottom of my vase with water.


The next stage was to add flower stems and leaves.
These can be made from fabric (trace onto Bondaweb and apply to the wrong side), by stitching the outline (as I did for the vase), or by printing the leaf onto the canvas (with a stamp).


More free machine stitching adds vein details to the leaves.

The hydrangea flower head was next. I poked a few pins through from the wrong side, using the pattern to guide where the flower head would be.
Having applied some Bondaweb to the reverse of my petal fabric and removed the paper, I cut 1.5cm squares.
These were placed face up (Bondaweb down) on the right side of the canvas in the marked flower head area. I left areas of canvas showing through my overlapped square arrangement. Placing baking parchment over, I ironed these in place with my mini iron.


On the wrong side of my canvas, I stitched around the hydrangea heads. This is easiest done as two figure of eights returning to the centre. I used a variegated thread ( top and bobbin) in hydrangea colours. The idea of this bottom layer is to give the impression of depth of the flower head, and you will find that the flowers don’t match up with the squares, but that is fine because there is a top layer to add.

For the top layer, I cut 2cm squares from my fabric (no Bondaweb this time). I folded each square in four and then held the smaller square at the point where each fold meets, to cut away either side making a curved petal shape. When you let go, you have a four-pointed flower shape. I saved my offcuts as I think they will be great for a future buddleia botanical project!

Using my cut out flowers and my variegated (purple, blue, pink) thread, I sewed the top layer of flowers on by hand with a cross in the centre and further stitches in between. I added beads too for further dimension. There are some lovely hydrangea Indian beads for this. I also used the white beads and green embroidery thread for the gypsophila stem. It’s great when the weather obliges and I can sit and hand stitch in the garden, but whatever the weather, I can get a flower fix by botanical textile art. A great feel good kick!


I tried out several frames for the hydrangea and used this silvery Ikea frame. You can use a frame you have and add a metallic finish as I did recently for a recent felted project.

I would love to see any floral projects you have been doing, please share them.

Here’s to time in the garden

Helen x


Warning: getimagesize(include/images/thumbnails/125/39096): failed to open stream: No such file or directory in /var/www/vhosts/smouwen.nl/thumblinky.nl/preview.php on line 85

Warning: getimagesize(include/images/thumbnails/125/39094): failed to open stream: No such file or directory in /var/www/vhosts/smouwen.nl/thumblinky.nl/preview.php on line 85

Warning: getimagesize(include/images/thumbnails/125/39097): failed to open stream: No such file or directory in /var/www/vhosts/smouwen.nl/thumblinky.nl/preview.php on line 85

Warning: getimagesize(include/images/thumbnails/125/39093): failed to open stream: No such file or directory in /var/www/vhosts/smouwen.nl/thumblinky.nl/preview.php on line 85

Warning: getimagesize(include/images/thumbnails/125/39092): failed to open stream: No such file or directory in /var/www/vhosts/smouwen.nl/thumblinky.nl/preview.php on line 85
Related Posts Plugin for WordPress, Blogger...