Showing posts with label altered art. Show all posts

Monday, 27 January 2020

Mixed media recycling project with Brusho

Hi everyone! 
Today, I have for you a little recycling project. You know when you have a sheet of keyboard and you pop out all the elements... you are left with something that you'd normally put in the bin, right? Well... I decided to play and utilise mine as a base for mixed media projects that can be used as... an unusual card (rather than a traditional paper one) or cool piece of home decor.


Here's how I made it:


Start by preparing the sheet - I used ivory matte chalk paint.


Choose Brusho powder which will be the colour of your project - I went for Yellow Ochre, Burnt Sienna and Copper SprinkleIt to make it look a little bit rusty. Mist it with water as much as you wish creating lovely puddles of colours on the base. 


The awesome thing about using the 'negatives' is that you can leave them as they are with the holes or back them with paper of your choice adding to it another texture or design. Here I backed it with paper with vintage registration plates.


Using a puddle of Burnt Sienna, I stamped out coffee stains and fussy cut them to use as embellishments later on. (the stamp is from Crafty Too Designs)


I covered floral greyboard elements (from Lisa Horton Crafts) with Copper SprinkleIt - this made them look rusty and shiny at the same time.


For a feminine touch, I added a lacy ribbon with a big bow - I build the layers of embellishments around it. You can see it in the close-ups below:

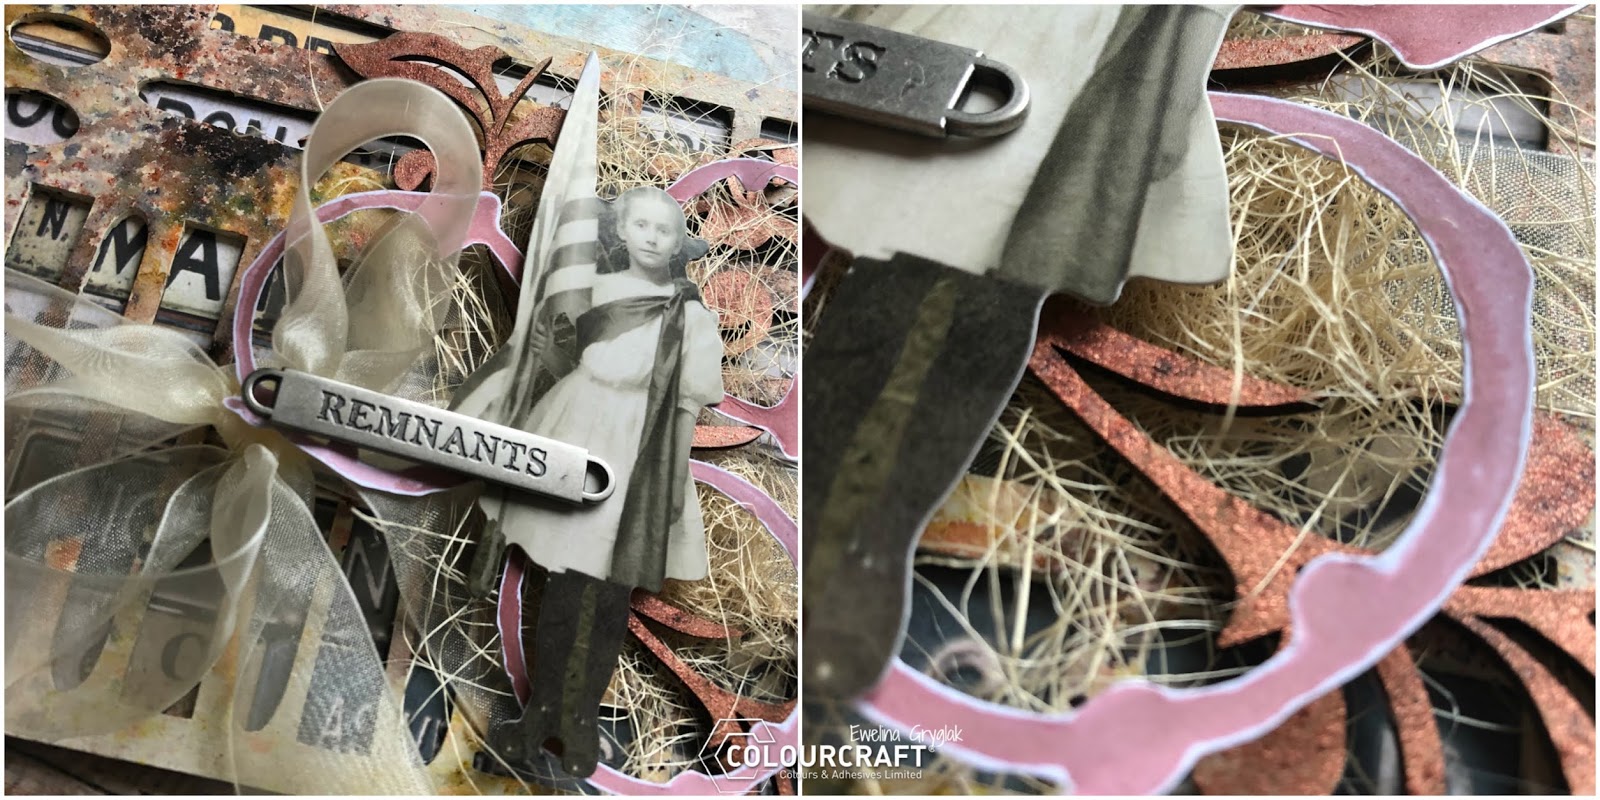

Now, the project is finished, all I need to figure it is which wall in the house it will live on.

See you next time!


Monday, 17 June 2019

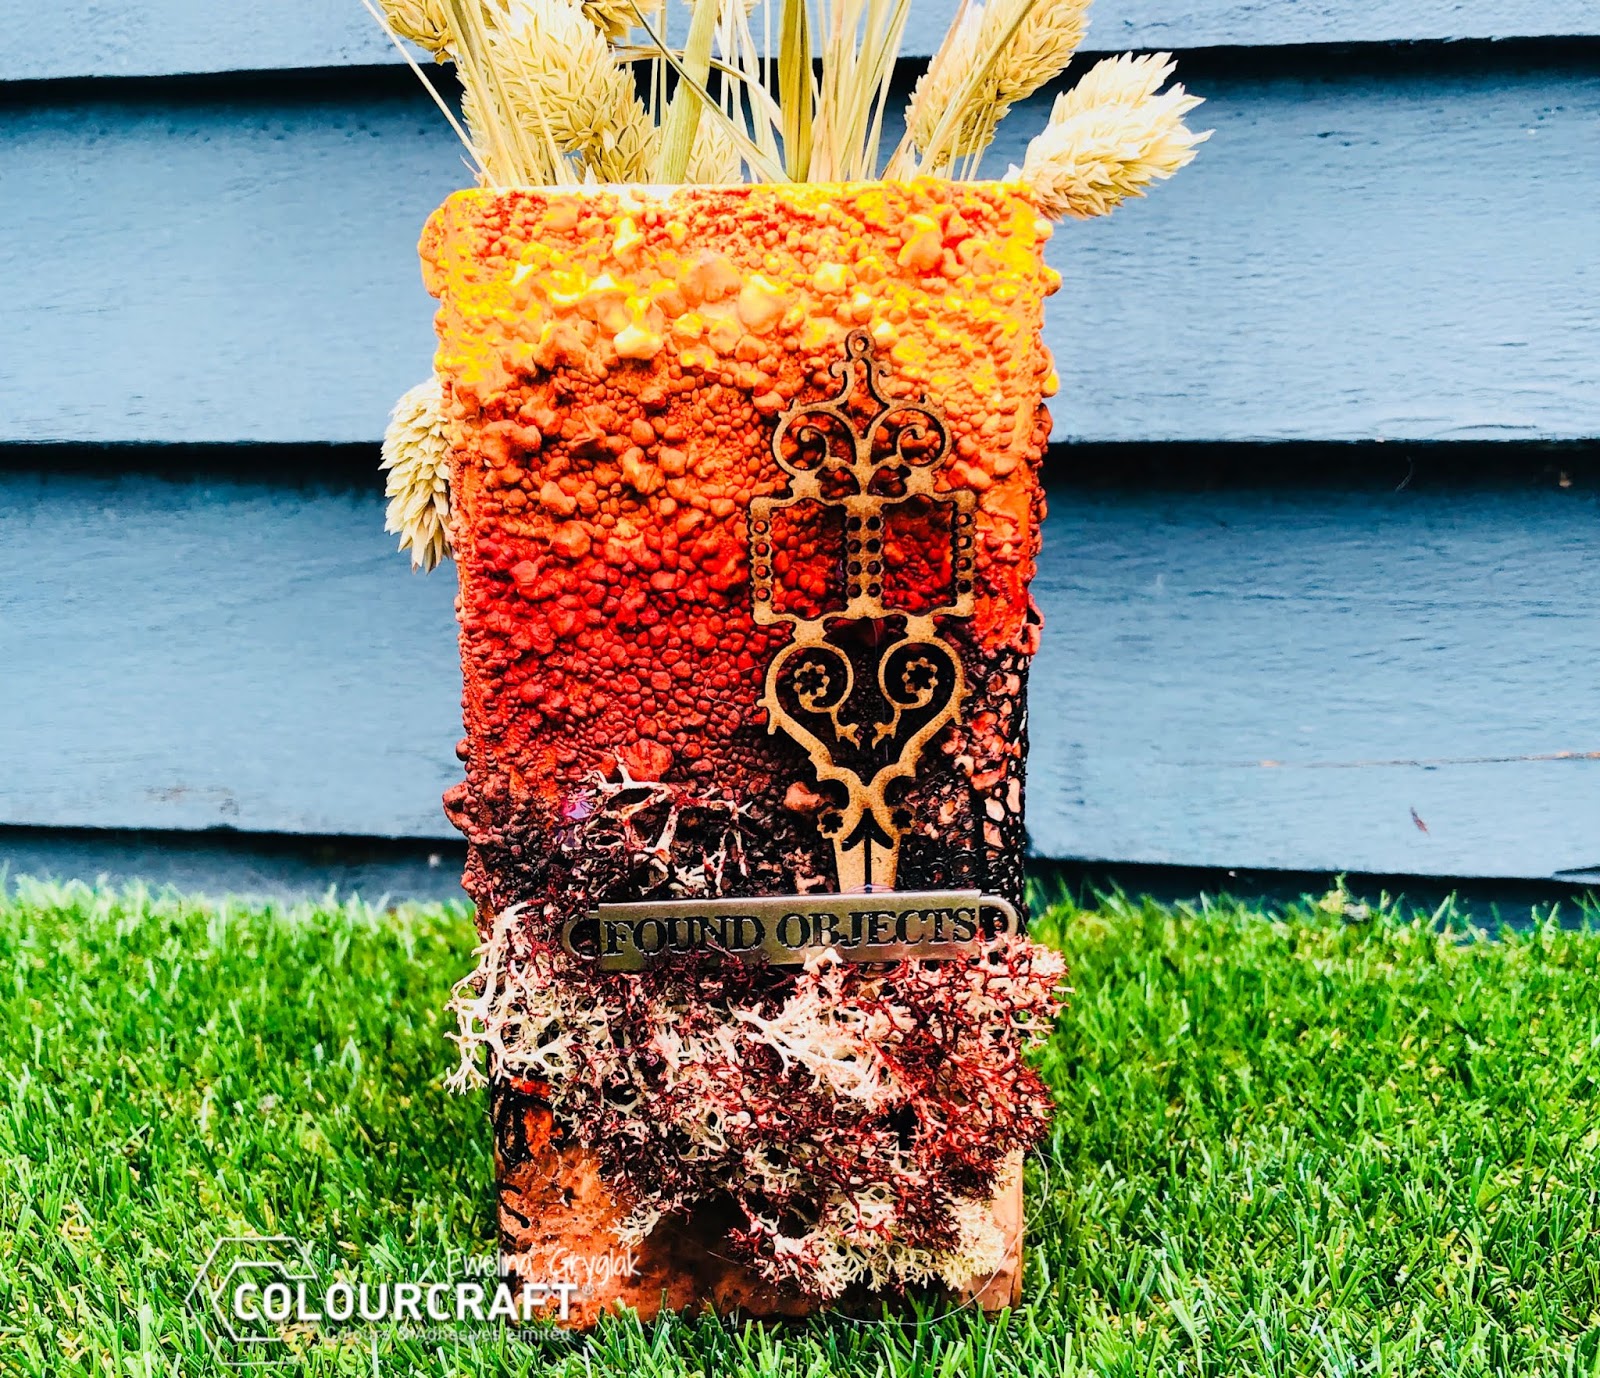
Rusty vase with ExpandIIT and Brusho

Hello, my crafty friends!!! 
As promised, I am back with another project using the ExpandIT paste.


This time I have altered a plain and boring white vase to make it look rusty, grungy and cool.


As prep, I used a silicone lace form (usually used to make decoration for cakes) and black DesignIT paste (aka Soft Form relief Paste); I gave it approx. 24hrs to dry. 
When ready, I took the lace out of the form and glued onto the vase.


Because I wanted the ExpandIT bubbled to be as irregular as possible, I used my hand to spread the paste above the lace rather than a palette knife.


As you can see, where there was more paste, the bubbles are bigger.
ExpandIT is such a cool medium to work with!!!


Next step was adding colour with Brusho; I chose Gamboge, Sandstone, Burnt Sienna and Terracotta.
I sprinkled it in lines to let the colours blend when misted with water.


Here you can see how the colour flows creating new shades.
I did that on each of the sides of the vase.


The last step was to add some embellishments to the front; the choice was some florist moss (I coloured it with whatever paint was still on the table - you know, make the best of every drop!); I also added a chipboard and a Tim Holtz metal badge.


As you can see, the process is quite simple but the result is absolutely freaking amazing!!!

See you next time.


Monday, 19 November 2018

Christmas canvas banner with Ewelina

It's mid-November so call me crazy but I have already started working on my Christmas decorations!
Don't get me wrong, I am not displaying them anywhere yet - they're all going to nicely wait in a box in my studio until the first week December. I am not that crazy!


My first make is a canvas banner from Canvas Corp which I altered to hang on my front door when the time comes.


I started by priming the banner in Procion fixer, which comes as part of the Dytek Procion Dye Complete Starter Kit and will create a base for the Brusho sprays. I have done it last week so that it could air dry thoroughly. 
Once on my working table again, I sprayed it with Scarlet and Sea Green Brusho Sprays and left to dry.


Next, I used gold and bronze Metallic Fabric Paints to stencil on a Christmassy design.


While the paint was still wet, I generously sprinkled Gold and Bronze SprinkleIT to add texture to the stencil.


I purposefully made it uneven and added more SprinkleIt is some areas than others - I really like the distressed, grungy look.


What do you think?

Get ready for some more Christmas things when I'm back in two weeks!


Monday, 4 June 2018

Hello Sailor! - nautical canvas goodie bag with Ewelina

Hey, everyone!

Couple of months ago, I have shared with you my 'Gypsy Soul' canvas where I used a stamp designed by an arty friend of mine, Mark Gould. Today, I'd like to show off another one of his creations - 'Sailor Jim'.


For some reason, the most obvious choice for me was to make a nautical-theme canvas goodie bag.
With that in mind, I grabbed a Canvas Corp canvas drawstring bag and Colourcraft Fabric Paints (both opaque and metallic) and sat down to work.


My calligraphy skills are not top notch as you can see but I didn't let that stop me from writing 'hello sailor' on the bag.


You can watch the tutorial here:


Thanks for joining me today!

Have a great day!


Monday, 21 May 2018

Simple square vase with Ewelina

You know when you decorate a room and the colours you've chosen make it almost impossible to find decor that will match? Well... that's exactly what I've done to my kitchen... 
With Prussian Blue accent walls and magenta splashbacks... the struggle is real!!!


There was no other option but to put my arty skills into action and make things happen!
You might remember the abstract canvas I made some time ago - they match the kitchen's colour scheme perfectly. 
Now, it was time to use a White Square Vase I got from Country Baskets - I need something to put flowers in!!!


I started by using stencils (my own design) and Archival Inks to create background for the colour.
I overlaid two stencils making sure that the patterns flows around the vase.


The second step was adding the watercolour effect - I did that one side at a time.
Randomly, sprinkle just a little bit of Brusho in Alizarin Crimson and SprinkleIT Iridescent Flash on the side; from far, mist the side with water allowing for the pigment to create watercolour effect but not flow all over the vase. Make sure you dry each side thoroughly before moving to the next one - otherwise, you'll end up with unexpected blotches of colour.


That's it! Quick and easy and... pretty!!! But most of all, it actually matches my kitchen!!! Yay!


Monday, 12 March 2018

Believe in Angels with Ewelina

I'm kind of in a crafty Easter mood these days but for some reason, this year I'm all about golden eggs, golden baskets and golden everything. Don't know why because I've never associated Easter with that colour before; it was always about the green grass and colourful dyed eggs in gorgeous wicker baskets. Oh, well...


When I sat down to making this project, I took my Aztec Metallic Paints in all shades of gold available and started to play and started layering them around this 12x12cm wooden board. I also added some stamping in the background.


I am not sure if I mentioned that the DesignIT paste is another cool product that I love playing with - I tend to put it into a silicone mould and, once the design dries, use it to add very detailed texture to my projects.


You can see here how brilliantly the DesignIT lace blends into the background - it almost looks like it's part of it rather than added on top.


The MDF wings have been outlined with a black Sharpie and the painted with Pearl Metallic Aztec Paint - I wanted them to contrast with the rest of the project.


You can watch the process in my video tutorial:

Related Posts Plugin for WordPress, Blogger...