I'm so excited to be part of the Colourcraft Design Team. As a textile and mixed media artist, fabric and/or thread are involved in most of my projects, but not always. My first blog shows how I have coloured fabric to create a Botanical fabric picture.
I just love seeing all
the flowers in my garden right now. On a sunny day, I’m even tempted
to take my sewing machine outdoors, but usually, our climate is such
it’s safer to just take hand sewing outside so you can quickly move
inside in if it clouds over. This piece involves both machine stitch
and hand stitch for the flowers, so we are good whatever the weather.
The first stage is to
prepare the canvas.
For a vintage feel, I
took three floral pieces from my fabric stash and joined them
together.
It is worth remembering the golden ratio. This rule of
thirds states that if you divide any composition into thirds,
vertically and horizontally, then place the key elements of your
image either along these lines or at the junctions of them, you’ll
achieve a more pleasing arrangement and more interesting and dynamic
compositions.
So I didn’t have any of my patchwork divisions in
the centre (vertically or horizontally) and the botanical focus of my
final composition is in the is about two thirds up and left. I
include a pattern to print and use if you wish.
Once I had my fabric
patchwork piece, I wanted a more subtle floral vintage background so
painted on white gesso.
To avoid brush marks,
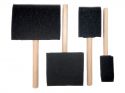
and for speedy application, I used a foam brush
Gesso is an excellent
base coat primer and is non-yellowing and non-cracking. One coat is
enough and dries quickly. Previously I have tried building up the
effect I wanted with diluted leftover white matt emulsion paint, but
this wasn’t as quick to apply or to dry.
The bonus of the primer
is that it stiffens the patchwork too so you don’t need to use an
embroidery hoop when sewing. As long as you haven’t got a fine
needle in your sewing machine, it works just fine.
If you want a
distressed look you can scratch away some of the dry primer with
either a piece of sandpaper or a metal pot scourer.
For the flower petals I
used some old cotton lining. (just wash new cotton fabric well if you
are using new) and after laying it on a plastic sheet I sprayed it
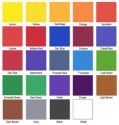
with water and then sprinkled on my chosen Brusho colours. Spraying
with some more water created the mottled hydrangea petal effect I was
wanting. Hydrangeas are more blue or pink depending on the soil but
with art, you can choose to have both.
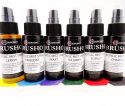
You could use the BrushoMist Sprays instead in violet, rose red, ultramarine for
example.
I
dried and ironed my cloth ready for the later stage of creating the
flower head.
Draw out your
composition or print my design. The final design will be a mirror
image.
I traced the design onto Stitch N Tear, although because of
the primer, you don’t really need the stabilising properties and
could use paper. I find it easier to tear away than paper though.
Having the design on
the wrong side, I did my first machine stitching along the outline of the vase on the wrong side. I chose to do this with grey thread (top and
bobbin) and without the feed dogs. I love the freedom of this free
machine embroidery but it is worth practising if you are new to this
technique. I do run workshops in South Yorkshire if you are
interested.
I then turned the
canvas over and repeated stitching the vase, using my first stitching
as a guide.
I chose to add a couple
of light highlights to the vase to create the reflection on the glass. I
used a light variegated blue, white yellow thread and a satin stitch.
You could use paint to
create these instead.
I used a watered down
blue Brusho to fill the bottom of my vase with water.
The next stage was to add flower stems and leaves.
These can be made from fabric (trace onto Bondaweb and apply to the wrong side), by stitching the outline (as I did for the vase), or by printing the leaf onto the canvas (with a stamp).
More
free machine stitching adds vein details to the leaves.
The hydrangea flower
head was next. I poked a few pins through from the wrong side, using
the pattern to guide where the flower head would be.
Having applied some
Bondaweb to the reverse of my petal fabric and removed the paper, I
cut 1.5cm squares.
These were placed face
up (Bondaweb down) on the right side of the canvas in the marked
flower head area. I left areas of canvas showing through my overlapped
square arrangement. Placing baking parchment over, I ironed these in
place with my mini iron.
On the wrong side of my
canvas, I stitched around the hydrangea heads. This is easiest done
as two figure of eights returning to the centre. I used a variegated
thread ( top and bobbin) in hydrangea colours. The idea of this
bottom layer is to give the impression of depth of the flower head,
and you will find that the flowers don’t match up with the squares,
but that is fine because there is a top layer to add.
For the top layer, I
cut 2cm squares from my fabric (no Bondaweb this time). I folded each
square in four and then held the smaller square at the point where
each fold meets, to cut away either side making a curved petal shape.
When you let go, you have a four-pointed flower shape. I saved my
offcuts as I think they will be great for a future buddleia botanical
project!
Using my cut out
flowers and my variegated (purple, blue, pink) thread, I sewed the
top layer of flowers on by hand with a cross in the centre and
further stitches in between. I added beads too for further dimension.
There are some lovely hydrangea Indian beads for this. I also used
the white beads and green embroidery thread for the gypsophila
stem. It’s great when the weather obliges and I can sit and hand
stitch in the garden, but whatever the weather, I can get a flower
fix by botanical textile art. A great feel good kick!
I tried out several
frames for the hydrangea and used this silvery Ikea frame. You can
use a frame you have and add a metallic finish as I did recently for
a recent felted project.
I would love to see any
floral projects you have been doing, please share them.
Here’s to time in the
garden
Helen x
Warning: getimagesize(include/images/thumbnails/125/39096): failed to open stream: No such file or directory in /var/www/vhosts/smouwen.nl/thumblinky.nl/preview.php on line 85
|
|
|
|
Warning: getimagesize(include/images/thumbnails/125/39094): failed to open stream: No such file or directory in /var/www/vhosts/smouwen.nl/thumblinky.nl/preview.php on line 85
|
Warning: getimagesize(include/images/thumbnails/125/39097): failed to open stream: No such file or directory in /var/www/vhosts/smouwen.nl/thumblinky.nl/preview.php on line 85
|
Warning: getimagesize(include/images/thumbnails/125/39093): failed to open stream: No such file or directory in /var/www/vhosts/smouwen.nl/thumblinky.nl/preview.php on line 85
|
Warning: getimagesize(include/images/thumbnails/125/39092): failed to open stream: No such file or directory in /var/www/vhosts/smouwen.nl/thumblinky.nl/preview.php on line 85
|
|