Showing posts with label upcycling. Show all posts

Wednesday, 1 January 2020

Upcycled Storage by Karen

Happy New Year! Have you made any resolutions? Mine are based around decluttering and tidying so I started with part of my craft stash. It was getting hard to find things or even to look without setting off an avalanche of things falling in all directions: Time to get organised!
The 'before' photo:

I do like the small wooden trays that we often buy satsuma or clementines in at this time of the year. They are fairly strong, stack easily and are not too big for things to hide in. I had all ready collected a few and I pulled off any loose labels and gave them a coat of white Gesso to try to smooth out imperfections and cover metal staples before giving them a coat of bright Eco Acrylic Paint.  I wrote on each box what they would be used for in black paint and roughly edged round the front of the box to frame this section.

Each box was then treated to a layer of stenciled Design-It paste in Pewter, Aquamarine or Copper and left to dry before I organised my pots and bottles back in to the correct box.

I also gave the writing and borders some white paint highlights which you can see in this photo. This helped make the colours pop and the writing to stand out. You'll also see a fourth box that I decorated to go with the original three and I have another two boxes put aside to do for more supplies.

I still have a way to go to get everything organised but this simple project has been quite a transformation so far: It is so much easier to find things and put them back tidily. I think it will help me use what I have and save time too!
Wishing you a happy, creative 2020!
Karen
x


Wednesday, 19 June 2019

Upcycled box by Karen

For today's project I'd like to show you this little box I've made to give a candle to my sister: Just a little thank you gift for someone who loves candles. The candle is also homemade from my own beeswax.

The box was packaging from some biscuits and the perfect size for the candle so that sparked the idea to use it and, as the top and bottom are plain, I only need to decorate the sides with something that would match the colour.

I set to work with a large 30 x 30 cm sheet of paper so that I could choose the part I wanted to use afterwards and sprayed it with Brusho Acrylic Mist sprays in Turquoise and Violet and Violet Shimmer.

Having then cut a band the same height as my box, I sponged a stencilled pattern and round the edges of the paper with Eco acrylic paint in Prussian Blue.

I used Aztec metallic paint in Antique silver to stencil over the pattern for a shimmery accent.

The band was finished with randomly stamping some crackle and text patterns over the paint. This was then stuck on to the box.

I sprayed some tissue paper with the Violet Shimmer spray to wrap the candle in.

The original sheet was used to diecut a tag on an area which was mostly blue, which I stamped with the text. Then, for contrast, I chose a violet area to stamp and cut a butterfly. I think these finish off the box nicely.

So, hoping my sister likes her gift, I'm off to buy more biscuits: I easily have enough paper left to decorate another box so it's the perfect excuse!
Thanks for stopping by.
Karen

Monday, 17 June 2019

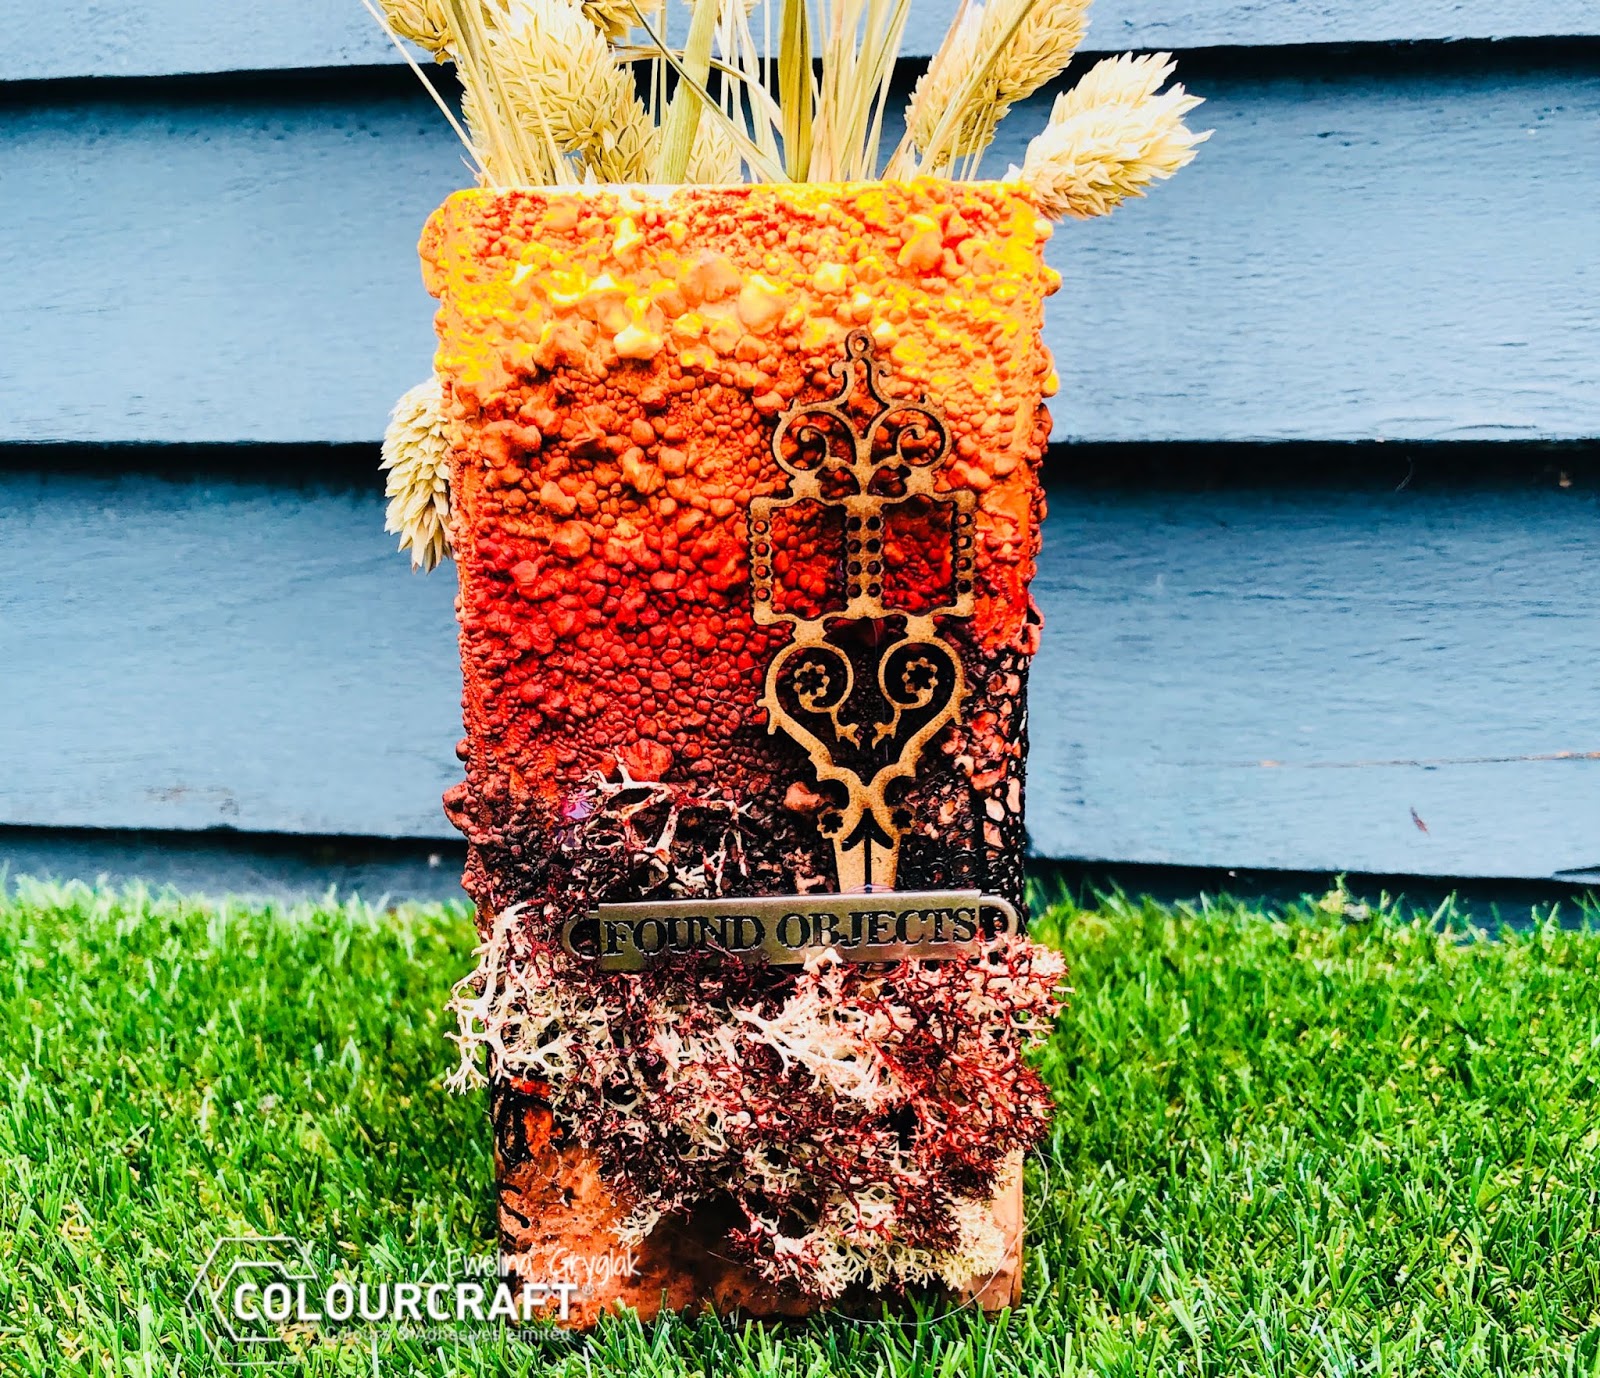
Rusty vase with ExpandIIT and Brusho

Hello, my crafty friends!!! 
As promised, I am back with another project using the ExpandIT paste.


This time I have altered a plain and boring white vase to make it look rusty, grungy and cool.


As prep, I used a silicone lace form (usually used to make decoration for cakes) and black DesignIT paste (aka Soft Form relief Paste); I gave it approx. 24hrs to dry. 
When ready, I took the lace out of the form and glued onto the vase.


Because I wanted the ExpandIT bubbled to be as irregular as possible, I used my hand to spread the paste above the lace rather than a palette knife.


As you can see, where there was more paste, the bubbles are bigger.
ExpandIT is such a cool medium to work with!!!


Next step was adding colour with Brusho; I chose Gamboge, Sandstone, Burnt Sienna and Terracotta.
I sprinkled it in lines to let the colours blend when misted with water.


Here you can see how the colour flows creating new shades.
I did that on each of the sides of the vase.


The last step was to add some embellishments to the front; the choice was some florist moss (I coloured it with whatever paint was still on the table - you know, make the best of every drop!); I also added a chipboard and a Tim Holtz metal badge.


As you can see, the process is quite simple but the result is absolutely freaking amazing!!!

See you next time.


Wednesday, 23 January 2019

Heart Brush Pot with Suzi

Good Day All, Today it's my pleasure to share with you my latest creation using lots of gorgeous products from the ColourCraft Store.  I decided I needed a pot to keep my paint brushes and similar tools in, so here's what I made;


The pot is an old stain remover container, which I'd been keeping for a while as I knew it would be perfect for upcycling at some point.  I had lots of fun adding texture to it, and here's how I did it.

To start off with I gave it a coat of white gesso then applied a layer of Tim Holtz Decorative Tissue Paper followed by another coat of white gesso.  Once dry I added some Liquitex Modelling Paste through a Heart stencil and allowed it to dry.


The next step was to add some colour, I chose the Rose Red Acrylic Mist Spray for this project;


I then set about creating some embellishments for my pot, so the first step was to spray some corrugated card with the Rose Red Acrylic Mist Spray.

 Once the card was dry I added some Copper DesignIT Paste (formerly Soft Form Relief Paste) and left it to dry.  Once dry I cut some hearts.


Then it was time to start adding the embellishments to my pot.  I took some cerise twine and wrapped it around the top of the pot, where the lid had screwed on.  I adhered it with a hot glue gun.  I then added some turquoise jute ribbon around the centre of the pot and hot glued on my hearts.

I then decided the hearts needed a little more sparkle, so I added some lovely pink floral gems to the hearts.


The only thing left to do was to fill the pot with some of my brushes.  Here it is along with some of the products I used to decorate it.

I love how this project turned out, lots of colour and texture, and perfect for it's chosen purpose.
I hope you've enjoyed seeing how I upcycled this container.  It's so easy to do and was lots of fun.

Thanks for visiting with us today
Bye for now
Suzi
xxx

Monday, 16 July 2018

Printing on Canvas Shopper Bag with Ewelina


Hey everyone! The heat-wave continues and my crafting mojo has most probably left to the beach as I haven't made it into my studio for at least a week now... it's simply too hot.


But heat or not, life goes on and I do need to crack on with my life, part of which is going shopping - I hate it with a passion!!! Since I am not a fan of purchasing my groceries online, I have to make the dreaded trip to a supermarket every week to stock up on the basics. To make it slightly more pleasant, I take my own colourful bags with me - it also means that I am more environmentally friendly by not buying any of the plastic carriers that supermarkets offer.


Amongst my stash of Canvas Corp black canvas goodies, I found this Canvas Shopper Bag
which was perfect for both - adding some funky colours to it and using for carrying  my fresh veggies from the market.


All I needed to make the first part happen was some Metallic Fabric Paints and a couple of large stencils (I opted for mandala designs as they are pretty in at the moment and look cool with ombre colouring).


To make sure the stencil stayed in place, I used large paper clips to pin it down.


After deciding on the colours I wanted to use (pink, purple, green and blue), I grabbed a sponge dauber and started playing.


Changing the colours as I went, I made sure to use a clean part of the sponge for each new colour to minimise the contamination and keep the colours vibrant.


Then the second mandala - I used the same colours but in different order.


And the third one - again, same colours but different order.


Once my mandalas were all stencilled on and dried, I decided to add a bit more detail using a different stencil and Metallic Gold Fabric Paint. To make it look like it was part of the original design, I overlaid it slightly with the original pattern.


As you can see, the two stencils worked pretty well together.


Now my shopper bag is ready for being filled with some market goodies... but I think I'll wait for the weather to cool down a bit before I brave a visit to the local market.

See you next time!


Related Posts Plugin for WordPress, Blogger...