Showing posts with label Galaxy Effect. Show all posts

Wednesday, 2 October 2019

One Background Four Cards with Suzi

Good Day, Today It's my pleasure to share with you my latest creations using lots of ColourCraft Products, I've used a selection of Brusho Crystal Colour Powders, SprinkleIt Powder and Aztec Metallic and Lustre Paints.

  Our theme this month is 'Chill in the Air' so I decided to create a Galaxy Night Sky, the sort of Sky you see on a clear crisp night.  I've created Four Different Cards using the Galaxy paper I created;


Here's how I made them; First of all I created my Galaxy paper using Brusho Crystal Colour Powders in Alizarin Crimson, Violet, Purple, Turquoise and White along with Pearl SprinkleIt Powder.  I then cut the background down to fit my cards.


For my first card I decided to create a wintery scene,

To create this scene I used a piece of the Galaxy paper, along with some White Card cut in the shape of hills, which I edged with blue ink and then gave a coat of Silver Aztec Metallic Paint to give it a lovely subtle shine.  I also die cut a Polar Bear from White Card, edged with blue ink then paint with the Silver paint.  For my Trees and Moon I used some paper that I'd painted with Pink and Purple Aztec Lustre Paints.  I added a little Silver paint to the sky and moon for a bit of extra shine and contrast.

For my next card I decided to find a way to use the smaller bits of Galaxy paper, I love using circles at the moment, so die cut a few circles in different sizes.

To compliment the die cut circles I used a Bubble stamp and sentiment from Crafty Roo Designs.  I love how the circles look like planets.

My final two cards were so quick and simple to make.  I took two pieces of white card and using cut away dies cut my designs from the cards before layering the Galaxy paper behind them and adding to a couple of card blanks.  I also stamped a sentiment on each card using two more sentiment stamps from Crafty Roo Designs.

 Here's a close up,


Here's another close up,

That's all of my cards for today, as you can see one background paper can be used in a few different ways and even the smallest pieces can be utilised to great effect.  I loved creating my Galaxy background, you never quite know how it's going to turn out, but the Brusho Crystal Colour Powders make it so easy to get great results. This was the first time I used the White Brusho Powder, and it adds some really subtle highlights/stars to the background; adding a little of the Pearl SprinkleIt Powder gave it a love subtle shimmer too so it really does look like a starry night.

That's all from me for today, I hope you've enjoyed seeing my cards and reading how I created them.
If you've been inspired to create some Galaxy or Starry Night backgrounds don't forget to share them with us over on Facebook in the Create with ColourCraft Group, we really would love to see your creations.

Bye for now
Suzi
xxx

Friday, 30 August 2019

Galaxy Background with Brushos

Hello and welcome back to the final post of our 'Paint, Paint, Paint!' month. 
Teresa here, and today I am sharing a card with a painted galaxy background.


I began by mixing some Brusho and water in my travel palette - I chose shades of blue, purple and red:


I took a piece of mixed media paper and sprayed a little water on to make the paint blend easily, then added the different colours, letting them run and mix on the paper. 


Once dry I splattered some white acrylic paint lightly over the 'sky' to create stars. 


I added more stars using the tip of a fine brush, allowing them to follow the pattern in the background.


Finally, I die cut the background into a circle and heat embossed a sentiment before adding to my card blank.


Thanks for stopping by today, I hope you are inspired to give this background technique a go, it's so much fun and really easy to do.


Saturday, 29 June 2019

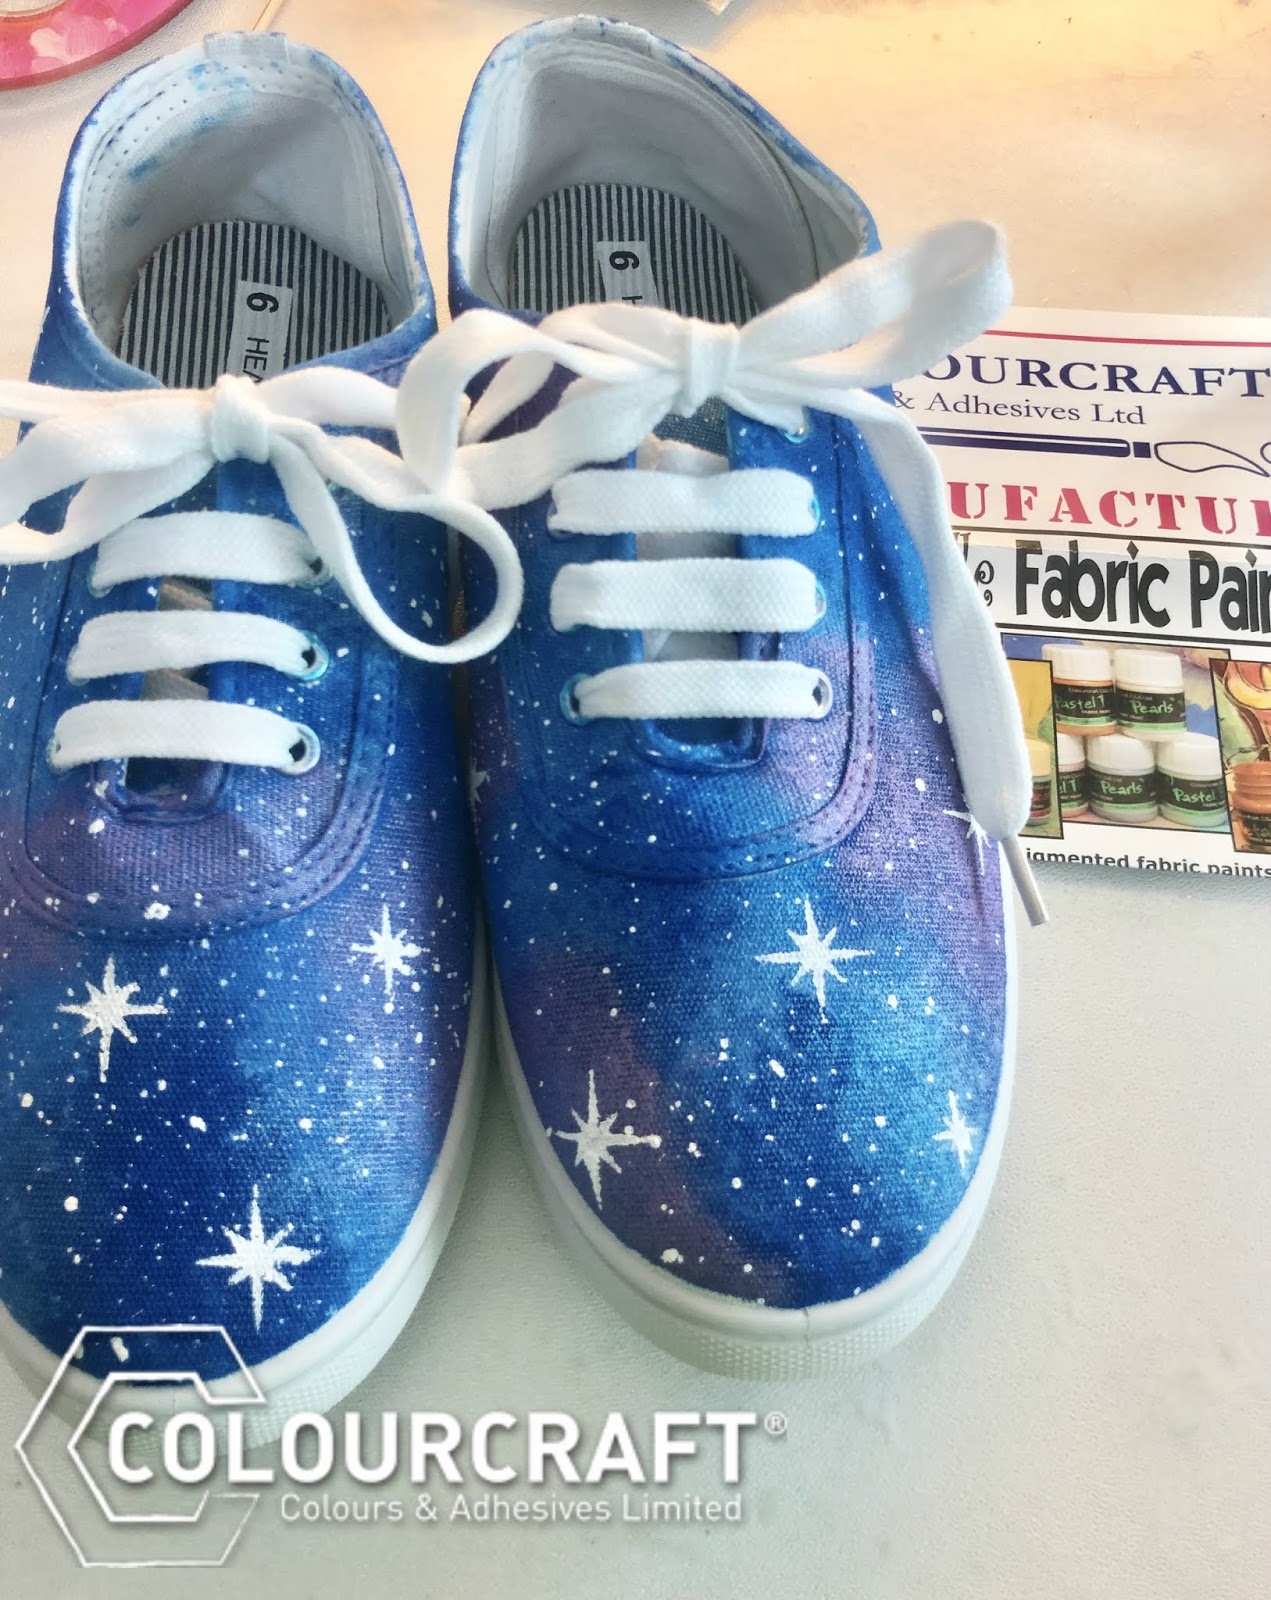
Galaxy shoes


Recently I discovered the ColourCraft fabric paints! When I saw all the lovely colours (especially the rich blues!)  I knew exactly what to do! Galaxy shoes!

Armed with a pair of white trainers, sponges, tape and the fabulous fabric paints I set to work.  It was really enjoyable and therapeutic.


Firstly, I removed the laces and then taped the rubber strip around the base of the shoes using masking tape.  I used smaller pieces of tape around the top edge to ensure I got in as close as possible without taping the fabric of the shoe. I then used a thicker tape to cover the larger section.


I used a combination of the metallic and opaque paints and started with two blues and two sponges.


I fully covered the shoes with patches of the dark and light blue paints. I was sure to cover the 'tongue' of the shoes as well.


Once that was done, I took the pink and purple metallic paints and, with the sponges, applied the colour in smaller patches on top of the blue paint.

I then used a fan brush and applied white splatters all over the shoes. I watered the paint down a little to ensure that I achieved nice splatters.


I then painted 9 stars over each shoe in different places and replaced the laces. I am so happy with my galaxy shoes.  It was so easy and so much fun! I hope you will have a go too.

Voila!


Friday, 26 April 2019

Guest Spot Galaxy Mixed Media Card

Hello all

I am guest designer today and i am going to show you how to make a space themed card.


Start off by mixing a bit of Black Brusho Powder in with water. Then take a makeup sponge and dab it onto a card blank. Leave white spaces so that you can add other colours later.


Next take Turquoise, Purple and Crimson Red Brusho powders and sprinkle them on. wet with water so they spread out. Dry off with a heat gun on a low setting so you don't blow the ink off the card.


i discovered that the SprinkleIt powders create this milky way sort of effect when sprinkled onto a dark background so sprinkle away until you have this dense night sky look. Add it while the ink is wet so it stays put. You can get this fabulous stuff here  and the brusho powders are here.


Next add a stencil over the card.
I used a tiny splatter one but it started to come out chunky so i then took a paint brush and flicked on some white paint. mix the paint with water to get a fine spray.


Lastly i coloured in the stamps with markers and glued them onto the card along with a sentiment.


Thank you for visiting


Related Posts Plugin for WordPress, Blogger...