Showing posts with label buttons. Show all posts

Wednesday, 8 April 2020

Mixed media canvas with Karen


This type of project is a great way to use up bits of your stash or even bits around the house because, for these types of mixed media canvas, it doesn't matter about shape, size or colour!

The base for my project today is an A5 artists board: A hard-backed canvas. However, a piece of wood or a stretched canvas of your chosen size would also work just as well. The first step is to then arrange your bits and pieces so you have a rough idea of where you want to glue things down. It is then critical to use a good gel medium like Liquitex Heavy Gel Medium or Golden Matte Medium to collage your objects on to the canvas. Use plenty and let it dry thoroughly as you do not want things to fall off later! This type of heavy gel will hold metals, plastics and just about anything, all layered on top of each other as long as they have plenty of gel to hold them and it is left to dry thoroughly, preferably overnight. In this case, I used a few scraps of florist ribbon, lace and some buttons so all relatively light.

As soon as I had stuck down one button, I decided to move it and that is a benefit of the slower drying time of gel on non-porous surfaces. For more texture, I used Design-It paste (formerly Soft Form relief paste) spread through a stencil with a paint knife. At this stage I then left everything to dry.

Once everything is completely dry and well stuck down, cover it all in gesso. You lose all the colour but keep the texture. Be sure to check from different angles to see that all the original colour has been covered.

Now you choose the colours to put back. I wanted a fairly vintage feel to this piece so I chose Dark  Brown and Black Acrylic Inks. I added the Dark Brown to the top edge with a large round brush and sprayed it with water to let it run down the canvas. It is also possible to use acrylic paints and colour sprays.

I also dry brushed some black acrylic ink round the edges of the canvas to frame it and over some of the texture to emphasise it. I smudged alot of this with my fingers for a softer look. I traced round the 'people' (Tim Holtz paper dolls) and filled in this shadow with a light layer of Black acrylic ink to give them more dimension and stuck them down with 3D foam.

Finally I added some text with 3D foam. It translates as 'Really lucky to have you'.

I hope you enjoyed that project. Please give it a go with whatever takes your interest and whatever colours you like. As another example, a few years ago I made a 30 x 30 cm canvas with old lego pieces which is electric blue and silver. You really can have great fun playing with different materials and colours.
Stay safe.
Karen

Saturday, 26 October 2019

Button Book with Brushos


 Recently I was poking around on Instagram and I found a very cool book artist (@daveykit) who was making some miniature books using buttons as covers! Very cute, I must try this!
Here is how I did it.
First I took a page and a half from an old dictionary and added some color/texture with Brushos in Gamboge and Olive Green.


I then glued on some red thread in a random pattern with a gel medium.


I then added some other patterns on top with thicker black and white threads.
One thing I had to bear in mind was that my buttons are 1" in diameter- so any patterns I made need to fit in that dimension.


Next I cut out my "pages" using a 1" punch. 


I then glued a 1/8" ribbon along the back sides of my front "pages". I made sure to leave enough ribbon between the pages so I could fold them together later.

Next I glued the backs on the pages and the buttons on the ends.

Here is how the book looks fully opened up on the "right" side. I love both sides though. 

The book looks like this completely closed.

It's so cute!

We'd love to see what you do with this project idea!


Friday, 28 June 2019

Buttons & Tags


Buying buttons, and also tags for quilts, can be time-consuming and costly. But in a few minutes, you can make your own, personalising and designing at whim.
Here is a tutorial on making buttons and tags from shrink plastic.


I used the white shrink plastic, but you can also get clear, which are great if you want to see through what you sew the button or tag on to.


Shrink plastic sheet shrinks 7 times thicker than the original when heated. I prefer to place my designs on a baking sheet and place in a preheated oven (at 160 °C 320 °F Gas 3) but you can use a heat gun.

I stamped shrink plastic sheet using some stamps from my collection and Stazon solvent ink pad 


I then used permanent pens to add a little colour. You can also use coloured pencils on white shrink plastic. There is no point in lots of careful colouring as the details will be lost on shrinking.
Here is a keyring next to the heart stamp used to make it, to help give you an idea of the size change:


I made some tags using a stamp and when the ink has dried, wrote on with a pencil. I also made a hole in them to allow me to sew them to my finished textile art pieces.
Here they are ready to go into the oven.


And here they are after heating:


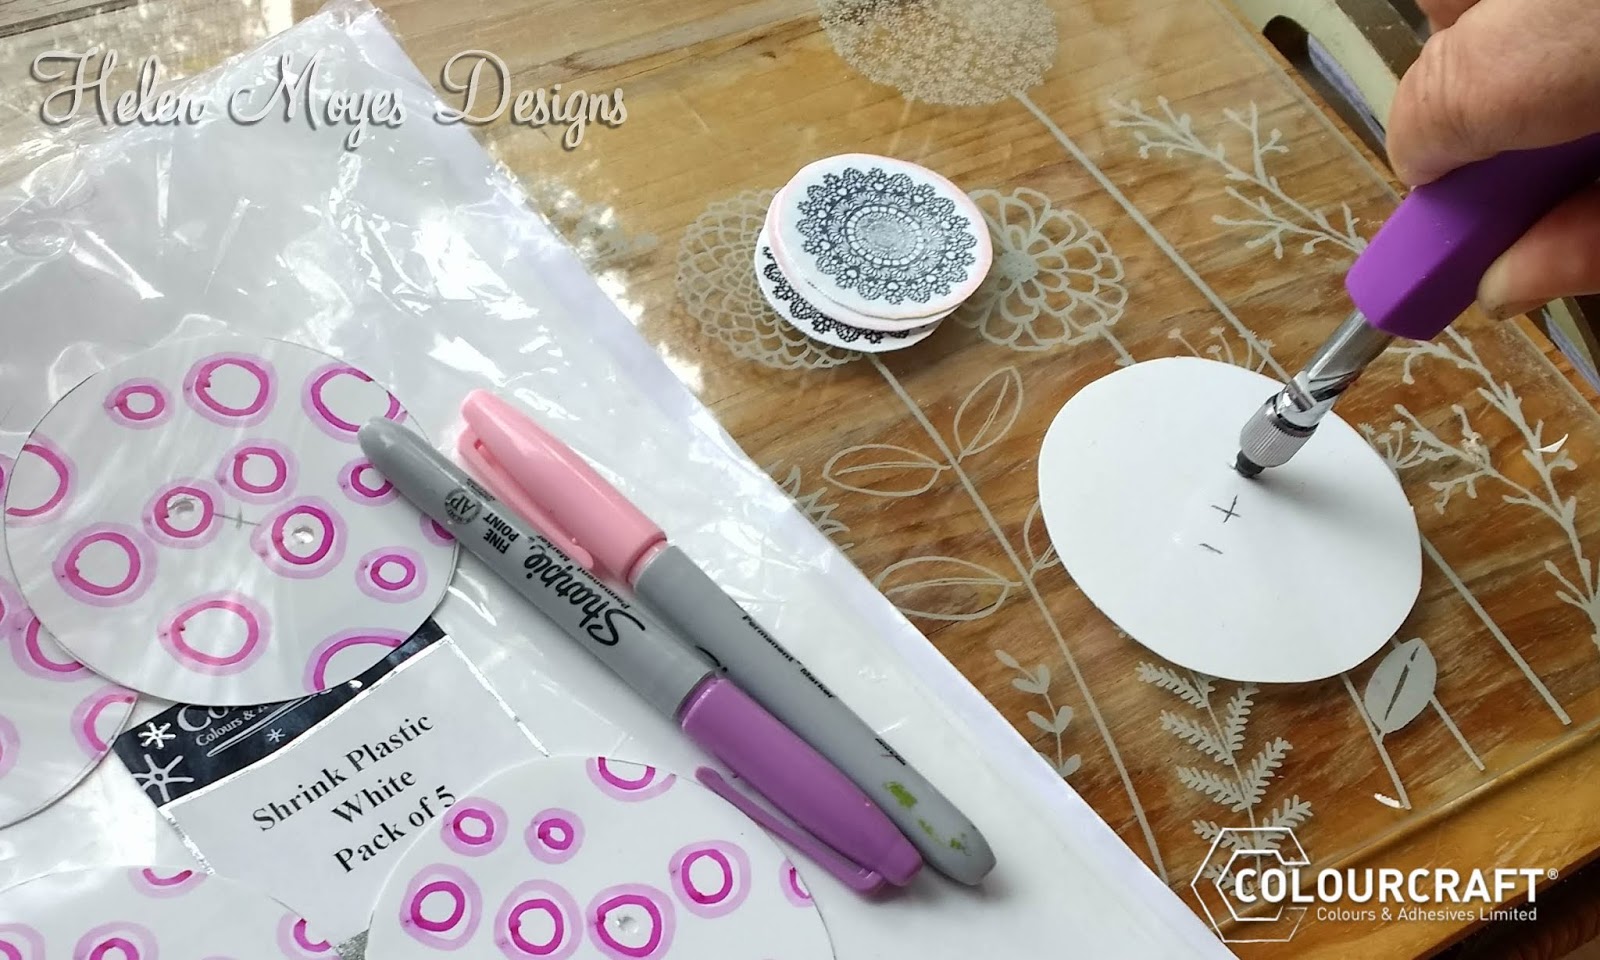
To make circular buttons, cut circles from the shrink plastic.
I drew round a lid to guide my cutting out.


Make holes to enable sewing buttons, either 2 or 4 holes. I marked the centre of my circles using a ruler and making a pencil cross. I used my craft hole punch tool to make holes, making sure I was not doing this on a surface that could be marked or damaged. I would usually use my self-healing cutting mat for this but was creating these while away.
Again, because of shrinkage, it doesn’t matter being too accurate with hole punching. Yeah, this is my kind of craft!


To give you a guide on shrinkage, my original 8.5 cm diameter circles shrank to about 3cm in 2 minutes in the oven.
Add a design to your buttons.
I did some circles with marker pens, but you can use acrylic paint.


It's important to remember that any colours will become darker and more intense as the plastic shrinks: Plan for this by keeping colours lighter than you want the finished look to be.

Place buttons on a baking sheet and into the oven for a couple of minutes. Note the buttons will twist and curl before magically straightening out into their smaller size.
Remove the tray from the oven using heatproof gloves and allow to cool.
Choose what you want to sew your buttons onto and prepare to say “why thank you, I made them myself”


I would love to hear what you have used your shrink plastic creations for, please share.

Helen x

Related Posts Plugin for WordPress, Blogger...