Friday 29 May 2020

Quilted Tyvek Squares

I love to design using different techniques and materials - mixed media & skills.

Here are some sketchbooks I have decorated with quilted Tyvek squares


These spiral-bound Pink Pig sketchbooks, stocked by Colourcraft, have handmade coloured silk covers (front and back) and 35 leaf quality 150gsm cartridge paper (made from acid-free pulp purchased from accredited and sustainable resources). 
This picture does not really show how fabulous the silk cover design on the notebooks is, you really do have to hold one in your hands to appreciate it!
They come in some gorgeous colours, I've used the Berry and Lime Green, and a wide range of sizes, I've used the 21cm square. 
Not all the sizes and colours that Colourcraft actually stock, are listed in their website dropdown options so give them a ring if you want to order from the whole range.

For this project, I started with a couple of squares of Tyvek fabric.


These were stamped with a couple of my favourite polymer stamps:  patterned heart and leaf. I mounted the polymer stamp on a acrylic block and inked them with StazOn ink. As the ink is solvent-based, I can paint the Tyvek squares straight away using eco-friendly acrylic paint in leaf green and purple


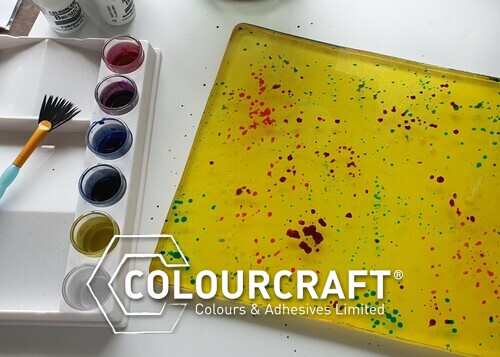
While the slightly diluted paint was still wet, I sprinkled on a little Brusho SprinkleIT: iridescent violet on the leaf and metallic pearl on the heart.

Once this was dry, I layered the Tyvek on top of black cotton fabric with some quilting batting behind. I chose a couple of variegated threads.


I sewed around the outside of the Tyvek squares with a zig-zag stitch. This holds it firm for the next stage: free machine embroidery of the heart and leaf.


Then it's time to heat distress the Tyvek, using a heat gun. NB. Work in a well-ventilated area. 

I made a heating mat from a folded newspaper covered in kitchen foil. I used a couple of pins to hold the quilted squares to the mat. 


Once cooled, I flattened the squares with my hands, before trimming and using double-sided tape to mount them on the sketchbooks.


For more detail, on this process, you can watch the film from my YouTube Channel.


Wednesday 27 May 2020

Tears of Gold with Suzi

Good Day All, I'm here today to share with you my last project as a member of the ColourCraft LTD Design Team, I've had a wonderful two years working with the wonderful people and products from ColourCraft LTD.  

As it's my last post I wanted to create something that I truly love, so I've painted a portrait, I've done a couple over my time here but today's is a little different as I've used Metallic Acrylic Paint, Acrylic Inks and a Koh-I-Noor Progresso Aquarelle Pencil with Matte Medium.

Here's a little snippet, scroll down to see how I created the finished painting;

I took a 10 x 14 inch canvas and sketched my portrait;


Once I was happy with my sketch I took a Koh-I-Noor Progresso Aquarelle Pencil and using Matte Medium to activate it, I darkened my lines.  Once dry the pencil is permanent if you use Matte Medium to activate it instead of water.


I then added my first layer of colour using Metallic Acrylic Paint in Bronze;


My next layer was added using Metallic Acrylic Paint in Pink;


I then added a layer of Metallic Acrylic Paint in Silver;


Then I added a layer of Metallic Acrylic Paint in Gold to the hair;


Next it was time to darken some areas of the painting, so I used the Koh-I-Noor Progresso Aquarelle Pencil and Matte Medium again;


I then added more layers of colour using Metallic Acrylic Paint in Copper, Gold, Silver and Pink;


It was now time to add details to the facial features and hair using Acrylic Ink in Dark Brown and Black.  I also added some highlights with a white pen;


At this point I left the portrait overnight, so I could look at it with fresh eyes the following morning.  I really liked her, but she was missing something.  She reminded me of an angel, but she looked so sad, so I decided she needs some tears.  It only seemed right that an angel would cry tears of gold, so I added a few drops of Gold Metallic Acrylic Ink and sprayed with water, so it ran down her face.


The Metallic Acrylic Paints are beautiful to work with, they add such wonderful colour and shine to your projects.  I've tried my best to show their wonderful shine in these pictures, but they look even better in real life.  If you are not confident in your drawing skills you can still create a similar effect using a stamped image or digital stamp for your initial line work.  Make sure you stamp in waterproof ink; If you use a digital stamp leave it to dry overnight and add a little water to the image to see if it runs, or apply a thin coat of clear or white gesso to seal your image before using the paints.

I hope you've enjoyed seeing how I created this project, and all my projects over the last two years.  It's been my pleasure to share them with you all, thank you to all those that have left comments for me, I really appreciate them.

That's all from me, 
Happy Crafting
Suzi
xxx

Monday 25 May 2020

Tropical Fish Card with Brusho

Hello Colourcraft friends.  Gail here today with some tropical fun.


I started by cutting three 2.5" diameter pieces from white card.  I was thinking artist trading coins and I usually make them in threes cos they fit perfectly across a piece of A4 card.  I used a stitch edge die and then stamped using a fish from Rubber Dance Textured Fish set.


I masked the fish, stamped with Rubber Dance Grungy Sequins and sprinkled with Turquoise and Sea Green Brusho powders.  I carefully removed the masks and spritzed with water.  The water can draw some of the colour across the masked fish, but I just used a paper towel to blot it away.


I stamped with a grid stamp and a water reactive blue ink, sprinkled with the Sea Green Brusho powder and spritzed.  The water spreads the Brusho colour nicely and also softens the grid stamping.


I selected one of the fish coins, edged it with dark blue ink and added it to the card base.  I die cut the word from white card and added it in the corner.

Thanks for visiting today.  I hope you have enjoyed my project. 
Take care, stay safe, craft on!!  Hugz

Saturday 23 May 2020

Layered Garden with Transfer Colours

This week the Fabulous Clare did some tips, tricks and demos with Colourcraft's transfer paints in a live broadcast on Facebook! You can watch it HERE

Anyway, I also love playing around with Transfer paints. This week I thought I would take inspiration from my last blog post, this time doing similar techniques but on fabric!

I decided to use transfer paints and crayons- that way I could do my images on paper first and then layer them onto fabric when I transfer them with an iron.
Transfer colours are paints, crayons and pencils that you draw and paint on paper with (normal copy paper is best really) and then transfer over to fabric with polyester content (or that has been treated with transfix) by using heat. I started by decorating my paper- I used an old candle and Colourcraft resist sticks to scribble on paper- even over a rubbing plate!! I painted around some hot glue stencils I made for my last blog. I used some makeup sponges to stamp through a paper stencil I made and around actual leaves I had picked. 


These are the finished papers I made:


The wax resists the paint, I also flicked some droplets onto some of my pieces. 
I then played around with using pieces I had cut out of plain paper as masks and ironing the different paintings in layers onto a glittery satin. 
Leaves laid on the fabric...

This is with the "background" painting ironed over the top.

This one is with several of the paintings ironed on top of each other. 

This one is my favorite result! The paper paintings often can be used more than one time- giving a lot of depth and texture to a piece.

Here was the one I had done on paper with Brushos:
I'm quite pleased that I managed to imitate the effect! Of course, I had done the one on fabric with mostly shades of grey, but you can see the similarities.
Here are some more links to blog posts I've done with transfer paints:

See you next time!!!


Friday 22 May 2020

Magical Brusho Gel Print Backgrounds by Teresa

Hello and welcome to my final post for the Colourcraft team. One of my favourite tools is my gel plate, and I love experimenting with different products on it. Today I am using Brusho Crystal Colours to create magical backgrounds for some stamped cards:


I began by brayering a thin layer of gel medium over the plate:


Next I mixed up some Brusho colour with a little water in my sealable palette. The pots have lids so you can store the paint.


I took a fan brush and splattered the paint over the surface of the plate.


Next I spritzed with a little water to help the colour move on the surface.


I took a piece of watercolour card and pressed onto the plate to transfer the colour to the paper.


Once dry, I trimmed into two pieces for my backgrounds,


I stamped my design on the Brusho backgrounds, added some details with colour pencil and a white pen, then matted onto black card to finish,


Related Posts Plugin for WordPress, Blogger...