Showing posts with label leaves. Show all posts

Saturday, 23 May 2020

Layered Garden with Transfer Colours

This week the Fabulous Clare did some tips, tricks and demos with Colourcraft's transfer paints in a live broadcast on Facebook! You can watch it HERE

Anyway, I also love playing around with Transfer paints. This week I thought I would take inspiration from my last blog post, this time doing similar techniques but on fabric!

I decided to use transfer paints and crayons- that way I could do my images on paper first and then layer them onto fabric when I transfer them with an iron.
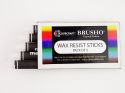
Transfer colours are paints, crayons and pencils that you draw and paint on paper with (normal copy paper is best really) and then transfer over to fabric with polyester content (or that has been treated with transfix) by using heat. I started by decorating my paper- I used an old candle and Colourcraft resist sticks to scribble on paper- even over a rubbing plate!! I painted around some hot glue stencils I made for my last blog. I used some makeup sponges to stamp through a paper stencil I made and around actual leaves I had picked. 


These are the finished papers I made:


The wax resists the paint, I also flicked some droplets onto some of my pieces. 
I then played around with using pieces I had cut out of plain paper as masks and ironing the different paintings in layers onto a glittery satin. 
Leaves laid on the fabric...

This is with the "background" painting ironed over the top.

This one is with several of the paintings ironed on top of each other. 

This one is my favorite result! The paper paintings often can be used more than one time- giving a lot of depth and texture to a piece.

Here was the one I had done on paper with Brushos:
I'm quite pleased that I managed to imitate the effect! Of course, I had done the one on fabric with mostly shades of grey, but you can see the similarities.
Here are some more links to blog posts I've done with transfer paints:

See you next time!!!


Friday, 6 September 2019

Autumn Colours: Tyvek Leaves


I don’t know if you are one of those folk rubbing your hands together in glee at the thought of Autumn? I tend to reluctantly face the fading of summer as I love long days and sunlight. However, I do love some aspects of Autumn, log fires and the changing colours of the leaves to name a couple.
So in crafting, it is autumn leaves I turn to for inspiration at this time of year.
In July I shared how I use painted Tyvek sheets for the sky in textile art landscapes, but once painted there is so much more you can do with Tyvek! Amazing things happen when you apply heat.
(You can apply heat using an iron, craft heat gun or a soldering iron.
Take care not to breathe in the vapours, working in a very well ventilated area and wearing a respirator if doing more than a small piece. At my workshops we are able to use the conservatory for the heating part, working by the open French Door).


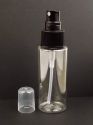
The first step is to paint the Tyvek paper sheets. Water-based paint acrylic paint is fixed when completely dry whereas watercolour will dissolve in water. Don’t dry on paper which will leech the colour from the sheet, I painted one side a reddy brown and then waited for that to dry before turning over and painting with a mixture of green acrylic paints. But if you’d like some Autumn sparkle, before each side dries, Spray on a little water and then sprinkle on a little Brusho SprinkleIT. I used gold and copper. The great thing about using Tyvek for this project is that the paint does not go through so each side can be different.


Look at the lovely effect, you get on Tyvek when it’s dry:


You can either draw on a leaf freehand or if you, like me, are not so confident in your drawing skills, draw around leaves. Mark on some veins too.

I then sewed the main stem and centre vein using satin stitch over paper-covered wire. Variegated thread looks good. Because each side of the Tyvek was a different colour, I used different variegated threads in the needle and bobbin.
Sew the veins with a straight stitch or free machine embroidery.


Sewing on clusters of beads with invisible thread adds more sparkle! There is a pack that has some gold and pinky colours in that work well.


I painted the exposed paper covered wire and then sprayed the leaves with gold Brusho Shimmer spray for even more Autumn glow.
Now to apply heat. This will distress the Tyvek, causing it to bubble, curl, and produce holes. The leaves will become firmer, and look more realistic. The trick is to not distress it too far so you are left with no leaf.
Protect your iron and ironing board with baking parchment, placing the leaf between two pieces.


Use a dry iron but don’t press! Hover the iron over the sandwiched leaf. Note my hand position for how I find it easiest to do this. Keep checking how the leaf is applying short bursts of heat until you are happy.


I added a few extra holes with a craft soldering iron. I made a pad to do this on with newspaper with foil on top.


Here it is held up to the light.


I then curled the wire stems around each other to create my Autumnal table decoration. I think it looks great on a mirror tile as you get the reflection of the underside.


I couldn’t resist taking it outside to the garden to see how realistic it looked. What do you think?


Happy autumn, Helen x

Related Posts Plugin for WordPress, Blogger...