Wednesday 27 February 2019

Foil transfer techniques with Karen


I've been wanting to test out Colourcraft Transfer Foils for some time and finally sat down to test some colours with ColourCraft Flexi glue to create a few cards. Love the results! I'll share with you what I did and what I learnt...


Could the foil and glue combinasion be used with a stamp? Oh yes! I sponged some glue on to my stamp and stamped this repeatedly on textured paper. I immediately pressed on the lime green foil, burnished over this with the back of my thumb nail (you could use a tool), left it while I cleaned the glue from the stamp and then peeled back the carrier sheet to reveal the super pop of colour as the foil is left behind on the glue. I think the coverage is great and this would probably be even better on flat, untextured paper.


To decorate my card, I marked the corners of the black panel on to a card base and stuck down strips of double-sided tape. The piece of foil I had used still had plenty of foil left on it so I stuck this down on to the tape, going back over any areas where the foil was missing.


The black panel was stuck down, leaving the matching foil border all round. I then die-cut the sentiment from some double-sided foam and stuck this down on to the card. I lifted the carrier paper from the foam and transferred the foil as it stuck to the foam. Lifting the carrier sheet from the foil revealed a lovely foiled sentiment. I then added some spots of flexi glue directly to the card in the centre if my starbursts and in a few other places and left this to go clear before rubbing more foil over the top to transfer more little pops of green foil. The critical point to apply the foil is when the glue is clear and no longer liquid but hasn't dried completely so it is still tacky. 

You can see above when the glue is first applied and below after the foil has been transferred. As my piece of foil had been well used by the time I did this stage, I also found that rubbng a tiny amount of glue over the die-cut allowed me to fill in more foil over patchy parts of the transfer. If you compare the two 'y' in the photos above and below  you'll see this was very effective. I love being able to coordinate everything like this too: I didn't have to hunt around for things to match!


So, what about using the glue through a stencil? Yes again! Using the same sponge that I'd used for the stamp, I applied the glue over a stencil on to scrapbooking paper, lifted the stencil and pushed on the silver foil, leaving it there while I washed the stencil. In hindsight, I would probably put a thicker layer of glue on next time, but I still love how this turned out and it still has a super shine.

To finish this card I layered the paper on to some card mats and again die-cut some double-sided foam and carefully stuck this down on the card. Here the bare foam is shown:

I removed the carrier film from the die-cut, revealing the sticky foam and laid the same piece of foil I had already used over the top, choosing a part which still had plenty of foil remaining. I rubbed this to transfer the foil and lifted away the carrier sheet. My card now has a beautiful, professional looking foiled sentiment! As I already had some silver foil card, I used this as an additional matching layer.

I used a second stencil, this time a two-layer stencil, inking the first layer then using the foil to highlight over these shapes.

This time, to create a panel for the piece of card, I cut a rectangle of double-sided foam and covered one side with a slightly larger piece of foil.


Knowing the centre wouldn't be seen, I used it to die-cut the sentiment and then removed the carrier sheet from the foil. I think the pressure of the machine gave an even better finish to the foil so, although it uses more foil, it may be better to transfer the foil before die-cutting.


I stuck my white piece of stencilled card over the purple panel and used another piece of white card to mount the text on to. I then cut a wavy edge to the card front, stuck a strip of double-sided tape up the inside edge and foiled that too. It adds more interest and decorates the inside of the card as well as the outside.

So, without having to splash out on expensive heat foiling machines that I might not use often, I had a great time transfering the foil to stamped and stencilled patterns, double-sided tape and foam and directly on to the glue where I'd made my own patterns. The nozzle of the Flexi-glue is fine enough that the patterns could easily be more elaborate than the random dots I created. This glue is also suitable for fabric and wood as well as paper and card so there is lots more experimenting to do! The foils are super shiny and transfer easily and give another dimension to card-making.

Have you tried these foils? What is your favourite technique with them? I'd love to know if you have a technique or project to share.

Karen

Supplies:
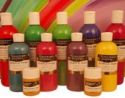
Flexiglue can be < found here > and the selection of foil colours can be seen through the link below:

Monday 25 February 2019

HOME - embroidery hoop with Ewelina

Hey everyone!

I want to share with you my latest obsession - embroidery hoops.
I have loads of various types of canvas and burlap and have been creating loads of different projects after stretching them on various size embroidery hoops; some of them are mixed media, some are just fabric, some are painted canvas - just like this one.


To start, I chose the hoop I was going to use and outlined it on the canvas so that I knew what area I was working on. (Make sure you have an eraser ready to later on remove the outline! It took me good 15minutes to find a white eraser which wouldn't leave colourful lines on the fabric... oh, well...)


I attached the canvas to a cardboard to make it easy to stencil on and then attached the stencil where I wanted to add the design. It's important to stop both the fabric and the stencil from moving during the process to avoid smudges and spills.


Rather than using block colours, I tried layering and blending them a bit.


After removing the stencil, the design looked a little bit 'square' so I randomly added some more flowers to build it up.


Now for the hard part (for me) - writing.
I test-wrote the word first and once I was happy with the outcome, I transferred it onto tissue paper. That allowed me to play with the placement on the canvas; once I decided where to add it, I transferred it on to the canvas ready for painting.


I used my old PIGMA BrushPen and black paint to write the word - I find it works better than using regular paint brush.


Now that all the painting was done and dried, it was time to do some stretching... 
It's important to aim for the hoop to be where the outline you previously pencilled. Oh, and don't forget to erase it!
Once you're happy with the placement and tension of the fabric, tighten up the hoop and trim off the excess fabric.


Simple but pretty. 
You could add some fabric flowers or hand-stitch the wording...I am leaving mine just as it is right now.

See you next time!

Saturday 23 February 2019

Spring Home Decor : Birds Nest

Hi Everyone,

Sarah here with you today on the blog and I have a super quick and easy easter/springtime project for you!.


Step 1

Take a paper plant pot and apply a layer of white acrylic paint over the surface, a bit like dry brushing, so that you don't get full coverage, as we are going for a shabby rustic look


Step 2

Dig around in your stash for some lace, trims and fibres, I layered 3 together to make the easter nest look pretty.


Step 3

Paint your polystyrene eggs with a layer of gesso, then paint with a layer of titanium buff, and speckle them with burnt sienna and turquoise.


Step 4

I scrunched up some raffia into the pot and arranged my speckled eggs inside to complete the project


I hope you enjoyed today's project, this took me less than an hour to complete and would make a great addition to your spring/easter themed home décor

See you all next month with more fun projects

Thanks for visiting today

Sarah


Wednesday 20 February 2019

Embossed Lustre Cards with Suzi

Good Day All, Today I'd like to share with you a set of cards I've created using the gorgeous Aztec Lustre Paints on Black and White Paper, some stamps and embossing folders from my stash.

Here's one of the cards;

Here's how I created my project.  First of all I took Aztec Lustre Paints in Pink, Yellow, Blue and Purple and added some onto sheets of Black Paper with a brayer.  I created 3 different sheets;

I then decided to start work on the focal images for my cards.  I stamped a selection of Hearts onto mixed media paper;

I then added a layer of Yellow Aztec Lustre Paint to the whole page;

I then added some stamping to the background with a distressed stamp.

I then stamped some hearts onto the patterned papers I'd created;


I then cut out the hearts and glued them to the yellow paper.  I then cut the page up into 6 pieces to create the focal images for my cards.

I took the rest of the black patterned paper, trimmed it to fit 5 x 7 inch card blanks then embossed each sheet using a selection of embossing folders from my stash.

I then started to put my cards together, I added a piece of black paper behind my embossed papers to add a nice border, then added the pieces of yellow paper to the cards.  Here's what I ended up with;


I stamped a couple of extra hearts onto the leftover yellow paper and added them to two of the cards.  I may add sentiments to the rest of the cards at a later date, I'm not sure yet.  But for now they are all finished.

I hope you've enjoyed seeing how I created my cards, you can find the Aztec Lustre Paints on offer at the moment, so it's the perfect time to treat yourself to a set of them.

That's all from me for today
Bye for now
Suzi
xxx
Related Posts Plugin for WordPress, Blogger...