Wednesday 30 August 2017

Do what you love, love what you do Art journal by Kate

Hi,

today I have for you one quite special art journal. No media, no stamping, co watercolouring, no glueing just basic easy painting.

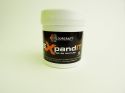
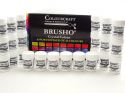
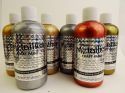
Yes I wanted to show you how awesome are Aztec Mettalics craft paints. I made art journal just with them. I am not super artist, I cannot paint any complicated art works but you do not have to be artist to take brush, craft paint and start.

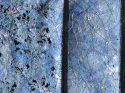
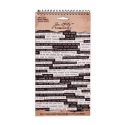
I used my black art journal and I did not prepare page - no gesso needed. I just sit and painted, relaxed and enjoyed my crafty time. All images I painted just according to my phantasy. As sentiment I used sticker from Tim Holtz with great quote.

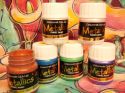
During my work I decided that I really need to compare Aztec Mettalics with metallics watercolours (I was curious) , I did it and I have to say do not invest into any mettalic watercolour, yes they can be nice, easy using, but Aztec paints are more vibrant, the same easy for painting with and you will get for your money really big bottle of awesome paint. And I am not saying it just because I am in design team, it is really my own opinion. So when you are standing in front of big decision about mettalic colours, choose Aztec.

I made more photos because those mettalics colours are so difficult to photograph.


Have a nice day
Kate Dachovska


Monday 28 August 2017

Rainbow coasters with Ewelina

It's already been two weeks and I am back again! Hello!

The weather seems to be quite OK where I live at the moment and the sunny bright colours put me in a mood that I am not often in... a mood for rainbow-ish, kind-of-unicorn-ish, bright and unusual for me project... 


With that in mind, I took out my metallic fabric paints in Aquamarine, Green, Pink and Purple, a set of canvas coasters from Canvas Corp and Andy Skinner's Sunburst stencil... the problem is... I didn't want it to be flat; I wanted 3D! Then I remembered that in my DT box a mystery mixture arrived - it's called ExpandIT - and I had no idea how it worked...


So I set off to work - to test and play with the new medium which is meant to add texture to my projects in fabric... and honestly?!?! WOW!!! Just, WOW!!!


Can you see this texture?!?! 


Once heated, the medium expands and tons of little bubbles pop up and start growing - it's so awesome to watch! - creating amazing effects.

I used the medium on its own - the white coaster - and mixed with metallic fabric paints - the rainbow/unicorn coasters. SO MUCH FUN!!!


You can see the whole process here:


Thanks for stopping by! See you next time!

Ewelina

Saturday 26 August 2017

Introduction to Lutradur, Expandit and Sprays by Sarah Allan

Hi Everyone!

Hope you are all having a great Saturday... I have had a fabulous time experimenting with Lutradur, Expandit and Acrylic Sprays this morning, they are fabulous to work with and I am looking forward to working with these products more in the future...


I cut Lutradur into small pieces, I cut them small as my intention was to place the finished pieces onto cards

I then applied a layer of Expandit direct onto the lutradur with a paint brush


I then applied heat  to the lutradur with my heat gun until the Expandit  dried and expanded


The texture left on the surface is fantastic, and it is pliable with a rubbery feel


My next step was to give all my pieces a good spray with Brusho Acrylic mist sprays.. 

This piece was sprayed with Lemon, Charcoal and Violet


and this next piece was sprayed with Scarlet and Lemon


I would recommend leaving them to dry naturally if you can but they look equally as vibrant when dried with a heat gun

I then ran them through my die cutting machine to cut out some leaves


and I kept some of the patches intact to use as backgrounds for my cards


I am sure you agree the effect and texture that you get with these products is amazing


I am looking forward to experimenting more with these products, I think there are so many possibilities and future projects that would look great using them


I hope you enjoyed seeing the product Expandit, I know I have really enjoyed working with it today


Have a great weekend everyone!
Sarah x


Friday 25 August 2017

Autumn Leaves - Greeting Card by Susanne

Hi everyone!

I'm still on summer holidays, but as it's the end of August it's time for some autumn inspiration! Although I am a little bit sad, that summer will be over soon, I am looking for the smell and the wonderful colours during September and October.

Today I have a step by step card tutorial for you. I will share how I made these lovely autumn leaves.


What you need are some leave dies and maybe any kind of leave stamps. Those doesn't have to match the dies!
I picked the Tim Holtz "Fall Foliage" by Sizzix and the "I Love Leaves" stamps from Rubber Dance.


Cut the leaves from mixed media or watercolour cardstock and pick your favourite Brusho Colours. 
I used: Gamboge, Purple, Crimson, Burnt Sienna, Moos Green and Yellow.
Wet the leaf, sprinkle the pigments on top and spread the colour with a brush until you're happy with the result.


Add some veins to the leaves with Aztec Metallics Gold. Pick the paint up with a sponge and use this to ink up your leave stamps. Stamp by putting each leaf on top of the stamp, that matches best. Finally you can wipe the edges with your inked sponge to add more shimmer to your foliage.


Use embossed cardstock and add some Aztec Metallics Gold Splatters.
I mix the paint half with water to make these droplets. Mount your foliage with 3d foam dots and add a sentiment stamped (or embossed) on vellum.


I hope you like my card!
Have a nice weekend!
xx Susanne.

Supplies:
ColourCraft:


Others:
Sizzix Tim Holtz Fall Foliage
WOW! Embossing Powder Gold
Rubber Dance I Love Leaves
Sizzix Embossingfolder
Related Posts Plugin for WordPress, Blogger...