Saturday 28 March 2020

Distressed Butterflies with Transfoil- Garden Mandala part 1


Hi Everyone!

In all the craziness in the world at the moment- there are some bright spots! One is more time to craft! the other is Colourcraft Ltd. delivers!
One project I've been working on is a minature quilt with the theme of "Garden" for my quilt guild's show in October. I thought it would be fun to combine a bunch of different art quilt and embroidery techniques in a mandala whole cloth quilt.
The first art quilt element I did was linoleum cut and printed snails. You can read my blog about doing those here.
Today I'm going to explain how I made my butterflies though! 
I started with quilting all the basic creatures etc I'm going to have through all three layers of my quilt sandwich. This included doing a bit of appliqué and trapunto on my little linoleum printed snails.

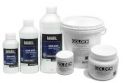
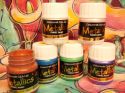
Then I took Pastel Pearl Fabric Paint in pink and pearl and painted each butterfly.


I then added dots of transfer foil using fusible web and drew around them using a pink paint pen.


There is fusible on the dots, I lay over the foil and used the mini iron to activate the glue. Let it cool before removing. 

It just didn't feel like enough to me though... so I added some "mending powder" which is basically fusible in a powder form and added more foil. This gave me a random "distressed" effect on my butterflies which I love! 

Here is a picture of the quilt so far:


Next time I will show you how I make the dragonflies! More foil, Angelina and lots of bling.
Take care of yourself. 


Friday 27 March 2020

Floral Wreath Tote Bag by Teresa

Hello and welcome to my project for today. I have a pretty painted cotton tote bag - certain to brighten even the dullest of days.


I began by drawing a rough circle on one side of the tote with a pencil - you could draw round a plate or find the centre and use a piece of string like I did here:


I applied a thin layer of fabric paint to the foam stamps with brush, then stamped onto the bag, using the circle as a guide:


Next I added some leaves:


I continued to work around the circular design using different stamps and colours of paint:


Finally I added gold dots using the eraser end of a pencil. I placed some in the centre of the flowers, and some just to fill in spaces around the other stamped images.


Once happy with the design, allow to dry, then iron on the reverse to set the paint.


Wednesday 25 March 2020

Art Journal pages by Karen

Art journaling is used by many people as a form of therapy, letting emotions out on to the page which can then be hidden by the art layers. I don't often do this but today I thought I would show this process because it does help to sometimes get feelings out of your head and on to the page.

Without any planning as to how the page would look when finished, I made a process video:

I scribbled some thoughts in the journal and then covered the pages with some gesso and started my mark-making, adding colour with Colourcraft acrylic inks. These translucent inks are permanent once dry so they can be layered without creating mud and have a lovely soft effect.

The colours were softened further in places with white ColourCraft Eco Acrylic Paint and the stencil was used with black.

 Further contrast and texture was added with Design-It paste in Glossy White.
Finally, I used a white pen to add highlighting to some shapes and the text.

Thanks for stopping by today. Do you do art journalling? I hope you like this spread and the lovely acrylic ink colours.
Karen


Friday 20 March 2020

Using Photos for a Memory Quilt

I bought some fabric whilst on holiday and am going to quilt with them. It's been in my "to-do" pile for a while, but since quite a lot of my work has been cancelled at the moment I am going to get sewing!

The quilt will be on the theme of my holiday - nature: leaves, trees, mountains, wildlife. I have been inspired by the quilting of Nicholas Ball from Bernina at the 2019 Festival of Quilts and getting into improv triangle blocks and I'm also interested in his leaf skeleton block 


I then realised that a great link to the holiday memory quilt would be to include some of the photos I took!
It's been lovely to look back through my photos and choose some to print out on my inkjet printer to transfer to fabric.
It is worth remembering:

  •  that when you transfer images, they will be reversed, so if you want your photo to be the same as you took, flip it in the image programme before you print. This is especially important if there is any words in your image.
  • that the transferred image will be a little muted, so choose images with contrast, and possibly increase the contrast of your image.
  • it is best to make sure fabric is washed and ironed before image transfer.
  • protect your work surface

First, you apply a coat of image transfer medium to your fabric (or paper if you are creating with paper)

Then coat the image with Image Transfer Medium, and apply it face down onto my fabric


Smooth the back of the image. I used the back of a spoon to make sure the image adhered to the fabric

 Let it dry thoroughly. 
Apply water to the image 

Rub the paper from the fabric to leave the transferred image. Then leave to dry.


I'm going to transfer some more images, work at my various block ideas and then audition them into position to make my holiday memory quilt.

This process is likely to appear on my Instagram feed

I'm booked to teach some workshops at this year's Festival of Quilts and Colourcraft will have a stand. Really hoping this will be able to go ahead from 30th July, but if you do buy tickets or book on workshops, you will be refunded if the festival has to be postponed. 

Hope to see you there!

Wednesday 18 March 2020

Thankful Animals Index Cards with Suzi

Good Day All, Today I'd like to share with you my latest creations using some of the fabulous products available in the ColourCraft store; For Today's projects I've used Black & Natural ExpandIT Paste, Brusho Crystal Colour Powders, Metallic Lustre Paint and Eco Acrylic Paint.

The first thing I did was to Die Cut some Elements for my Index Cards, including a Geo Butterfly, Geo Rabbit and A sentiment block.  I used a Rainbow Mirri Card for these elements;


I also used a die that resembles sequin waste, I used this along with some Brusho Crystal Colour Powders in Gamboge, Lime Green and Alizarin Crimson to create a patterned paper.


I sprinkled the same Brusho Crystal Powders through the sentiment block;

I created a couple of sheets of paper using Brusho Crystal Colour Powders in Gamboge, Orange and Dark Brown to go behind some of my die cut animals.

Once all the papers were dry, I adhered my die cuts to the papers and then fussy cut around the die cute to create my focal images.


I then had a rummage in my stash and found some Index Cards onto which I'd added ExpandIt Paste and heat set it.  One background was made using  Black ExpandIt Paste with a thin coat of Copper Lustre Paint over it.  One background was made using Natural ExpandIt Paste mixed with Cadmium Yellow Eco Acrylic Paint.  The other two backgrounds were created with Natural ExpandIt Paste which I'd then covered with different shades of Green Eco Acrylic Paint.

I then set about adding my elements to the Index Cards with the addition of some staples, decorative die cuts and dew drop embellishments.

Here's my finished Index Cards;


I had great fun creating these Index Cards, I love how the Rainbow Mirri Card catches the light and contrasts the Brusho backgrounds I created for the die cuts. I love the texture the ExpandIt Paste creates, I've still got a couple of Index Cards in my stash that have ExpandIt backgrounds but no focal points yet, they are a great thing to keep for future projects.

I hope you've enjoyed reading how I created my Index Cards; Index Cards are a wonderful thing to craft on, they are a lovely size, so perfect for experimenting and trying new products and techniques.
That's all from me for today, I hope you have some time to relax and craft
Bye for now
Suzi
xxx
Related Posts Plugin for WordPress, Blogger...