Wednesday 30 October 2019

Trick or Treat with Suzi

Good Day All, It' Halloween Tomorrow, so I couldn't resist creating a couple of spooky projects for you.  I'm hoping you'll view them as Treat's rather than Tricks, but we shall see!

Here's my first project;
In a previous life it used to hold a note pad, it's got a couple of large magnets on the back, so I thought it would make a wonderful extra large fridge magnet.

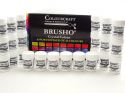
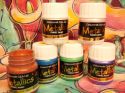
The first thing I did was give the board a couple of coats of white gesso to prime it.  I then added some White DesignIt Paste through a spiderweb stencil.  Once dry I dry brush it with some Prussian Blue Eco Acrylic Paint.
The next stage was to create my die cut elements to decorate the plaque.  I used Black Pearl Pigment Powder mixed with Gloss Medium to colour some card for my spooky houses.  I also used some card painted with Yellow and Orange Lustre Paints.

Here's the houses once I'd added them to the board;

To decorate the top half of my oversized magnet, I used a large Trick or Treat Diecut, and layered it over more of the Yellow and Orange paper.


Now onto my second project, which is rather spooky!
I had great fun decorating this polystyrene Skull, Here's how I went about it;

First of all I added White Gesso and Blue Metallic Acrylic Paint to the Skull for my base coats;
I then added a couple of layers of the Metallic Blue to the left side of the Skull, Whilst on the right side I added some White DesignIt Paste through a spiderweb stencil (unfortunately this come out as clearly as I'd hoped, afterall it's tricky stencilling a 3D object, lol).

Next I dry brush some Prussian Blue Eco Acrylic Paint over the whole Skull.  I then decided to add some extra decoration to the Metallic Blue side of the Skull.  Using Snowflake stamps from Crafty Roo Designs, I stamped in Clear Embossing Ink, and Embossed with Stamp and Stick powder so that I could add Silver Foil to the Skull.  I also added some of the Ink to the Eye sockets, nose and teeth, for an extra bit of sparkle.


To finish the Skull I took two large White marbles and added Iris details to them with a couple of paint pens, afterall, Mr Skull needs to see what's going on.


He can be a little careless with his eyes, as you can see from this pics;


Well that's all from me for today, I do hope you like my projects and there were not too scary, especially Mr Skull. 

Have a Happy Halloween
Bye for now
Suzi
xxx

Monday 28 October 2019

Halloween Tag with Aztec Paints

Hello Colourcraft friends.  Gail here today with a Halloween themed tag.  I have a friend who was lucky enough to be born on the most spooktacular day of the year so I needed a tag for the gift.  


I started by cutting a piece of corrugated card with Gummiapan large Old Tag die.  I painted it with Blue Aztec Eco Lustre Metallic Paint.  When it had dried I over painted with Purple Aztec Eco Lustre Metallic Paint.  The resulting colour reminds me strongly of shot silk.   The bubbles you may be able to see in this picture disappeared once the paint was dry.


 I cut the spooky house, bats, moon and words using Sizzix dies and some scraps left over from my mermaid project.  I had painted some card with Charcoal Aztec Eco Lustre Metallic Paint and then added some gold splats.  


A bit of recycled sari 'wool' and the tag is done.

I hope you have enjoyed my project today.  Don't forget there is a Create With Colourcraft fan group over on fb where you can share all your makes using Colourcraft products.  See you there.  Hugz

Saturday 26 October 2019

Button Book with Brushos


 Recently I was poking around on Instagram and I found a very cool book artist (@daveykit) who was making some miniature books using buttons as covers! Very cute, I must try this!
Here is how I did it.
First I took a page and a half from an old dictionary and added some color/texture with Brushos in Gamboge and Olive Green.


I then glued on some red thread in a random pattern with a gel medium.


I then added some other patterns on top with thicker black and white threads.
One thing I had to bear in mind was that my buttons are 1" in diameter- so any patterns I made need to fit in that dimension.


Next I cut out my "pages" using a 1" punch. 


I then glued a 1/8" ribbon along the back sides of my front "pages". I made sure to leave enough ribbon between the pages so I could fold them together later.

Next I glued the backs on the pages and the buttons on the ends.

Here is how the book looks fully opened up on the "right" side. I love both sides though. 

The book looks like this completely closed.

It's so cute!

We'd love to see what you do with this project idea!


Friday 25 October 2019

Snowflake Artist Trading Cards

As Autumn is heading towards Winter, I have a simple project featuring some pretty metallic snowflakes. These Artist Trading Cards make great card toppers - make a few in advance and you won't be stuck for a last minute Christmas card!


I began by spritzing some water onto a piece of watercolour card. Top tip: if your card starts to curl, then spritz a little water on the back and it will flatten out again). I sprinkled some Prussian Blue, White, Grey and Black Brushos onto the damp card and spritzed again to start moving the colour.


I found some laser cut wooden snowflakes in my stash (you could use die cuts or punched shapes too). I gave them a couple of coats of metallic fabric paint. This paint is super versatile and not just for fabric.


Once the background was dry, I cut to ATC size - 2.5 x 3.5 inches and added a little black ink around the edges. I glued the snowflakes in place and added a festive sticker to finish.


Wednesday 23 October 2019

Painted Coasters with Karen


I realised my coasters were in a sorry state, faded and peeling, so I decided to give them a new lease of life. Here is the 'before' picture:

I peeled off loose bits of film then lightly sanded them before giving them a light coat of gesso to give a grounding for the layers to follow.

The first layer of colour was Phthalo Green EcoAcrylic Paint which was sponged over more than half of each coaster.

I finished this layer with Turquoise Eco Acrylic Paint on the remaining part.

I stamped White Eco Acrylic Paint over the frst layer to add more texture and depth.

Then, for a contrasting colour and interest, I used Copper Aztec Metallic Paint to stamp leaves, words and small texture stamps on to the coasters and also to sponge around the edges. This catches the light and shines beautifully.


To make the leaves solid against the background, I painted in the leaf using the same Copper paint. When this was dry, I stamped over the leaves with Black StazOn ink.

To give a drop shadow to the words, I used a fine permanent pen to line the left and bottom edges of the letters. Finally, I used Black Eco Acrylic Paint to add a dot to the centres of the little circles to make them 'pop'.
I have taken my photos before spraying with a varnish but I think this will help to protect the paint layers from the heavy usage these coasters are likely to get. I hope this has inspired you to give your coasters and table mats a new lease of life!

Karen
Related Posts Plugin for WordPress, Blogger...