Saturday 31 August 2019

Crazy Block with Painted Effects

I recently stocked up on some fun Colourcraft products when I visited The Festival of Quilts, so I decided to play around with some of these things and made a super cute Crazy Quilt inspired block!


 I first started by photocopying a page from a Japanese book which I then transferred to a piece of calico with Image Transfer Medium . This involved applying the medium to the printed side of the copy, applying it to the calico and letting it dry, and then spraying water on the paper to remove excess paper leaving just the image.


I then added some color with Brushos and a bit of glitz with SprinkleIT.
I then added a bit of Gesso to make a space for my stamp, and used a stencil with DesignIT paste to add my next layers.
 
Once my DesignIT paste stenciling was dry,  I stamped my image with StazOn ink and a beautiful stamp from Crafty Roo Designs called "Bob Robin", I then used another stencil and applied some ExpandIT.

I then added some Brusho and heated up the ExpandIT with a heatgun.
I love the texture! But I decided to add some more of the DesignIT to really show off that stencil. This time I blended silver and copper to make rosegold. 
And here is the finished product all ready for stitching!

 I hope you enjoyed this project! I'm certainly going to be exploring these materials further!


Friday 30 August 2019

Galaxy Background with Brushos

Hello and welcome back to the final post of our 'Paint, Paint, Paint!' month. 
Teresa here, and today I am sharing a card with a painted galaxy background.


I began by mixing some Brusho and water in my travel palette - I chose shades of blue, purple and red:


I took a piece of mixed media paper and sprayed a little water on to make the paint blend easily, then added the different colours, letting them run and mix on the paper. 


Once dry I splattered some white acrylic paint lightly over the 'sky' to create stars. 


I added more stars using the tip of a fine brush, allowing them to follow the pattern in the background.


Finally, I die cut the background into a circle and heat embossed a sentiment before adding to my card blank.


Thanks for stopping by today, I hope you are inspired to give this background technique a go, it's so much fun and really easy to do.


Wednesday 28 August 2019

Painted Wrap Jounal with Karen


I have made a little video of how I made my painted journal that I hope you will enjoy.


Here are the inside and outside cover photos that the video demonstrates me decorating with Eco acryic paint and DesignIt paste.


The Pewter DesignIt paste has such a gorgeous metallic sheen when it is dry, as well as good relief. I can predict that I am going to be using this a lot!

Karen

Monday 26 August 2019

Angelina Fibres on a canvas bag

Hi everyone!
I have been MIA for a while but I am back now... sorry for that :)

In August, I went to drop off some of my past projects with Colourcraft at their stand at Quilt Festival - I usually avoid going to busy conventions like this because I'm not a fan of crowds but I have to admit that this one was something else! Not only because of the amazing quilting work that I had the pleasure of seeing but also because I got to have a chat with the Colourcraft people and, most of all, get my hands on some brand new products. 

Let me tell you something... they are awesome!!!

Today, I will share with you my canvas pouch with some cool embellishments made using Angelica Fibers. Not that I am blowing my own trumpet but... I have the coolest fruit lunch bag in my department!


When I first saw the small package filled with shine, colourful fiber I was like... what do I do with this? But after a quick demo, my mind was fluttering with ideas!


Here goes:
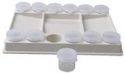
Choose your stamps, black ink (it's better if it's pretty wet) and your fibres. set your iron on medium heat (Be careful not to melt your stamp with too high setting!!!) and have baking paper ready. Ink the stamp generously and arrange fibres so that they completely cover the design. Cover it with a sheet of baking parchment and iron over until you see the stamp design come through the fabric. Remove the baking parchment and delicately remove the fibres - now melted into a sheet - from the stamp. The result should be as the last pic above shows - the design stamped onto the luminous rainbowy fabric.


Repeat the process for all the stamps you want to use in your project.


Once all your designs are ready, cut them neatly out ready for assemble. 
Do not dispose of the leftover fibres - you can use them next time - no waste!!!


You can finish your project here by attaching the elements to your bag. I used spray fabric glue to do it (Crafter's Companion Stick and Stay for fabric is perfect for that).

Or you can do what I did and create a colourful background for the elements.


To do that, I outlined the main element on the bag to know where it would be placed once finished.
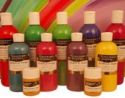
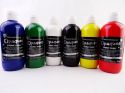
I then chose a flowery stencil and with plenty of colourful Opaque Fabric Paints, I added the flower wall over the bag.


Once the paint was completely dry, I attached the fibre elements onto the bag.


Because I wanted to add some dimension to the elements, I attached the butterflies only at their centre so that the wings were sticking out when the bag is filled with my apples and oranges.


The pouch is really fun and so far, everyone who has seen it, asked where I got it from...
I'm sure it's the rainbow sparkles that do it!

See ya next time!


Warning: getimagesize(include/images/thumbnails/125/39486): failed to open stream: No such file or directory in /var/www/vhosts/smouwen.nl/thumblinky.nl/preview.php on line 85

Warning: getimagesize(include/images/thumbnails/125/39487): failed to open stream: No such file or directory in /var/www/vhosts/smouwen.nl/thumblinky.nl/preview.php on line 85

Warning: getimagesize(include/images/thumbnails/125/39488): failed to open stream: No such file or directory in /var/www/vhosts/smouwen.nl/thumblinky.nl/preview.php on line 85

Warning: getimagesize(include/images/thumbnails/125/39262): failed to open stream: No such file or directory in /var/www/vhosts/smouwen.nl/thumblinky.nl/preview.php on line 85


Saturday 24 August 2019

A little bit of paint and a lot of fun

I just love the metallic paints. They shimmer and enable you to create a depth and texture which is fabulous.  I particularly like the way this 'wall' has turned out. Hope that you will have a try!


I cut a tag from a piece of white 300gsm cardstock to create a good sized tag and I used a piece of sea sponge and all four of these colours whilst painting.

Using a 'brick' stencil, I picked up a little of the first colour - copper - onto my sponge.  I dabbed it off onto a scrap piece of paper as I didn't want it to 'leak' through the stencil which it can easily do. The trick here is to build up the colour gradually.  That way, you will end up with a nice clean image on the other side.  The paint dries very quickly, so each colour can be layered on top of the previous one almost straight away. This is so much fun as there is no right or wrong way to do it! And if you don't like a particular 'brick' you can just dab some more paint over it with different colour.  Remember also, that each brick can contain several different colours.


This is what my 'wall' looked like when I was finished. It doesn't matter that the bricks aren't exactly square; after all, real bricks change as they age. You can see the shine from the metallic paint here.


The next thing that I did was to stamp the image with Versafine onyx black ink.  I then used a very fine paintbrush to paint in small parts of his wings with some gold paint.  I also used a charcoal pencil around the edge of the whole image which I 'smudged' with a paper pencil.  This gives the impression that the image is sitting 'on top' of the 'wall'.


To add extra interest I used a blending sponge and some onyx black ink through a stencil. As versafine ink is not permanent until heat set, I gave it a few minutes blast with a heat gun.


I punched a hole in the top of the tag and threaded some soft ribbon through it.  I hope you like it and that you will give it a try.  The paints are really fabulous. :)


Related Posts Plugin for WordPress, Blogger...