Wednesday 29 April 2020

We're All Mad Here Journal Page with Suzi

Good Day All, Today I'd like to share with you an Art Journal Page I've created featuring Brusho Crystal Colour Powders, Koh-I-Noor Polycolour Pencils and some wonderful stamps.

The first thing I did was to take a page out of my A4 Art Journal, then using the Bubble Wrap Texture stamp from Crafty Roo Designs along with clear ink and white embossing powder I add texture to the top and bottom of my page.

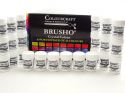
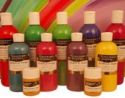
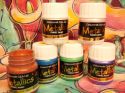
Next it was time to add some colour to my page,  so I sprinkled the following colours of Brusho Crystal Colour Powders across the page in strips starting at the top with Ultramarine, Turquoise, Sea Green and finally Leaf Green at the bottom.

Once dry I used the Sketch Lines Texture stamp from Crafty Roo Designs and Green Permanent Ink to add lots of lines to the bottom of the page to give the impression of grass.


I then added Sketch Lines in Blue Permanent Ink to the top of the page to enhance the sky.


The Next step was to stamp my flowers to create my garden, I used a selection of Funky Flower stamps from Crafty Roo Designs.


To colour my flowers I created patterned papers with Brushos in shades of Blue, Purple and Orange, I then stamped my flowers onto them and cut them out ready to layer onto my journal page.


To colour the leaves I created a patterned paper with Brushos in shades of Green, stamped the leaves and then cut them out.


Before sticking the flowers and leaves down I decided to add some more texture behind them using the Cluster Texture stamp from Crafty Roo Designs.  Once I'd stuck the flowers and leaves down I added Blue inks to define the stems and flowers and edged the page with the same ink.  

I then added shading to the flowers and leaves with Koh-I-Noor Polycolor Pencils.


.I then decided to add some extra elements to my page, namely some Butterflies from Crafty Roo Designs, and Anya, Ian and Cat stamps from The Greeting Farm.

To finish the page I stamped my sentiment onto some leftover papers, cut the words out and edged with blue ink before sticking them to the page.  For final details I used a white pen to add highlights.


Here's a few closeups to show the details;


I had great fun creating this page, I love Alice in Wonderland and it's quite a while since I created anything inspired by it.  I love how the little characters make the flowers look really big and magical.
We are living in crazy times at the moment, so it's good to believe in a fantasy world were everything is beautiful and magical.  Hopefully our world will stop being quite so crazy soon, but in the meantime, lets all stay safe and look after each other.

Thanks for visiting with us today,
Bye for now
Suzi
xxx

Monday 27 April 2020

PL Page with Brusho's and Aztec Paints

Hello Colourcraft friends.  How are you holding up in these strange times.  Some days the surreality of it all is just overwhelming.  April has a lot of significant dates for me so I have decided to document a few of them.  


I made a mini album page


I used black bazzill 12 x 12 inch sheet and Green, Blue and Silver Aztec paints and had a splat fest!!    Looks quite galactic!!!


I filled all the page pockets with my splatty background and then added that particularly fetching picture of myself.  I coloured a piece of card with green brushos and added some gold Aztec paint smears.  I die cut the leaves and added some pen details.  The flower was stamped and embossed and I added some brusho sprinkles.  I used a typewriter for the date and journaling.  I added a shrink plastic Poodle on my jacket cos I am obviously having a poodle sort of day!!!  Poodle stamp by Rubber Dance, flower stamp by Uniko.

Thanks for dropping by.  Keep safe, stay well.  HUGZ

Saturday 25 April 2020

Angelina Dragonflies - Garden Mandala part 2

Last time I talked about making the butterflies in my mandala quilt- this time I'm going to show you how I made the dragonflies!
I started with the wings.
First I chose some beautiful Angelina films and fibers- making sure to crinkle the film to get the best effect.
I added a very thin layer of the fibers between two layers of the crinkled film- ironed between parchment paper- a VERY QUICK pass with the iron gets these to fuse together. If you iron for too long of a time, the fibers can change color.  I made two different colors and then cut these into wings.
For the bodies I started by sprinkling some Brusho and SprinkleIT onto fusible web, adding water and letting it dry.

By the way, the paper backing makes a great piece for collage and/or art journals!

I then peeled off the fusible and made a layer of fabric, the painted fusible and a transfer foil in a shimmery and sheer rainbow color- ironed those together to make the base of my dragonfly bodies.

I backed this with more fusible web and then cut and applied my dragonfly bodies with a mini iron (being careful not to melt the wings!). Make sure to protect your iron from the front of your foil/fusible/fabric sandwch as well! 
I then added beads for eyes and voila! Bling bling dragonflies! 

I added some color to the leaves in the middle- now it's just to add ants, ladybugs and maybe some flowers in the corners.
See you next time! Stay healthy.


Friday 24 April 2020

Mixed Media Artist Trading Cards by Teresa

Hello and welcome back to another mixed media project. Today I have created some shimmery Artist Trading Cards.


I began by colouring some Tissuetex with Brusho Sprays:


Once dry, crumple and attach to some MDF Artist Trading Cards using matt medium. Trim away any excess:


Next I painted some MDF 'honeycomb' using metallic paints:


I painted some chipboard houses with white acrylic paint:


Then I used a sponge to apply gold metallic paint, creating a mottled effect:


Once all the components were dry, I glued them together and added a sentiment sticker:


I finished by adding some gilding wax around the edges:


Thanks so much for stopping by today, I hope you enjoyed this walk through!


Wednesday 22 April 2020

Springtime mixed media canvas by Karen


The starting point for this project is a large A3 size art panel and an A4 printed tissue paper to which is added lots of ColourCraft goodness. I divided the tissue paper up by painting water lines where I wanted it to tear: This makes rough lines that disappear more easily in to the background. I used Collage Gel to adhere these pieces to the panel. When it was dry, I stenciled over this with White Relief paste.

I also added transparent Design-It Relief Paste over the bee wings and mixed in some Yellow Brusho Crystals to the paste to colour the lower body while giving it some gloss and 3D relief. I did the same on a stamped bee to add later.

Once the paste was dry, I sprayed the panel with Brusho Acrylic Mist Spray in Sea Green and Turquoise, plus Gold Acrylic Shimmer Spray over the stenciled flower heads.

A little close up of how the bee came out with the Relief Paste resisting the colour spray:

As the tissue paper soaked up more colour, I softened the difference between the paper and the canvas art panel by stamping some flowers and background stamps across these and filling in gaps. I stamped some text on to white paper and then sponged some Gold Brusho Shimmer Spray on to it so it wasn't quite so stark against the background and added these with 3D foam.

Finally I added my third bee on some more 3D foam:

The text encourages us to take time, time to laugh, to cry, to love, to dream and simply to live.

Thank you for spending time here today.
Karen
x
Related Posts Plugin for WordPress, Blogger...