Showing posts with label Aztec Metallic Lustre Paint. Show all posts

Monday, 13 April 2020

Christmas Canvas by Gail

Hello Colourcraft friends.  Gail here today.  Last year Colourcraft had an article in the December Craft Stamper magazine.  I wanted to share the canvas I made for this feature and talk a bit about how I made it.  


I started with a small 10 x 10cm Canvas board.  I painted half with Blue Aztec Paint and half with Green Aztec paint, working on the diagonal.  The I stamped the trees across the canvas and embossed with green embossing powder.  I painted a piece of paper with Gold Aztec paint, stamped the deer and embossed with black embossing powder.  I fussy cut the deer and glued it to the canvas.  Both stamps are by Unity Stamp Co.


I painted some lace with Gold Aztec paint and glued it around the edge of the canvas.  


I added some more of the painted lace as a hanger and also added some bells.  I used embroidery thread to attach the bells and have also coloured this with Gold Aztec paint.  Perfect colour co-ordination.  


Thanks for dropping by.  Hugz

Wednesday, 18 March 2020

Thankful Animals Index Cards with Suzi

Good Day All, Today I'd like to share with you my latest creations using some of the fabulous products available in the ColourCraft store; For Today's projects I've used Black & Natural ExpandIT Paste, Brusho Crystal Colour Powders, Metallic Lustre Paint and Eco Acrylic Paint.

The first thing I did was to Die Cut some Elements for my Index Cards, including a Geo Butterfly, Geo Rabbit and A sentiment block.  I used a Rainbow Mirri Card for these elements;


I also used a die that resembles sequin waste, I used this along with some Brusho Crystal Colour Powders in Gamboge, Lime Green and Alizarin Crimson to create a patterned paper.


I sprinkled the same Brusho Crystal Powders through the sentiment block;

I created a couple of sheets of paper using Brusho Crystal Colour Powders in Gamboge, Orange and Dark Brown to go behind some of my die cut animals.

Once all the papers were dry, I adhered my die cuts to the papers and then fussy cut around the die cute to create my focal images.


I then had a rummage in my stash and found some Index Cards onto which I'd added ExpandIt Paste and heat set it.  One background was made using  Black ExpandIt Paste with a thin coat of Copper Lustre Paint over it.  One background was made using Natural ExpandIt Paste mixed with Cadmium Yellow Eco Acrylic Paint.  The other two backgrounds were created with Natural ExpandIt Paste which I'd then covered with different shades of Green Eco Acrylic Paint.

I then set about adding my elements to the Index Cards with the addition of some staples, decorative die cuts and dew drop embellishments.

Here's my finished Index Cards;


I had great fun creating these Index Cards, I love how the Rainbow Mirri Card catches the light and contrasts the Brusho backgrounds I created for the die cuts. I love the texture the ExpandIt Paste creates, I've still got a couple of Index Cards in my stash that have ExpandIt backgrounds but no focal points yet, they are a great thing to keep for future projects.

I hope you've enjoyed reading how I created my Index Cards; Index Cards are a wonderful thing to craft on, they are a lovely size, so perfect for experimenting and trying new products and techniques.
That's all from me for today, I hope you have some time to relax and craft
Bye for now
Suzi
xxx

Wednesday, 29 January 2020

Painted Tyvek Journal Cover by Karen


I have a number of kraft notebooks and I wanted to decorate one for a travel trip but felt the cover was a bit thin to take much multi-media treatment. Tyvek on the other hand is virtually indestructible unless subject to heat so I cut a piece of Tyvek larger than my cover and set about decorating that.

I had a piece of ribbon that I wanted to use as a closure so that guided my paint colour choices: Turquoise, Magenta, Phthalo Green and Yellow Eco Acrylic Paints plus Copper Eco Aztec Metallic Paint.

Using a paint knife, I dabbed on each colour in turn and then used a brayer to spread out each colour fairly randomly. It is important to leave plenty of the layer below visible to have lots of depth and the different colours visible at the end. When applied in thin layers the paints are semi-translucent so layering them also creates different tones than just the colours applied. No need to worry about creases in the Tyvek, I even created some of my own when brayering over it. They disappear when it is glued down and smoothed out.
 The four Eco Acrylic Paints I applied with this method resulted in this effect:

And then adding the Copper Aztec Metallic Paint added more depth and a fabulous metallic sheen:

Copper Design-It paste was added through a stencil and left to dry. This gave lots of 3D texture as well as more metallic sheen. (Sorry for the long shadows: Some late afternoon sun after a rainy day!)

Once the paste was dry I glued the Tyvek on to the notebook with Flexiglue spread out thinly with a paint knife, starting with the outside cover and then cutting the corners at an angle and turning and gluing the edges. However, I did not glue about a centimeter along the spine to allow the Tyvek to flex as the book was opened and closed: This might have been unnecessary caution as the Tyvek seems very flexible but better safe than sorry!

I also used Flexiglue to adhere the ribbon.

I covered the inner covers with printed paper to hide the edges of the Tyvek.

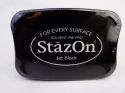
Finally I stamped the word 'jounal' on to the cover with Stazon permanent ink and then doodled a bit with some black and white markers. I didn't want to add any embellishments that might rip off when this is being used and being slid in and out of a bag but I know the Tyvek is going to offer good protection. I love the colours, the linen-like look of the Tyvek's texture and the fabulous copper paste!

Thank for stopping by! I hope you enjoyed today's project.
Karen (a proud journal owner)
x

Materials:  Flexiglue

Wednesday, 15 January 2020

Decorated Wooden Heart by Karen


For our 'Love is in the Air' theme this month, I have decorated a wooden heart I bought a little while ago. I recorded the process and edited it to a short video:
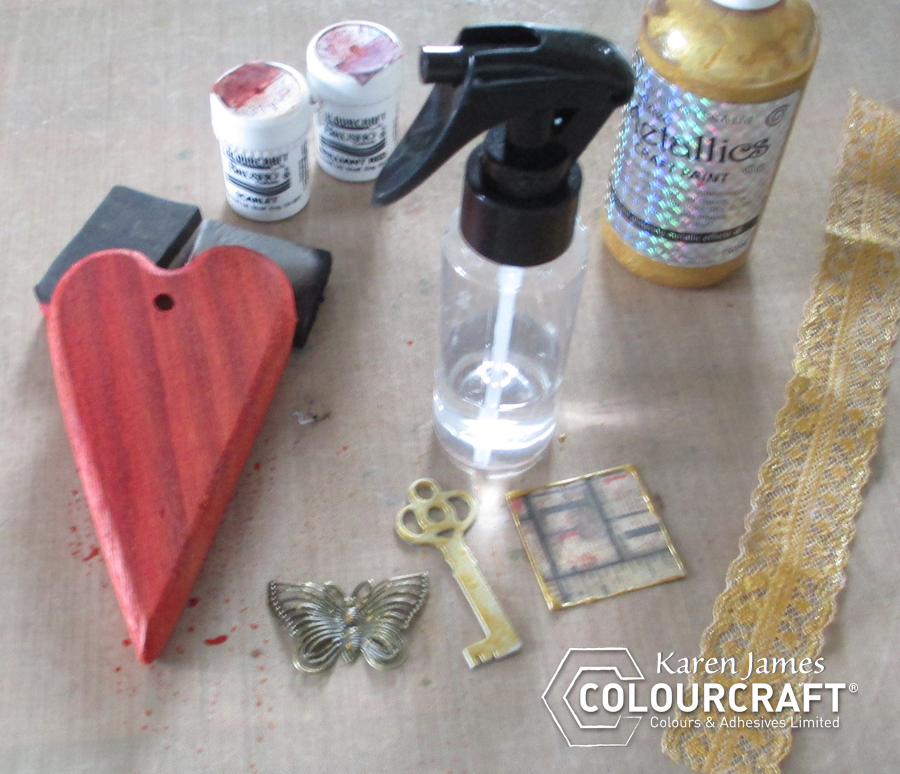


I love using Brusho as a stain on bare wood: It colours beautifully and brings out the grain pattern. This was my first treatment for the base. I mixed the Brusho with some water and brushed it on to the heart (the sponges are only there to prop it up while it dried).

Almost everything else I'd gathered to (maybe) use was painted with Eco Acrylic Gold paint and then all left to dry. I love mixed textures so in addition to the wooden heart, I'd gathered a chipboard key, some old lace, a square of scrapbooking paper and a metal butterfly. In the photo below you can see a duplicate bare wooden heart and the ribbon before they were decorated so you can see there is quite a difference before and after!


The painted ribbon was glued on to the heart and, while that dried, the chipboard key was 'aged' round the edges with Eco Acrylic Black. I also dry-brushed what was left of the paint round the heart to give it more depth and focus the eye on the surface.

Pewter Design-It paste was stenciled on to the heart and left to dry before sticking everything in place with Flexi-glue. Some word stickers and a twine hanging were the finishing touches.


I have to admit I am quite fond of my little heart and just need to find a nice place to hang it now.

Thanks for reading
Karen
x


Related Posts Plugin for WordPress, Blogger...