Wednesday 31 October 2018

Halloween Slider Cards with Suzi

Good Day All, As it's Halloween today I decided to share a couple of Slider Cards I've created using Brusho Crystal Colour Powders and some Dies.  Here's what I did;


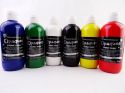
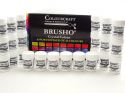
I used Watercolour Card to create these background sheets.  I sprayed the watercolour card  with water then add Brusho Crystal Colour Powders in Gamboge, Orange, Lime Green and Violet. I added the Lime Green and Violet then dried with my heat tool, before adding Gamboge and Orange and some more water.  This helps to stop the colours mixing too much and creating a brown, which I didn't want.  I omitted the Gamboge and Orange from the second sheet.

I then took a Black A6 card blank and added a layer of orange card, and created an Orange A6 card blank from same orange card and added a layer of black card.  These form the bases of my slider cards.


I then cut the Brusho backgrounds I'd created to fit onto my card bases.

Next I added my dies to my background and ran them through the die cutting machine.

The next stage was to add my die cuts to the card base.  I placed the main piece over the card base and carefully inserted the piece of card from the slider cut, this gives the illusion of your slider image floating, as you have a seam free background behind it.  I cut two circles of card and sandwiched them together either side of the background, with a piece of foam pad in between to create my slider element.  Once I was happy that it slide well, I adhered the background piece to the card with more foam pads.

I then created my main slider element.  I cut a rough body shape from a scrap of the other Brusho background  I'd created and place a spooky face die onto and ran it through my die cutting machine.  Before adding it to my card I added a scrap of white paper behind the cut.  I coloured the pupils of the eyes and added some doodling around the whole body and die cut features.

Here's finished card with my spooky monster face on the slider.  I added the word 'Boo' with a paint pen.  Here's a picture of the face once it starts to move;
Here's the second card I created using the same process, with the second Brusho background i'd created and a different face die.


I had so much fun creating these cards, I love how the Brusho papers I created tie all the elements of the card together. Interactive cards are fun to create and play with, and you can get some great dies to make creating them really easy.

That's all from me for today
Happy Halloween
Bye for now
Suzi
xxx

Saturday 27 October 2018

Improvisational Screen Printing with Colourcraft Fabric Paint

The chill of Autumn is definitely in the air, which means I'm cooking more soups, stews etc. I thought I would warm up a bit by decorating some fabric to use for a soup bowl cozy. There are a ton of different patterns and ideas out there- the link here shows a super easy cozy- you put your bowl of whatever in it when you heat it in the microwave. Bowl and food get warm, the cozy does not!
Just make sure if this what you are going to make out of your fabric to use 100% cotton thread, fabric and batting. Polyester content can melt, wool can smell a bit off when warm.


I started off by covering my work surface with an old towel and an old sheet. I grabbed a blank silk screen, some snow flake charms, old lace and Colourcraft Opaque Fabric Paints in Turquoise, White and Navy.
I laid out the snowflakes and lace on my surface, which this time was cotton muslin.
Laid my blank screen on top and applied my colors randomly over the screen.
I then scraped the colors through the screen with an old credit card- letting them blend as I went along!
It turned out the snowflake charms were really too thick to give a good print so I flipped them over and screened extra color where I felt it needed it. In the image below you can see an initial print where I had covered the whole fabric with lace and some charms that still had color on them.

Really, it's all about just having fun, flipping things over that have paint on them to get a secondary print, until you get a print that you're happy with.
Then it's just to let it dry, iron it according to the directions to make it permanent, and you have an unique fabric to make your cozy or whatever else you feel for!


I hope you enjoyed this technique! See you soon!
Tamara


Friday 26 October 2018

Autumn Trees by Rebecca Yoxall


Hey everyone! 
Hope you are well on this fine Friday. I absolutely love the colour of Autumn trees and couldn't resist creating this Brusho painting.
Painting trees is so easy with Brusho, it lends itself perfectly for the wonderful copper, gold and scarlet leaf colours. 
Using a sheet of good quality watercolour paper I drew out the trunk and main branches of the tree on the right hand side and suggested at distant trees, a field and water in the foreground.
I also wanted to make sure to keep lots of light through the foliage so decided to use wax resist. I drew with a wax stick in scribbles through the tree and added some grasses in the foreground as well as down the left hand side of the tree trunk. These will show up in later pictures.


Using a spray bottle I gently covered the foliage area of the tree with water and began sprinkling the Brusho directly on the paper. I used Yellow, Yellow Ochre, Orange, Crimson and Purple. 
Just a small amount of each colour so that plenty of white paper can still be seen. 


I then made a diluted mixture of Yellow Ochre and Light Brown Brusho in a palette and using a small round brush I painted in the distant trees and the field in a smooth wash.
I used even more water to paint in the foreground and then once again sprinkled Brusho directly onto the wet area. I used Light Brown and Dark Brown.


Once the paper was dry I used Cobolt Blue to paint in the sky and the small pond area.
Only a small amount of Brusho is needed to create a soft gentle shade of blue.


I also painted another layer in the foreground. It is here you can now see the drawn wax lines for grasses.  
I mixed up Dark Brown Brusho on my palette with a little crimson and coasted the trunk of the tree continuing up to develop some of the larger branches. Whilst this wash was still damp I painted a yellow on the left side of the trunk to further enhance the effect of light. 


Smaller branches were added using a fine brush or rigger brush, placing them in between areas of foliage to create the impression of intertwining around the leaves.


Using the small brush to suggest at more grasses and seed heads at the base of the tree and along the bank finishes the composition.

I hope you've enjoyed my post this time and maybe it has inspired you to create an Autumnal landscape of your own.
See you next time
Bec

Wednesday 24 October 2018

Autumn wreath decoration by Karen

As it has been so dry lately we have actually got some rich autumn colours to celebrate this year so I'm drawn to recreating those and to bring them indoors with this project.


I started with 2 pieces of watercolour paper cut just narrow enough to fit through my die-cutting machine and selected gorgeous autumnal shades of Brusho crystal colours - Dark and Light Brown, Gamboge, Sandstone, Scarlet and Brilliant Red - along with Shimmer Bronze from the Brusho Acrylic Shimmer range. Then I tried a little experiment! The 'traditional' way to activate Brusho crystals is with water but I often use them mixed in other 'wet' products like gel medium so how do they react to being sprayed with the shimmer spray instead of water? Gorgeous! In the photo below the paper on the right was sprayed with water, the paper on the left was sprayed only with shimmer spray. It activated all the colours, there are no powder crystals remaining on the paper, and gave a beautiful shimmery colour over the whole paper. I could have sprayed more and made the colours diffuse similar to the paper on the right but I love the effect ththe spray gave: Definitely something I will be doing more of! Of course, I did give the paper on the right a little shimmer spray too: I couldn't resist!


The papers were then die-cut with lots of different leaf shapes. With a pile of shimmery but relatively pale leaves I knew I'd need a dark background to set them against. I took a wooden box, sprinkled in some Light and Dark Brusho crystals, sprayed them with water and spread out the colour. I also mixed the same colours with water on a palette and used this to stain the rest of the box, inside and out. 

I cut a circle of brown card to support the leaves that was slightly larger than the box and glued this where they touched.
I then set about gluing down the first layer of leaves ...


and building up the layers until the card couldn't be seen. If you only use enough glue to make sure the leaves are stuck, they keep a lot of volume to make the wreath look fuller.


When a few leaves fell in the middle of the box I decided to keep them as part of the decoration. I stuck these to the base of the box with different heights of 3D foam, using two thicknesses under some leaves. Finally I added a printed banner that I had sprayed with Bronze Shimmer spray and sprinkled a tiny amount of Brusho crystals on to it so that it blended with the rest of the decoration.


'Autumn is a second Spring where each leaf is a flower' Albert Camus.

I love being able to change out decorations to reflect the changing seasons so I am thrilled with this new addition to my collection.

Monday 22 October 2018

Quick Halloween Pumpkins with Ewelina

Hey everyone!
Are you Halloween ready?
I certainly am not and last weekend was for catching up on some holiday decor.
I went to a local Pick Your Own Farm and gathered some small-ish pumpkins.
And, since I no longer had an excuse, it was time to do some crafty decorating...


I started by painting all my pumpkins with white gesso and letting it completely dry.
This was the base for my Brusho fun.


First pumpkin was sprinkled with Copper SprinkleIt and Burnt Sienna Brusho. 
I was misting the top with water and adding the pigments as I went until I achieved the look I wanted.


The next one was Crimson and Brilliant Red plus Pearl SprinkleIt.


Here you can see Leaf Green and Sandstone plus Iridescent Goes SprinkleIt.


And finally Terracotta and Yellow Ochre plus Iridescent Flash SprinkleIt.


That's it! The pumpkins are ready - make sure you let the paint dry thoroughly before handling them otherwise you'll end up smudging the drips as well as dyeing your hands.


After admiring the finished pumpkins for a moment, I decided to add some flowers and chipboard spiders to one of them and give it to a friend of mine to put on her doorstep - she loved it!


Happy Halloween!!!


Related Posts Plugin for WordPress, Blogger...