
Gelli Print flowers with Love

.
I have made this little card with some gel plate pages and die cuts.
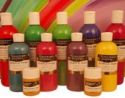
Firstly, I placed a few blobs of magenta eco-acrylic onto the gelli plate brayered it over the whole plate to ensure and even coverage. I then laid a stencil over it. I chose a stencil with an overall pattern with hearts and flowers on it.
I used a piece of copy paper to pull my print. I used copy paper instead of my usual thicker card because I didn't want the final flowers to be delicate.


I repeated the process several times with varying shades of magenta and white (which I mixed together) until I had a selection of prints. For some prints, I used the 'negative' and for others I used the 'positive' part of the print.


I then selected a fabulous flower die and die cut several 'layers' of petals from the different prints.

I layered them on top of each other and poked a hole through the middle and secured the flowers with a brad. For one of the flowers, I used glue and sprinkled a number of beads in the centre.


I created a double frame for mounting using co-ordinating coloured card.

Finally, I added a Happy Birthday sentiment stamp onto one of the pieces of gelli printed paper. Simple, feminine and an easy card.

 |  |

No comments:
Post a Comment