Showing posts with label mini quilt. Show all posts

Saturday, 11 May 2019

Mixed Media Mini Quilts

Hello!
Recently I started to participate in the #The100dayproject - I will be writing more about that at a later date, but the cool thing is that I got involved with a small group of textile artists and some of us have exchanged things and this project was inspired by a couple of them!


It all started with an exchange! I got a couple of lovely dyed fabrics by Sue from Sue Dreams in Colour and added one of my own to the mix. 
I then wove these together and stenciled it using a small mylar stencil (flower frenzy) and Pastel Pearl Fabric Paint.

While this dried, I decided to use a technique that Fran Harkes from McAnaraks had been playing with- that is melting Tyvek over rubber stamps to get interesting textures. 
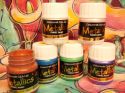
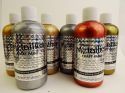
First I painted my Tyvek with Aztec Eco Metallic paints.

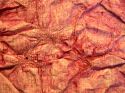
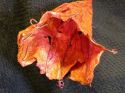
I had recently ordered small grungy butterflies from Rubber Dance Stamps. So I inked up the plate, laid my tyvek painted side down over the stamp, laid a piece of parchment paper on top, and pressed with a warm iron. Tyvek shrinks with heat- but gets an impression of the stamp using this technique.
I carefully clipped out a couple of them and sewed them fast to my mini quilt.
There is so much interesting texture using these stamps and this technique!
I also had bought the Round in Circles stamp set- this time I pressed my tyvek on the stamp without ink. I also used the same stamp to add more texture to a new mini quilt.
Here is the result so far.

I hope you enjoyed this post! See you soon.
-Tamara


Saturday, 16 February 2019

Spring Mini Quilt with Paste Paper effects

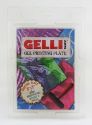
For quite some time I've been wanting to find a way to imitate traditional paste paper effects onto fabric. Well this week I got ahold of some Gelli printing tools and inspiration ran rampant!

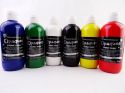
First I got out my opaque fabric paints and one of my Gelli plates. I cut a bunch of small pieces of calico fabric (muslin) and got started.


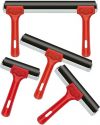
I added some color to the surface of the Gelli plate, rolled it out with a rubber roller, and then used one of the Gelli printing tools to mark a design.


I then placed a piece of fabric over the top and gently patted with my hand so the color transferred to the surface of the fabric. You can also use a clean roller on the back of the fabric. The above picture is the result!

I then continued to play with color, tools, overprinting and got a nice batch of very pretty fabrics!!
I decided to use most of them to make a mini quilt.

First I drew a simple flower design and traced it onto 4 pieces of fusible web. I fused those to the backs of 4 of my fabric pieces and cut out and swapped around the fabrics.
I then fused these onto another piece of fabric.
I took more of my fabric pieces, paired them up, cut them into strips and wove them into new blocks.

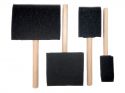
Finally I stamped an image that I got from Rubber Dance Art Stamps and made that my central block. I used Opaque Navy fabric paint dabbed on with a foam brush.

So then I set all the blocks together into a mini quilt! Now I just need to sew it all.
Happy Spring! See you next month for some Easter inspired projects.


Related Posts Plugin for WordPress, Blogger...