Showing posts with label brusho shimmer spray. Show all posts

Wednesday, 25 September 2019

'Happy' tag with Karen


I have used this month's theme of autumn colours to create a tag that I can hang on the wall. The photo of this lady just makes me smile everytime I look at it so I wanted to be able to see it often!


I started by colouring a sheet of waterproof paper using acrylic inks in autmnal colours. These were dropped on to the sheet when it had already been sprayed with water so the colours run and pooled together for soft shades of colour. I colour-matched some ribbon by dragging it through these colours while the sheet was still wet.

At this stage I have to apologise for the lack of photos: I took lots but, when I came to look at them, all I had was a bunch of error messages: The card had failed so this is all I have of the materials gathered ready to create the tag! This included a rectangle of Lutradur fabric.

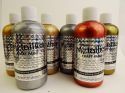
The wooden tag was prepared with a coating of clear gesso and then layered with scraps of book paper. For more layers and texture, I stamped the tag with a text stamp and a mix of white acrylic paint with the tiniest touch of yellow mixed in to make a light cream colour. I particularly wanted to point out the rectangle of Lutradur which I heated round the edges to get a lovely wrinkled and lacy effect. I also sprayed it lightly with Bronze Shimmer Spray.

The coloured sheet of paper, also lightly sprayed with Bronze Shimmer Spray, was die-cut in to flowers and these were layered with some sequins to embellish the tag.

I hope this tag has made you smile. Thanks for reading.
Karen

Materials:
Acrylic Inks
Eco acrylic paints

Wednesday, 5 December 2018

Winter tag decoration and card by Karen

A while back when I coloured some sheets of watercolour paper for this autumn project, I also coloured some paper ready to celebate winter's colours: Lots of Brusho Crystal Colours in blues and some grey with Shimmer Spray in Shimmer Silver and some SprinkleIT in Iridescent Flash for lots of sparkle as the paper catches the light.


I used one part to create a quick shaker card with some stamping and die-cut silver paper:


and I used another part to create a decoration to hang on a door (or the wall).


The tag was made by gluing the paper down well on to a large heavy-weight tag (Tim Holtz etcetera), sanding round the edges and then using Soft Relief Texture Paste in Gloss White to create some snowy features. I die-cut some snowflakes and sprinkled these and the paste with SprinkleIT Iridescent Violet to add even more sparkle!

Then, with some silvery thread and other embellishements glued on and some ribbon to hang the tag up, the project was finished!


I'm looking forward to using more of the paper left over for more cards and smaller tags. Getting lots of paper coloured and dried in advance is a great way to save time at this busy time of the year!

ColourCraft SprinkleIT can be <found here> and the other ColourCraft items are below.

Wednesday, 24 October 2018

Autumn wreath decoration by Karen

As it has been so dry lately we have actually got some rich autumn colours to celebrate this year so I'm drawn to recreating those and to bring them indoors with this project.


I started with 2 pieces of watercolour paper cut just narrow enough to fit through my die-cutting machine and selected gorgeous autumnal shades of Brusho crystal colours - Dark and Light Brown, Gamboge, Sandstone, Scarlet and Brilliant Red - along with Shimmer Bronze from the Brusho Acrylic Shimmer range. Then I tried a little experiment! The 'traditional' way to activate Brusho crystals is with water but I often use them mixed in other 'wet' products like gel medium so how do they react to being sprayed with the shimmer spray instead of water? Gorgeous! In the photo below the paper on the right was sprayed with water, the paper on the left was sprayed only with shimmer spray. It activated all the colours, there are no powder crystals remaining on the paper, and gave a beautiful shimmery colour over the whole paper. I could have sprayed more and made the colours diffuse similar to the paper on the right but I love the effect ththe spray gave: Definitely something I will be doing more of! Of course, I did give the paper on the right a little shimmer spray too: I couldn't resist!


The papers were then die-cut with lots of different leaf shapes. With a pile of shimmery but relatively pale leaves I knew I'd need a dark background to set them against. I took a wooden box, sprinkled in some Light and Dark Brusho crystals, sprayed them with water and spread out the colour. I also mixed the same colours with water on a palette and used this to stain the rest of the box, inside and out. 

I cut a circle of brown card to support the leaves that was slightly larger than the box and glued this where they touched.
I then set about gluing down the first layer of leaves ...


and building up the layers until the card couldn't be seen. If you only use enough glue to make sure the leaves are stuck, they keep a lot of volume to make the wreath look fuller.


When a few leaves fell in the middle of the box I decided to keep them as part of the decoration. I stuck these to the base of the box with different heights of 3D foam, using two thicknesses under some leaves. Finally I added a printed banner that I had sprayed with Bronze Shimmer spray and sprinkled a tiny amount of Brusho crystals on to it so that it blended with the rest of the decoration.


'Autumn is a second Spring where each leaf is a flower' Albert Camus.

I love being able to change out decorations to reflect the changing seasons so I am thrilled with this new addition to my collection.

Friday, 18 May 2018

Create an Art Piece from Card Board

Hi there!

Susanne writing today and I'd like to share an artsy piece to hang onto your wall or use as a self standing object to decorate a shelf.
My base are three pieces of card board and Brusho coloured copy paper.


Here are the step by step instructions:

I cut the card board and prepared the copy paper. I just wet the it, added the Brushos and crinkled it. After it was dry I ironed it.


I cut strips from the copy paper and adhered them with gel medium to the card board pieces.

I cut off the excess after everything was dry.


I added some stamping and more colour with the Brusho Sprays by using a brush.


Finally I added some shimmer with the Aztec Metallic paint. I added it here and there with my fingers.


To finish the piece up, I glued it together and added three butterflies. These are stamps from Rubber Dance. I embossed them with white powder on black cardstock.


Thank you for stopping by today!
xx Susanne


Supplies:


Related Posts Plugin for WordPress, Blogger...