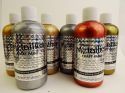
Showing posts with label brusho on wood. Show all posts

Wednesday, 15 January 2020

Decorated Wooden Heart by Karen


For our 'Love is in the Air' theme this month, I have decorated a wooden heart I bought a little while ago. I recorded the process and edited it to a short video:


I love using Brusho as a stain on bare wood: It colours beautifully and brings out the grain pattern. This was my first treatment for the base. I mixed the Brusho with some water and brushed it on to the heart (the sponges are only there to prop it up while it dried).
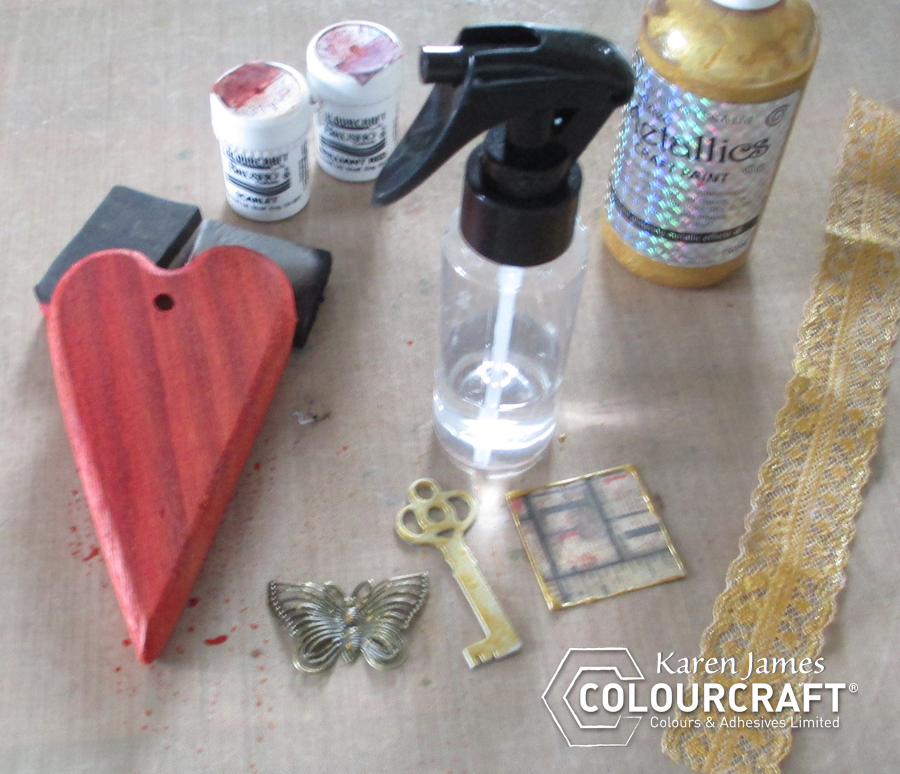
Almost everything else I'd gathered to (maybe) use was painted with Eco Acrylic Gold paint and then all left to dry. I love mixed textures so in addition to the wooden heart, I'd gathered a chipboard key, some old lace, a square of scrapbooking paper and a metal butterfly. In the photo below you can see a duplicate bare wooden heart and the ribbon before they were decorated so you can see there is quite a difference before and after!


The painted ribbon was glued on to the heart and, while that dried, the chipboard key was 'aged' round the edges with Eco Acrylic Black. I also dry-brushed what was left of the paint round the heart to give it more depth and focus the eye on the surface.

Pewter Design-It paste was stenciled on to the heart and left to dry before sticking everything in place with Flexi-glue. Some word stickers and a twine hanging were the finishing touches.


I have to admit I am quite fond of my little heart and just need to find a nice place to hang it now.

Thanks for reading
Karen
x


Wednesday, 8 May 2019

Mixed Media Spring Tag by Karen

Spring is fully underway here and I am seeing birds nesting everywhere at the moment so that was my inspiration for today's project.

I started off with a wood support and applied transparent Design-It paste (previously Soft Form Paste) through a tree stencil. Now spot the 'deliberate' mistake! I forgot to mix in my brusho powder before applying the paste! Happy accident: Time to experiment by adding the powder on top and seeing how it would react. I helped it move a little by spraying water over the top and then left it to dry and for the paste to turn transparent. It resulted in a lovely charred bark effect which reminded me of pyrography: That could be handy for a later project.

While the paste was drying I applied Leaf Green and Light Brown Brusho Crystal Colours to one watercolour paper for the nest and mostly Cobalt Blue with a touch of Turquoise and Prussian blue to a smaller piece for the bird. I used plenty of water and tilted it back and forth to make the colour cover the paper and then left these to dry.

As I thought about the composition and decided to add some leaves in to the background, I coloured another small paper with Sea Green and Leaf Green Brusho Crystal Colours and added more Leaf Green and some Sunburst Yellow to one side of the larger paper. You can these below along with the texture and shine created by the Design-It paste.

Making sure to mix in the Light Brown Brusho Colour first, I continued the stencilling to the bottom of the tag and added paste across the reinforcer and round the edges.

I stamped and cut out my images using a text stamp for the nest. I repeated this to cut the strips of words to glue just by the edges in all directions like twigs protruding from the nest. You can see how this was done below.
After highlights were added with a white gel pen and an eye was created with a dot of dimensional enamel I think my birdie looks quite settled in her nest.

I hope you like this springtime creation. Thanks for stopping by.
Karen


Wednesday, 27 March 2019

Sea themed door hanger with Karen


This project was started with a wooden support and a handful of shells. It was actually something I started a while ago: The hanger was stencilled and covered with gesso and the shells were glued on but then I stalled not sure where I wanted to go next but when I unearthed it again I knew exactly what I wanted to do: Use EXpandIT!

Firstly, to give some background colour, I sprayed the piece with Brusho Shimmer Sprays in Turquoise and Copper. I let this dry a little and then applied another coat of copper for more contrast in the lower part of the hanger.

Once these were dry, I stencilled on natural colour EXpandIT through a seaweed stencil. When you heat it, it expands and creates a fabulous organic texture. You can heat EXpandIT when it is still wet or when it is dry and you can colour it before or after heating it.

Being impatient, I heated straight away: Great fun!

I then used a brush to apply Copper Aztec Metallic paint to the EXpandIT and also to highlight the shells.

Now I needed a focal point so I die-cut a seahorse and patted DesignIT (previously Soft Form) paste in Shimmering Turquoise over him.

Once everything was dry, I added the seahorse and a bit of text 'by the sea' on 3D foam and added a dimensional dot to give the seahorse an eye, which always seems to bring them to life.

Being brought up in a big city but living near the sea now, I love beachcombing and collecting shells. I have enjoyed using some on this project and adding more texture with the EXpandIT and DesignIT pastes. Hope you like it.
Thanks for stopping by.
Karen x


Saturday, 6 October 2018

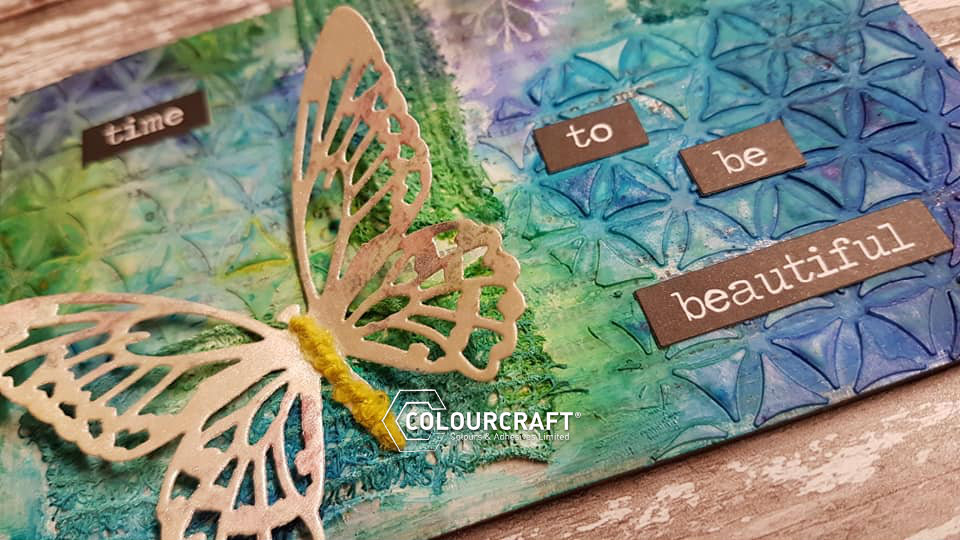
Time to be Beautiful

Hello Everyone!

Happy October to you all... our theme here on the blog for October is "chill in the air" and there certainly is quite a change happening already, we have had a couple of frosty mornings already!

So with this in mind, I chose cool blues/green and violet for my project today which is an altered wooden postcard.


Step 1

take some book pages and a wooden postcard and work out placement for the torn book pages, then adhere to the postcard with matte medium.


Step 2

Blend in the edges of the book pages with some white acrylic paint


Step 3

Add some old fabric bandage pieces to the postcard and adhere with matte medium and dry with a heat tool.   Apply soft form relief paste through a stencil and heat set.


Step 4

Apply some water to the surface of the postcard and sprinkle Brusho, I chose Turquoise, Lime Green and Violet, heat dry in between spraying and sprinkling until you get a background you are happy with.


Step 6

Take butterfly and press into versamark ink then dust with pearl SprinkleIT and adhere to postcard


Step 7

I took a small branch stamp and tapped this on versamark ink and stamped direct onto the postcard, then dusted over some SprinkleIT to tie the piece back to the butterfly.


Adhere the butterfly and text stickers to the project and we are done


you can pop this in an envelope and send through the mail as the butterfly will lay flat and there is very little bulk to it.

Thanks for joining us today on the blog and have a great weekend

Sarah x


Warning: getimagesize(include/images/thumbnails/125/36618): failed to open stream: No such file or directory in /var/www/vhosts/smouwen.nl/thumblinky.nl/preview.php on line 85
Related Posts Plugin for WordPress, Blogger...