Showing posts with label tissuetex. Show all posts

Saturday, 7 March 2020

Easter bags of fun


If you are anything like me, I get carried away at Easter time and buy too much chocolate :)  So this year I have decided to make individual bags for the children and pop  mini eggs into them.

This idea can just as easily be used for birthday treats or for Christmas gift bags.


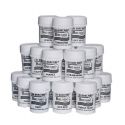
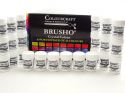
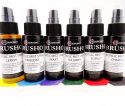
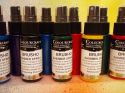
Firstly, I got out my brushos - ooh - look I found these fabulous stickers for them - one for each colour. I also stick a push pin in the top as this enables me to control the amount of powder that I sprinkle out at a time. For this project, I used lemon and lime green coloured brusho powder.


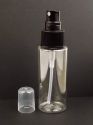
Firstly I placed a stencil over a plain piece of white card and then sprinkled a tiny bit of each colour on top of the stencil.  I used a fine spray bottle - the Colourcraft one works brilliantly - to spritz a tiny bit of water which activated the brusho crystals. I removed the stencil and dried the card with a heat gun.


These tiny bags I found quite inexpensively in my local craft store and I cut the card to fit the front panel. Before adhering the card to the bag,  I stamped some images with black ink.


I then took a 60cm piece of tissutex and sprinkled some lemon brusho crystals onto it. I spritzed them with water and this created a lovely all over colour.  I dried this with a heat gun. 

.


I popped the dry tissuetex into the bag with some excess showing for decoration. 
Voila - all ready for Easter eggs when the time is right.


Saturday, 22 February 2020

An upcycled brusho bangle


I use a lot of stencil tape in my craft room and the last time that I emptied a tape roll, I wondered how I could utilise it. Voila - an idea popped into my head. A bangle using one of my fav products of the moment - brushos.

Firstly, I sprinkled some lemon, turquoise and leaf green brushos onto a large piece of tissuetex.  Tissuetex is fabulous as it is more robust so it can be torn and 'stretched' a little more easily than standard tissue paper. I spritzed some water onto the brusho powder.  This gave me the mottled effect.  In some places, I spritzed it with more water than others to give variety in the effect.


I then painted my empty tape roll with two coats of white acrylic paint - inside and out.


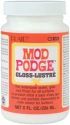
I tore the tissuetex into random but large pieces and I used modge podge to adhere these pieces to the painted roll.  In some parts, I taped over others to ensure that the roll was well covered and that the effect was how I wanted it. I was sure to cover it evenly and over the edges as well.


Finally, I gave a coat of modge podge all over to ensure that all pieces were well stuck and coated to seal it completely.  A bangle - ready for Spring and the fabulous colours that I wear then :)


Friday, 22 November 2019

Metallic Layered Cards by Teresa

I love to add texture to my projects and simply layering different colours and materials can add so much richness and interest to a card.


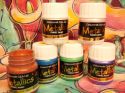
I began by painting some metallic paint onto watercolour cardstock.


Next I took some Tissuetex and sprayed several colours of Brusho spray. I finished with some gold shimmer spray.


Once dry, I stamped and heat embossed some abstract patterns.


I tore of pieces of Tissuetex and pieced them over the metallic background before stitching in place.


I die cut apertures from black card and added a little detail with a gold pen.


Once the stitched panel was fixed in place behind the aperture I added a gold die cut sentiment.


Friday, 19 July 2019

Zen Garden Scrapbook Layout

Good morning!! 
Teresa here with another project celebrating 'The Wonder of Nature'. Today I am sharing a layout inspired by a visit to a beautiful Japanese garden in Cornwall. It was such a serene place, full of gorgeous plants and statues, and I took lots of photographs while we were there.


I began with a piece of scrapbook paper and used some sprays through a stencil. I added a few extra 'splatters' for good measure!


Next I added some washi tape strips.


I put some black Eco-Acrylic paint in a palette and used a couple of old bottle tops to print circles on the page.


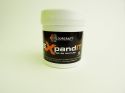
I wanted to add some texture, so used Expand-It through a stencil and heated it up until it puffed up.


I used some gilding wax to highlight the texture and tie in with the gold on the washi tape.


I coloured a piece of Tissuetex with Brushos, spritzing with water to blend the colours on the paper.


Next I used a cutting die to cut out some maple leaves from the coloured Tissuetex.


I arranged my photos on the page and added in the leaves, tucking them around the photos. I finished with some foam alphabet letters and a rub-on.


Thanks for stopping by, I hope you enjoyed this step-by-step. See you soon!


Related Posts Plugin for WordPress, Blogger...