Hello! In the middle of August I was at the Festival of Quilts in Birmingham UK teaching workshops. One of the workshops was using linoleum blocks to up-cycle fabric. That is, we carved small blocks which we printed on fabric to make it even more interesting!
I wanted to share my technique as well as some of the work my students did that weekend.
So here we go!
I started off with cutting a piece of
soft cut linoleum into a piece 5cm x 10 cm. I marked off a 5cm x 5cm area and carved my design in there. I use the blank half to hold the block still while I carve! Makes it much easier for a small block.
Some key things to remember!
The areas you leave are what is going to print
Always carve AWAY from your hand!
If you have parts of your design emerge from the corners- you can create secondary designs while printing!
I cut away the part I did not carve and got my materials ready to print.
It's a good idea to print on paper before trying on fabric. You get a feel for how much paint you need on your roller as well as how thick the layer of paint needs to be. You also can see if you need to carve deeper or carve away more.
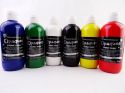
Colourcraft fabric paint is ideal for this technique as it is creamy and thick and covers nicely!
The key here is to be gentle and even. I roll the roller in the paint gently to get an even coat and then again gently over the top of the block. If your layer is too thick it can squish into the lines, if its not applied evenly, you won't get a good print. Here are some not so good prints:
Once I'm satisfied with my design, I can print onto fabric! Remember, even coats of paint, and press onto the fabric.
Depending on your block design you can create secondary designs as you print them- think tiling!
Since I've left a lot of the block, and my design tiles nicely, you can cover quite a lot of your original fabric! This way you can create a new and fabulous textile, from one that you were tired of.
Here are some pictures from my workshop in Birmingham and the super cool designs my students were doing!
I even had a mum with her two kids!
Of course, you can scale up designs by using bigger blocks etc. It's great fun as you can see! And is really versatile.
I hope you enjoyed today's blog! I shall see you again soon.