
Hello and good morning!
I am thrilled to be here as part of the Colourcraft Design Team this year, and today I am sharing my first project with you all.
I love the clean bright colours you get using Brusho powders and wanted to create a pretty summery project as the sun has been shining here in the UK.

I began by taking a piece of mountboard and stencilled a floral design across the top corner using white modelling paste.

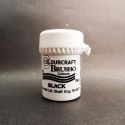
Once this was dry I mixed some Turquoise Brusho powder with water to create a wash and covered the whole panel. I added a sprinkling of Sea Green Brusho powder to the bottom right area and spritzed with water to activate it.

This created an interesting 'foliage' texture as well as adding a mottled effect on the turquoise wash.

I sped up the drying time with a heat tool then used a fan brush to speckle gold metallic acrylic ink across the piece. This has a really pretty shimmer to it, and really helps to add interest to the background.

I wanted a bit more texture along the bottom so added some coloured decorative sand mixed with gel medium. Only a little, but I feel it made a difference.

Next I took some die cut flowers and leaves and coloured with more Brusho powders. I just dabbed the colour on loosely with a paintbrush so as not to blend the colours together too much.

Now it was time to assemble the finished piece. I arranged the die cuts along the bottom and added my 'fairies' - Tim Holtz paper dolls with wings! I added some Stickles to the wings for extra sparkle. The figures are attached with 3d foam for dimension.

I stamped the sentiment and cut the words apart, inking the edges before gluing in place. I also added a border around the edge using Distress Ink.

I hope you enjoyed this tutorial and are inspired to create your own fairy garden! Thanks so much for stopping by today.

 |  |  |  |  |


