Showing posts with label lutradur lace effect. Show all posts

Wednesday, 6 November 2019

Mixed Media Mushrooms By Karen

I love all the wonderful wild mushrooms that pop up at this time of the year and they inspired me to make my decoration.

I had bought a wood base and I gathered up some cardboard pieces and rolls to recycle and create the mushroom shapes. Two tubes were cut in height and along their length and rolled narrower to make the different sizes. I filled the tubes with pieces of cardboard to make them more stable and give a bigger surface area to glue at the top and bottom.

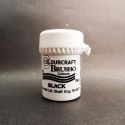
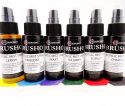
To decorate the lower parts, watercolour paper was coloured with Brusho Crystal colours in Burnt Sienna and Light and Dark Browns

Cardboard boxes were used to cut caps for the mushrooms. Red, Yellow and Leaf Green Acrylic Paints were mixed to make a red-brown and, although they are unlikely to be seen, I painted over the cardboard with this.

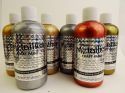
Once dry, I cut up the watercolour paper to fit around the mushroom stalks and to create the gills of the mushrooms. These were accordion-folded and then sprayed with Copper Shimmer spray for the smaller mushroom, gold for the middle size and bronze for the larger one.

Lutradur and Tyvek fabrics are wonderful in the way they react to heat, shrinking and getting lacey effects so I wanted to use these for the tops of the mushrooms.


Pieces were cut to size: One Tyvek circle and two Lutradur circles for each mushroom. These were sprayed with Shimmer spray and left to dry.

Once dry, the watercolour paper was stuck on to the mushrooms using Flexi glue:

The Lutradur and Tyvek papers were heated to get those wonderful lacey, bumpy textures...
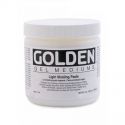
 and then glued on to the tops of the mushrooms with Gel Medium, Tyvek first followed by the two Lutradur layers:

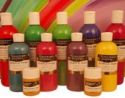
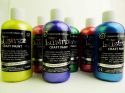
The wood base was washed with Dark Brown Brusho Crystal mixed with water to match the mushrooms. I also used some Aztec Metallic Paints to rub over the raised parts of the Lutradur to enhance the texture and shine.

Finally, for some contrast on the tops, I added some Leaf Green Brusho Crystal colours to the bits of paper left over and reactivated them with water and gold Brusho Shimmer Spray. I used this to die-cut some leaves and glued these and some sequins to the tops of the mushrooms.


I particulalry love the stalks and gills though: Quite lifelike!

I hope this inspires you to make you own Autumn decoration. Please leave a link, or any comments and questions, below.
Karen
x

Saturday, 23 September 2017

Lutradur Lace Effect Cards by Sarah Allan

Hi Everyone!

I hope you are all having a great start to your weekend and for those of you visiting the Yarndale event this weekend I hope you manage to pop along to the Colourcraft Stand and say hi to everyone :)

My project today is the Lutradur Lace effect,and I have to admit that I am having a lot of fun experimenting and learning new techniques with all these lovely products that we have been given in our design team package to play with and to create lovely new projects for you here on the blog


I have a step by step guide for you on how I created this effect and even as I am typing up this blog post I am already thinking of the different ways I can use this product in the future

Step 1
Take a piece of Lutradur (i used 70) which is the medium weight and cut a piece off to the size you wish to work with.. and spritz with water

Step 2
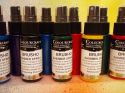
Apply colour.. I found that ifyou use brusho acrylic mist sprays they work best for an all over lace effect, if you wish you can use fabric paint, but the lutradur will not lace as much where the paint has been applied.. so if you wish to have solid areas on your piece, apply fabic paint :)


Step 3 

Dab off the excess spray with a paper towel and apply heat with your heat gun to your sprayed lutradur

Step 4
Move your head gun around your Lutradur until the lacing effect starts to happen and continue until you have the desired look you fancy


Step 5

add a touch of shimmer to your lutradur by applying Colourcraft aztec metallic paints to the perimeter of your piece and also to the lacey arear inside


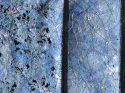
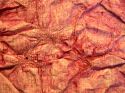
Here are a few close up pictures of the lace effect on the other pieces I made


you can always further embelish your lace pieces by sewing on beads or adding small sequins


now here are the cards that I created using the lace panels, you could also die cut flowers out of your finished lace and layer to create skeleton flowers, which would look great on many projects, even a flower embelishment for a hat..


I hope you enjoyed todays step by step tutorial, donlt forget to let us know what you think and show us your projects using this effect :)


I hope you see you soon, thank you for joining me today here on the Colourcraft Blog, enjoy your weekend!

Sarah x


Related Posts Plugin for WordPress, Blogger...