Showing posts with label Stenciling. Show all posts

Wednesday, 6 May 2020

Art journaling 'Dream Tomorrow' by Karen James

I've returned to my art journal and ColourCraft Acrylic Inks for another double page spread.


I used warm tones - Golden Yellow, Orange, Scarlet and Deep Crimson - for the background and then contrasting Turquoise, Emerald Green and Cobalt Blue for the focal points with Copper Design-It paste giving more texture and a lovely sheen.
I filmed the process so you can see how all the layers are built up. It is edited to keep it short and I've given a voice over with lots of art journaling tips and tricks: Hope you enjoy it!


Please don't forget to subscribe to the ColourCraft channel while you are there.
With thanks for spending your time with us.
Karen
x


Friday, 17 April 2020

Mixed media Butterfly


If you have seen my Insta feed recently you will have seen the pictures of butterfly in my garden, including one landing on my foot. They are the inspiration for this mixed media post where I use free-machine embroidery with fabric paint. 

I remember a lady at one of my free machine embroidery workshops being really surprised when I said I wasn't good at drawing. Art takes so many forms, and to be an artist doesn't mean you have to be good with a pencil!
So to help me, I found a non-copyright image of a lovely butterfly (American Monarch Butterfly, Danais Archippus to be precise) and printed it onto soluble paper.


I then laid this onto some cotton fabric and fastened it into an embroidery hoop.
The paper not only guides my stitching but adds stabilisation for the dance black free machine stitch I added.

I lowered the feed dogs on the machine and used an embroidery foot. The butterfly design gave me a guide for stitching.


See this in action 


Once the black was stitched, I ran the fabric under the tap and the paper dissolved.


 Whilst the fabric was still wet I used fabric paints to add colour to the butterfly with a fine brush - lemon yellow and gold. 


You may remember that last month I  made a screen from Tyvek Paper. Tyvek paper makes a great stencil and I used my Tyvek leaf stencil to sponge on a delicate leaf green.


I then used a foam brush edge to add some gold fabric paint


Once the design is dry, iron fix the fabric paint on a hot setting for 2 minutes or bake at 140°C for 4 – 5 minutes.

Wednesday, 8 April 2020

Mixed media canvas with Karen


This type of project is a great way to use up bits of your stash or even bits around the house because, for these types of mixed media canvas, it doesn't matter about shape, size or colour!

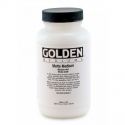
The base for my project today is an A5 artists board: A hard-backed canvas. However, a piece of wood or a stretched canvas of your chosen size would also work just as well. The first step is to then arrange your bits and pieces so you have a rough idea of where you want to glue things down. It is then critical to use a good gel medium like Liquitex Heavy Gel Medium or Golden Matte Medium to collage your objects on to the canvas. Use plenty and let it dry thoroughly as you do not want things to fall off later! This type of heavy gel will hold metals, plastics and just about anything, all layered on top of each other as long as they have plenty of gel to hold them and it is left to dry thoroughly, preferably overnight. In this case, I used a few scraps of florist ribbon, lace and some buttons so all relatively light.

As soon as I had stuck down one button, I decided to move it and that is a benefit of the slower drying time of gel on non-porous surfaces. For more texture, I used Design-It paste (formerly Soft Form relief paste) spread through a stencil with a paint knife. At this stage I then left everything to dry.

Once everything is completely dry and well stuck down, cover it all in gesso. You lose all the colour but keep the texture. Be sure to check from different angles to see that all the original colour has been covered.

Now you choose the colours to put back. I wanted a fairly vintage feel to this piece so I chose Dark  Brown and Black Acrylic Inks. I added the Dark Brown to the top edge with a large round brush and sprayed it with water to let it run down the canvas. It is also possible to use acrylic paints and colour sprays.

I also dry brushed some black acrylic ink round the edges of the canvas to frame it and over some of the texture to emphasise it. I smudged alot of this with my fingers for a softer look. I traced round the 'people' (Tim Holtz paper dolls) and filled in this shadow with a light layer of Black acrylic ink to give them more dimension and stuck them down with 3D foam.

Finally I added some text with 3D foam. It translates as 'Really lucky to have you'.

I hope you enjoyed that project. Please give it a go with whatever takes your interest and whatever colours you like. As another example, a few years ago I made a 30 x 30 cm canvas with old lego pieces which is electric blue and silver. You really can have great fun playing with different materials and colours.
Stay safe.
Karen

Wednesday, 1 April 2020

It's A Cat's Life with Suzi

Good Day All, It's the start of a new month so time for a new theme, this month's theme is 'Mixed Media' so for today's post I've created a Mixed Media Canvas using Acrylic Inks, Modelling Paste, Koh-I-Noor Progresso Aquarelle Pencil and some fun stamps from my stash.


You've probably figured out by now that I love using Acrylic Inks, they are so versatile, and rich in pigment.  I decided to try a couple of different techniques with them, mixing them with water to create sprays;


As well as mixing them with modelling paste;


Once I'd finished mixing sprays and pastes it was time to get started on my project; I took an 8 x 10 Canvas and added a few layers of the sprays I'd created.  I also sprayed a piece of white card stock which would use to stamp my focal images and sentiment.


Once the sprays were dry I used a stencil from my stash along with the blue and green pastes I'd created to add some texture to the canvas.


After the pastes had dried a little I added another layer of the sprays. This added more definition to my stenciled texture.


Next using a stencil I'd created with a 2 1/2 inch circle punch I added 3 circles of white gesso.


Using another stencil and Black Acrylic Ink I added some black to my canvas.  I also added more white gesso.


Once the white gesso was dry, using the circle stencil I added some yellow paste to my canvas. 


After the yellow paste had dried a little I added more of the sprays.  I then set about stamping my images and sentiment.  I left my images to dry and them fussy cut them out before adhering them to my canvas.  My images are some of the Cats from Katzelkraft, I used an old alphabet set from Graphic 45 for my sentiment.


My canvas was nearly finished, but I wanted to add a little colour to the cats' eyes as well as ground the cats.  To ground the cats and outline the sentiment I used a Koh-I-Noor Progresso Aquarelle Pencil dipped in Matte Medium; You can draw on your project and then activate the Pencil with water, but if you dip your Pencil into Matte Medium before you draw it activates the Pencils more and gives you a really dark mark, once dry these marks are permanent.


As you can see the Koh-I-Noor Pencil adds wonderful definition to the canvas.  You could use Black Acrylic Ink instead, but I find the Pencil is a lot easier to control.  Here's some close ups of the Cats;


This was a fun project to create, I've had the cat stamps in my stash for ages and this is the first time I've used them, I just love their characters. The colour scheme I chose was more muted than my usual choices, but it's still pretty dramatic with that pop of black, I love the contrast.

I hope you've enjoyed seeing how I've created my project and the different ways I've used the Acrylic Inks and Aquarelle Pencil.

Thanks for visiting with us today
Bye for now
Suzi
xxx
Related Posts Plugin for WordPress, Blogger...