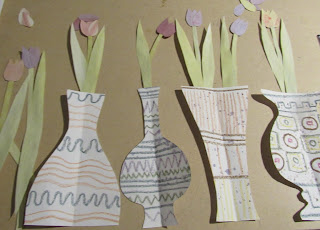
I began by painting some papers- thinking of tulip stems, tulip leaves and the colors that tulips are themselves. I mixed quite a lot of water into my colors. I also took some A6 sized paper and just drew funky decorations on with the transfer crayons.
Then I folded the crayon drawn papers in half and cut out vases, and cut out leaves, stems and petals from the painted papers.
To make things easier, I used a tiny bit of glue stick to stick together the vases and flowers how I wanted them.
And now comes the time for transferring! I like using a white Duchesse fabric- it's 100% polyester (makes for better transfers) and has a lovely hand and sheen!


 Here you can see how I took a vase, flipped it upside down onto the fabric, I then ironed it with a piece of baking parchment over it to protect my iron, and voila! The third picture shows the result.
Here I cut a second vase out of a painted piece of paper, which I ironed on first to the fabric, and then added the vase plus flowers on top.
Here I was adding a second vase to add an overall color to the initial vase after I had printed that.
And again! the finished results! This was a really fun project to do.
If you want some more ideas of what to do with transfer dyes, paints and crayons check out these blog posts I had done before!
See you next time!


No comments:
Post a Comment