

Do you have collections of old photos lying in drawers and boxes? I think many people do. When my husband inherited a huge number of family photos stretching back several generations most were loose and the only photo album was literally falling apart so I took on the massive project of organising and storing these in a new album using divided page protectors. I bought a pack of papers and have been using these to layer the photos on to but needed embellishments and wanted more variety in my backing cards: Brusho Crystal Colours to the rescue!

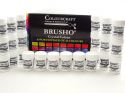
With my fairly neutral colour scheme and the vintage photos in mind, I chose my Brusho colours and cut 120 g/m² paper to the size needed. I sprayed the papers with water and sprinkled on the Brushos. I used Cobalt Blue and Moss Green, Grey and Light Brown.

I created extra papers by spraying a little more water and using a paper towel to blot off excess colour on to another paper, turning it to get a random, marbled effect.

The offcuts of paper were kept for die-cutting embellishments so I coloured these with brighter shades that would match my backing papers. I used Burnt Sienna and Sandstone, Gamboge and Sandstone and Turquoise. I also used a wash of Light Brown on another piece.

With everything dry and the die-cutting done, I had a good stack of papers and flower embellishments ready to add to my album, even more than shown above. I also included die-cut flowers from a left-over piece from <this project > using Aztec eco paints.

I added a freehand border to the background cards, some stamping, notes about the photos and Nuvo Drops to the flower centres before adding the photos with clear photo corners. Above is part way through the planning stage. Below is my finished layout, just before sliding the cards in to the protector, with some blue added to upper rows to draw everything together.

Some tips and points to remember when scrapbooking vintage photos:
- Everythng needs to be kept dry: Damp damages photos. Keep the photos away from your work area while you are spraying water about! As long as the papers created with Brushos are kept dry, they are archival and photo friendly.
- Keep everything out of sunlight: The Brushos are lightfast, photos are not!
- In a large album, let the colour scheme and other features evolve, avoiding sudden changes: I have plenty of flowers and other pieces of card left from this layout and my previous pages have the same brown cardstock I used in the middle row and the same die-cut flowers on them. Adding brusho coloured pieces to previous and following pages, will help this layout blend in with the others.
- Avoid anything touching your photos that could do them harm: Always use acid-free papers, inks, glue and embellishments to avoid the photos deteriorating.
- I use clear photo corners to avoid the photos being stuck down permanently: The photos are protected but are also free to be scanned, examined and rehoused in a new album if necessary. If possible, I recommend scanning the originals as a back up in case they get damaged. Most scanners take A4 size so photos can be done in batches rather than individually: Much quicker and you can name the file with the year followed by who and where so they stay in chronological order.
- Get as much information about the photos as possible and record it alongside them: Future generations will thank you!

Thanks for reading
Karen
 |  |  |  |

No comments:
Post a Comment