
Today I am going to continue my Screen Printing series with a tutorial showing how to make a simple frame and screen. This is a good starting point if you are not wanting to invest in a ready made kit until you are sure that Screen Printing is for you.
(If you haven't seen my previous post which gives a brief intro intro screen printing you can see it by clicking Here.)

I start by putting together a simple frame, you can do this by using some batons and screws, however if you are not into DIY or dont have these materials you can buy a framed canvas and remove the canvas from it to leave you with an exposed frame. I haven't provided a size for the frame as this will depend on what you are wanting to print. It's always better to have a frame larger than you need in my opinion.

Next you will need to cover your frame with a screen printing mesh, this can be brought online relatively cheaply. I do know that some people who are just starting out use voile or tights to print through........
You need to staple the mesh to the frame making sure that it is taught. I staple the top first, then the bottom and then the sides. I fold my fabric a couple of time before stapling to add a bit more strength, almost like if you hemming clothing.

You should then have a sturdy frame with a taught surface like the skin of a drum.
Now onto how to create your screen.

I am making a disposable screen from a piece of Kraft card some cutting dies. I want my screen to say; peace and joy.
I mark my card with a pencil to allow to me align the dies. I add stencil tape to them to keep them in place when I run it through the die cutting machine. If you dont have a die cutting machine you could draw a pattern or sentiment to cut using a craft knife.

After all of my words were cut I placed a piece of card inside a calico stocking to stop the ink bleeding through to the back. Next I laid my screen onto the stocking and secured it with some tape. I added the centres of my letters into place using some re-positional glue. (if die cutting remember to save all the little piece that pop out of the centres of letters as you need them!)

I then placed my frame over the screen and clamped it to the table, if you dont clamp it you will need somebody to hold it for you while you pull your print.

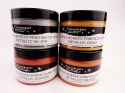
I decided to use some metallic copper screen printing ink for a modern look, you will need a squeegee of some sort that fits your frame, you could use a plastic ruler (just make sure it's clean and hasn't got any ragged edges as you dont want to damage your screen or fabric)
You need to hold the squeegee/ruler at a 45 degree angle and pull toward you in a smooth motion, lifting at the end to remove the excess paint which can be out back into the pot. (I have rotated the picture so it's easier to see the pattern and clamps, I had the ink at the the top and pulled to the bottom)

I decided to add some extra detail to my stocking using a stencil and some black fabric paint.

I love the clean modern look.

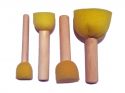
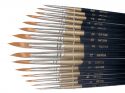
I then used a paint brush to add some more details.

Here is the stocking in all it's glory hanging in my fireplace.
I hope you have found this tutorial informative and that you give it a try. If you do please share your results with us at Colourcraft by adding the hastag #colourcraftltd to any pictures on social media.
Take care Terri
 |  |  |  |  |
 |

Wow, that looks amazing. I had always though screen printing involved a lot of bulky and expensive equipment. Can you use commercial stencils instead of cutting your own screen? Thanks for showing how to do this.
ReplyDeleteHi Lucinda, thanks for your question. I have not tried but I would think that it's a possibility depending on how thick the stencil is. The stencil would need to placed on top of your fabric/paper and then a screen with mesh on top. I can't guarantee the results you'll get so I would try on scrap paper first.
DeleteI will try this out myself and if it works then I could add it in to one of my future tutorials.
Terri :)