

It's only three weeks until Christmas! and the Christmas spirit is in full swing at my house! Here is one of my favourites and super easy...
I used three colours of paint to create the background. I painted the darker colour around the edges first. I then painted a lighter colour in the middle ensuring that there were no harsh lines between the two. To achieve this, I had only a little paint on the brush whilst I brushed it backwards to blend the dark and light colours together seamlessly!
I then stenciled with several stencils using paint and stencil brushes. The trick for success is to use a little paint otherwise it oozes out through the bottom of the stencil and you get a sloppy mess with no clear lines!

Now for the best part....Creating the snow! I can hear jingle bells now!

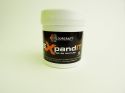
Expandit is honestly one of my favourite products by Colourcraft, especially for snowflurries and snowflakes. I did this by smearing a thin layer of Expandit onto my work surface with a palette knife, then stamping lightly into it with a stamp on an acrylic block and then onto my card. I then heat it with a heat gun and voila; puffy puffy fun!
It only takes a few moments. Take care not to heat it for too long otherwise it can burn
 Next I created the snowflakes by dipping a pointy tool into the Expandit and lightly tapping it onto my card at random intervals. Again a light blast with my heat makes the little circles puff.
For this card, I added some die images which I had painted with glitter glue and mounted onto the card!
Would love to see what you make with Expandit, you are not limited to just snow!!
Happy playing!
 |  |

No comments:
Post a Comment